Intercom - How do I link my account using OAuth?
Last updated: June 9, 2026
Overview
To authenticate Intercom via OAuth, you will need to provide your Intercom account credentials and complete an authorization flow.
Prerequisites
Please ensure you fulfill all the requirements to set up the integration:
You are an Administrator in your company's Intercom instance, or someone has shared their access with you.
Instructions
Step 1: Select the region where your Intercom instance is based in.
If you're not sure, you can check the URL when you are logged into your Intercom instance. You URL will start with either https://app.intercom.com/rest_of_url or https://app.eu.intercom.com/rest_of_url .

Step 2: Navigate through the linking flow
When you go through the connection flow, you’ll be redirected to Intercom to log in to your account when you click Open window.
Note this example shows the US region. If you select the EU region, it will show the EU option

Step 3: Sign into your Intercom account
A window should open up to either sign into your your Intercom account or to authorize access to your data (the next step). If you are not signed in, enter your credentials and click Continue.

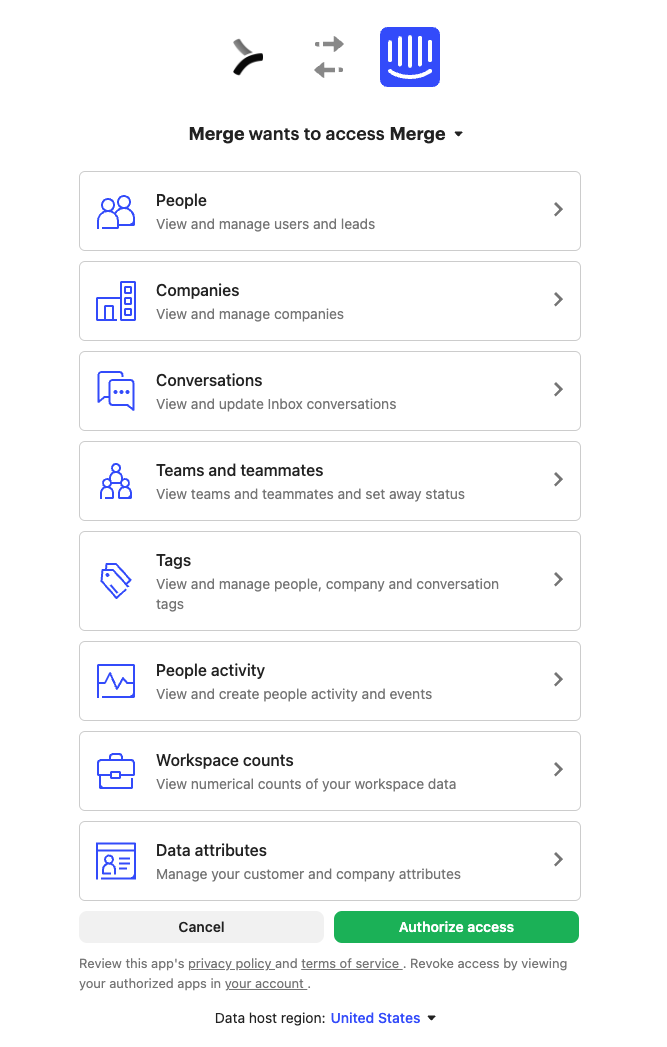
Step 4: Authorize access
Review the requested permissions and select Authorize Access to continue.
Permission requests may vary depending on the specific Front use case for you. The below screenshot is just an example.
After you accept the permissions, you’ll be redirected back to the connection flow. Once you finish any remaining steps, your Intercom account is successfully authenticated!
