SAP SuccessFactors - Service User Setup
Last updated: October 2, 2025
Overview
In this article, we will be covering the steps needed to create a new User in SAP SuccessFactors, and limiting the permissions / scope to what is required for the use case of the company you are linking to!
Instructions
Step 1: Create a new Super Admin User that will be used to link
Follow these steps from SAP SuccessFactors to create a Super Admin user in your system that will have limited permissions / scope for the use case you are linking for.
Step 2: Create a new Permission Group
Search up Manage Permission Groups in your search bar to navigate to the Permission Groups page.

You will need to click "Create New" to create a new Permission Group for linking.
You can name the "Group Name" something along the lines of "Integration Linking" to track that this Permission Group is for this specific connection.
The User Type needs to be "Employee", and the "Choose Group Members" should include the User you created in Step 1.
You do not need to input anything in regards to the Exclude Section, or the Granted Permission Roles at this time.
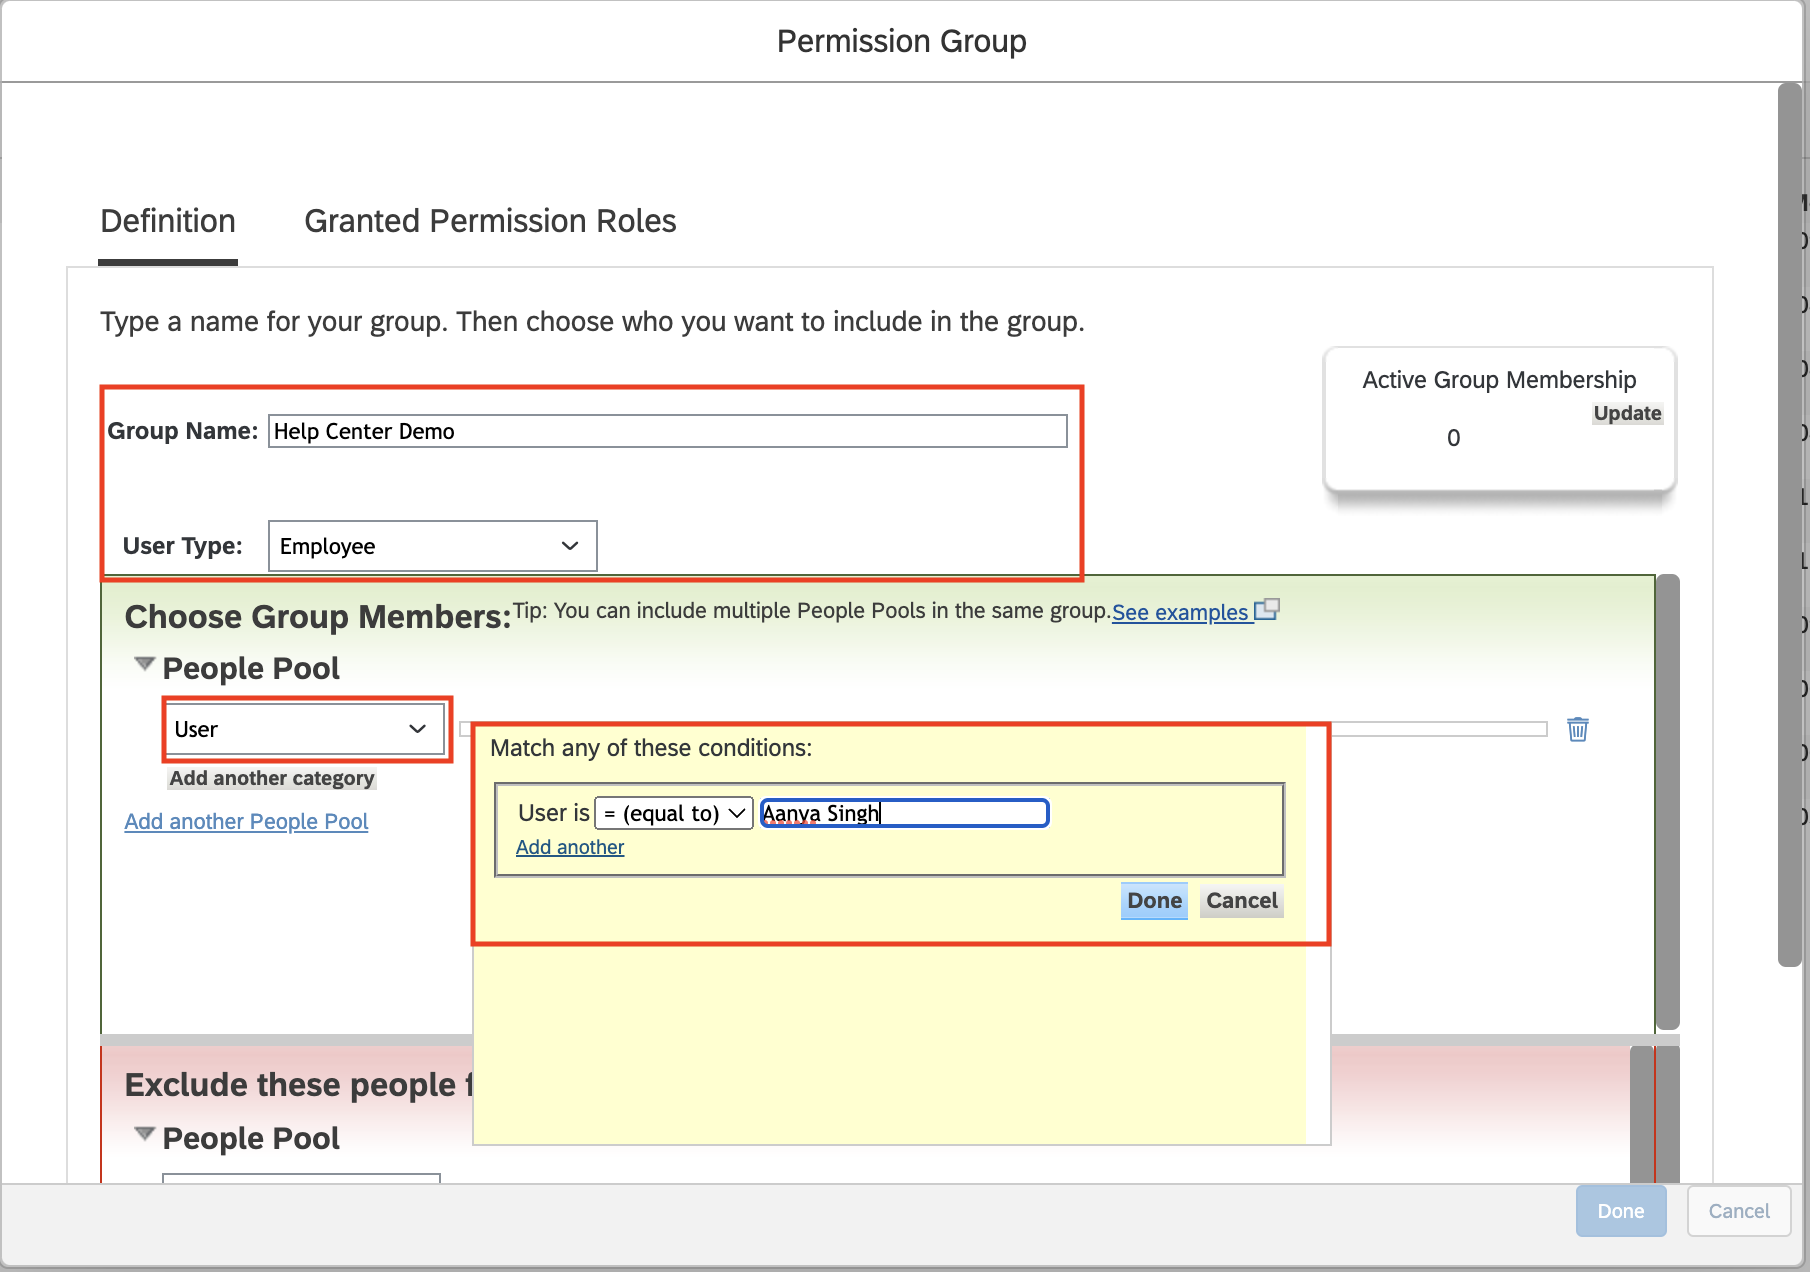
Click Done to create and save this Permission Group.
Step 3: Create Permission Role with Proper Permissions
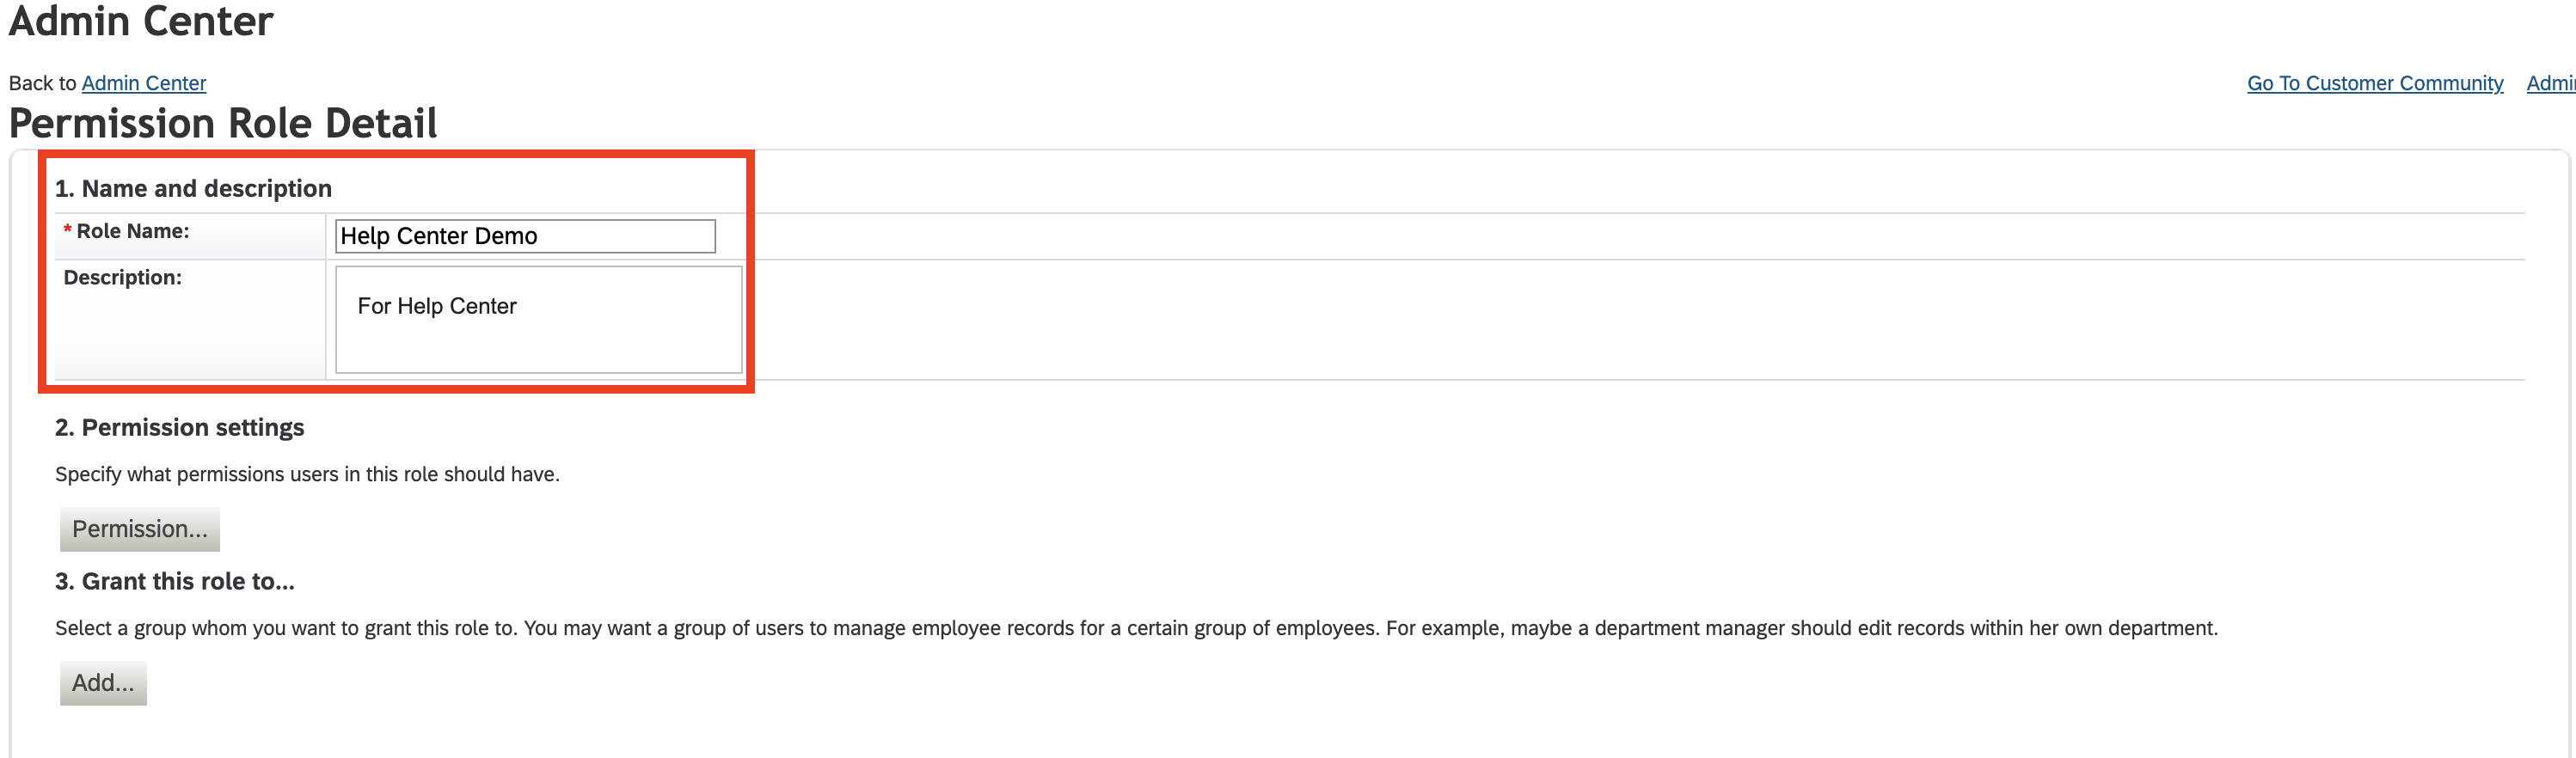
Search up Manage Permission Roles in your search bar to navigate to the Permission Role page.

Begin creating a new Permissions Role by selecting Create
Configure the name of the Group
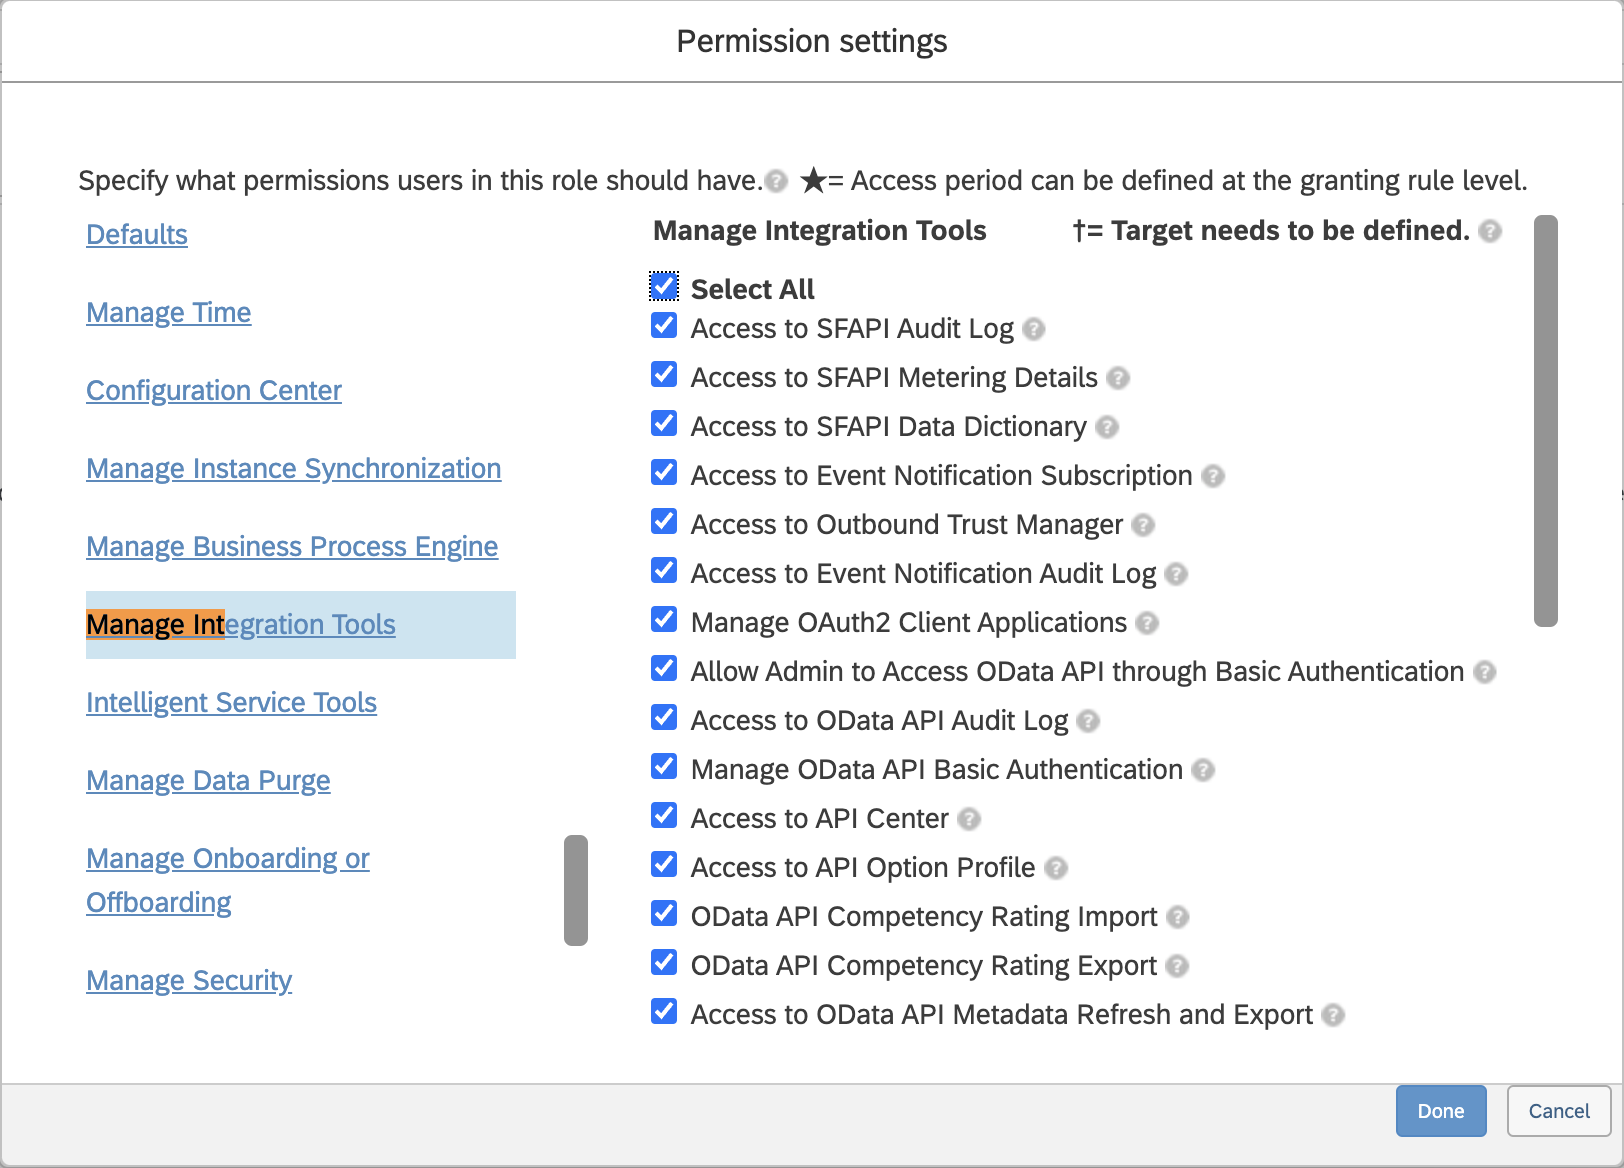
Click "Permissions" to open available User and Admin Privileges available.
Identify and select the permissions that matter for the use case you are trying to achieve. Details below:
REQUIRED for General Authentication
Manage Integration Tools
Manage OAuth2 Client Applications
Manager OData API Basic Authentication
and all API + OData related pieces
Manage System Properties > Picklist Management and Picklists Mappings Set Up
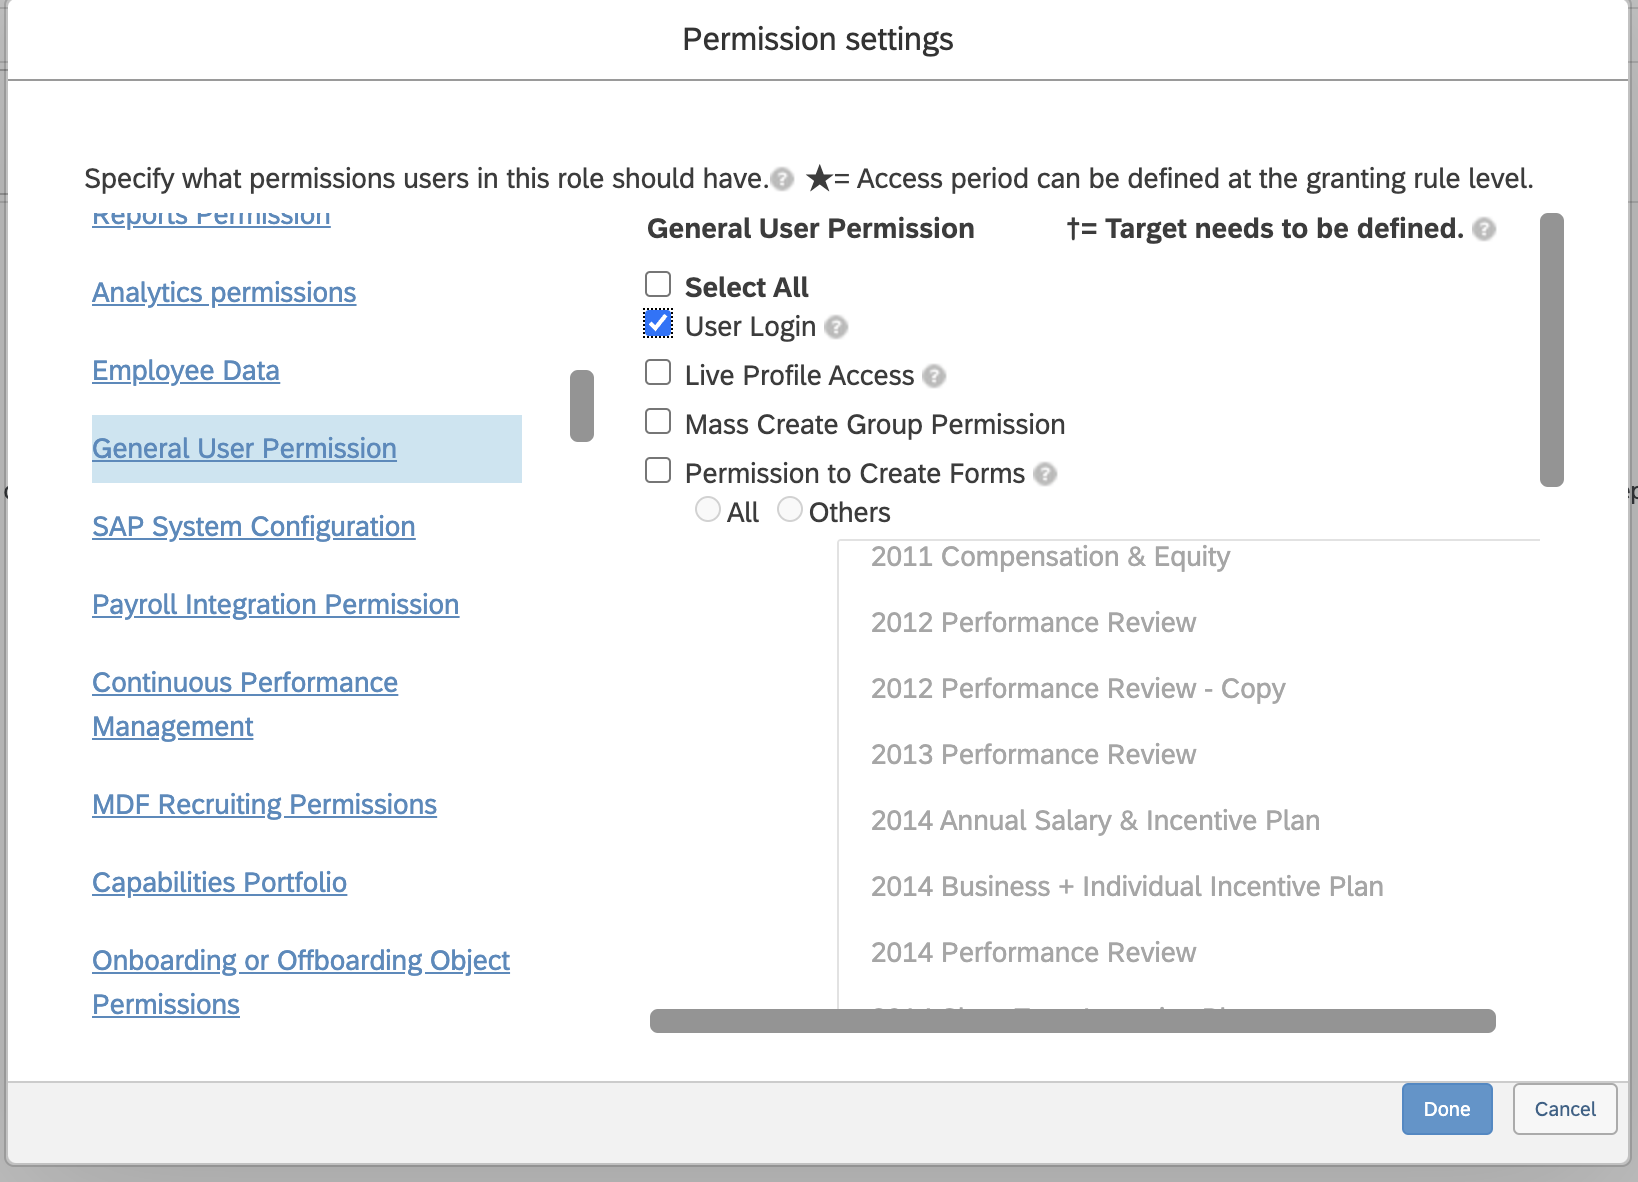
General User Permission > User Login is required to ensure that you're able to login to integrate
Permissions for HRIS (Employee) integrations:
Employee Data - this allows for View Access to Employee Information
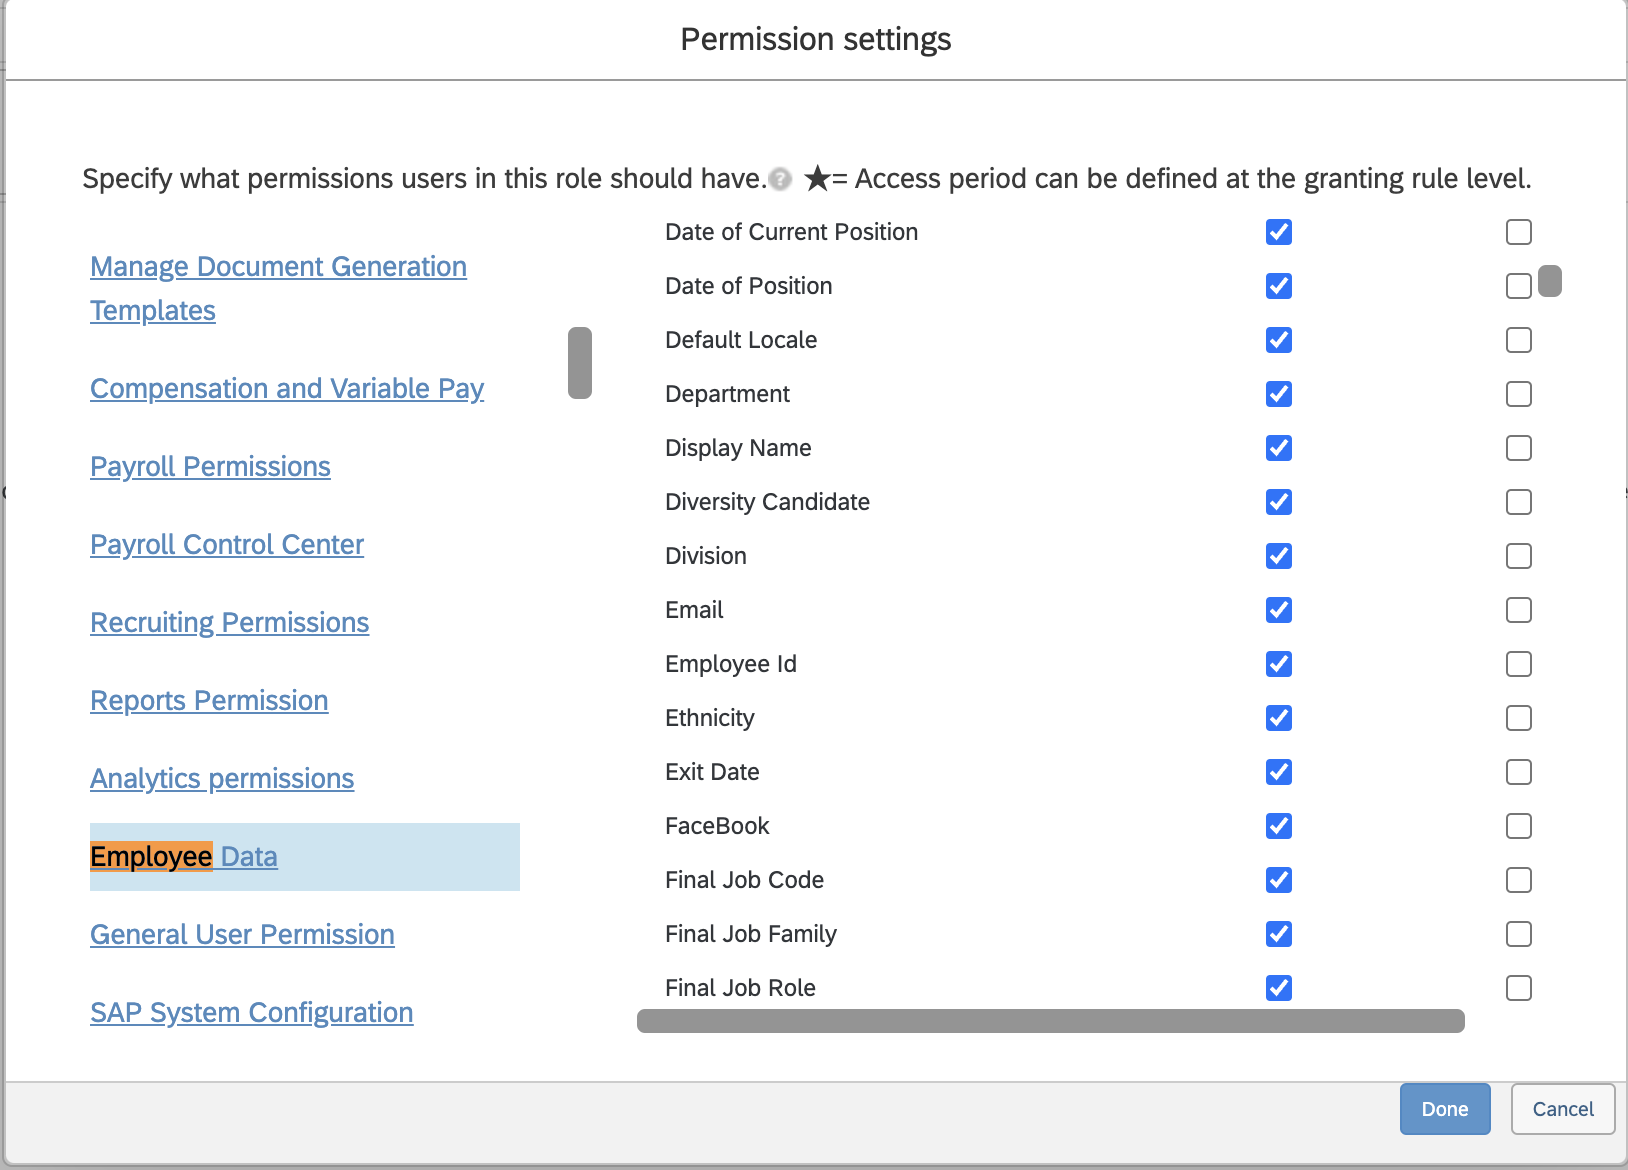
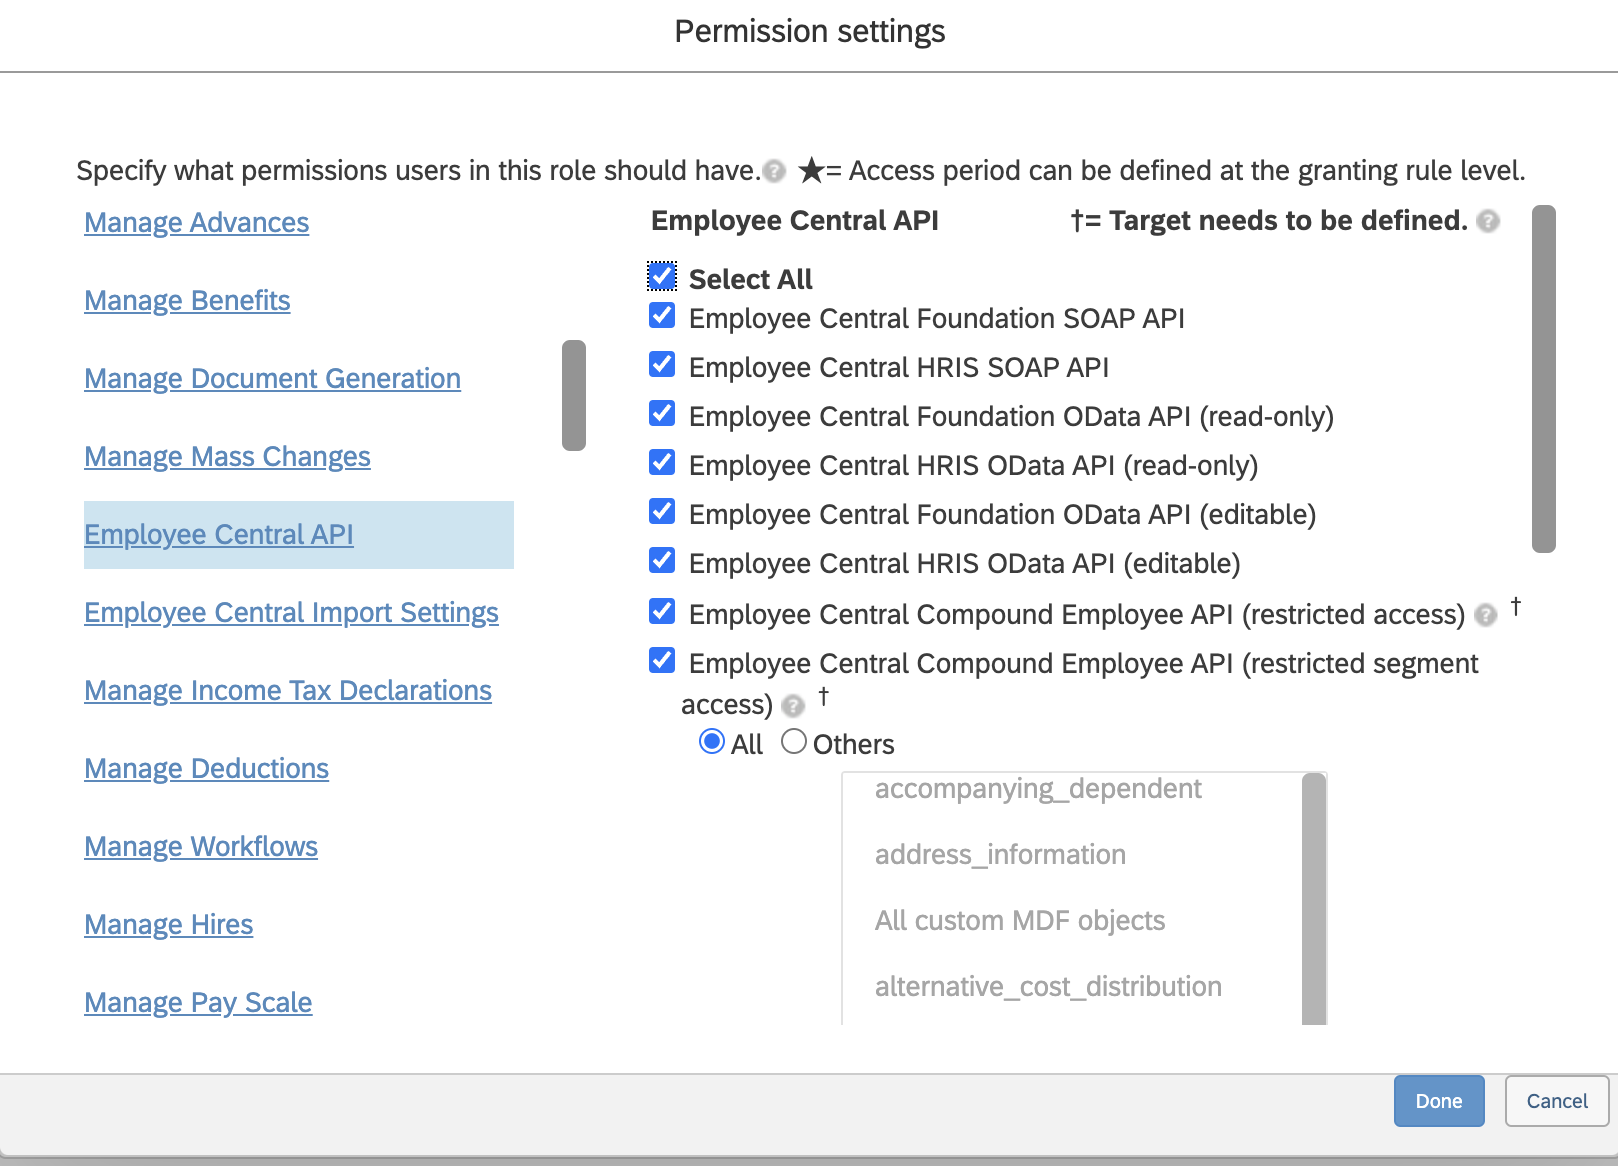
Employee Central API, Employee Central Import Settings
ATS Permissions
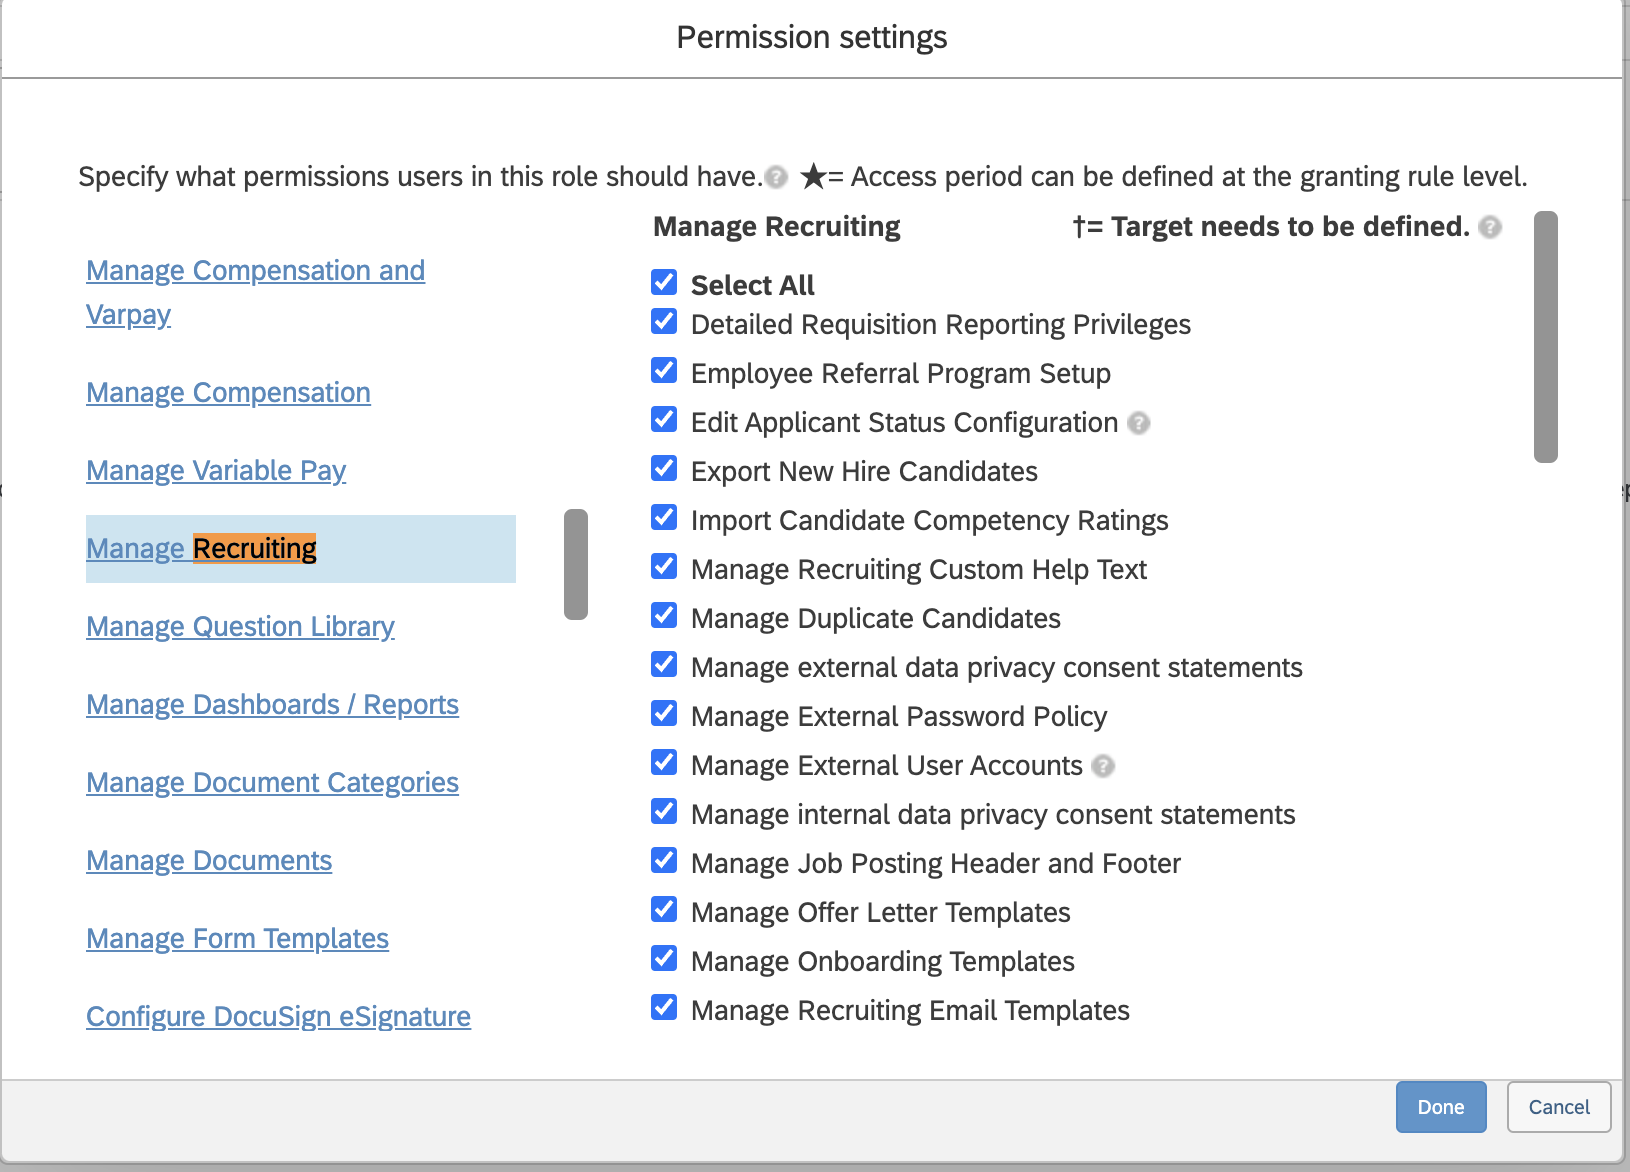
Manage Recruiting - this allows for access to SAP Recruiting Data
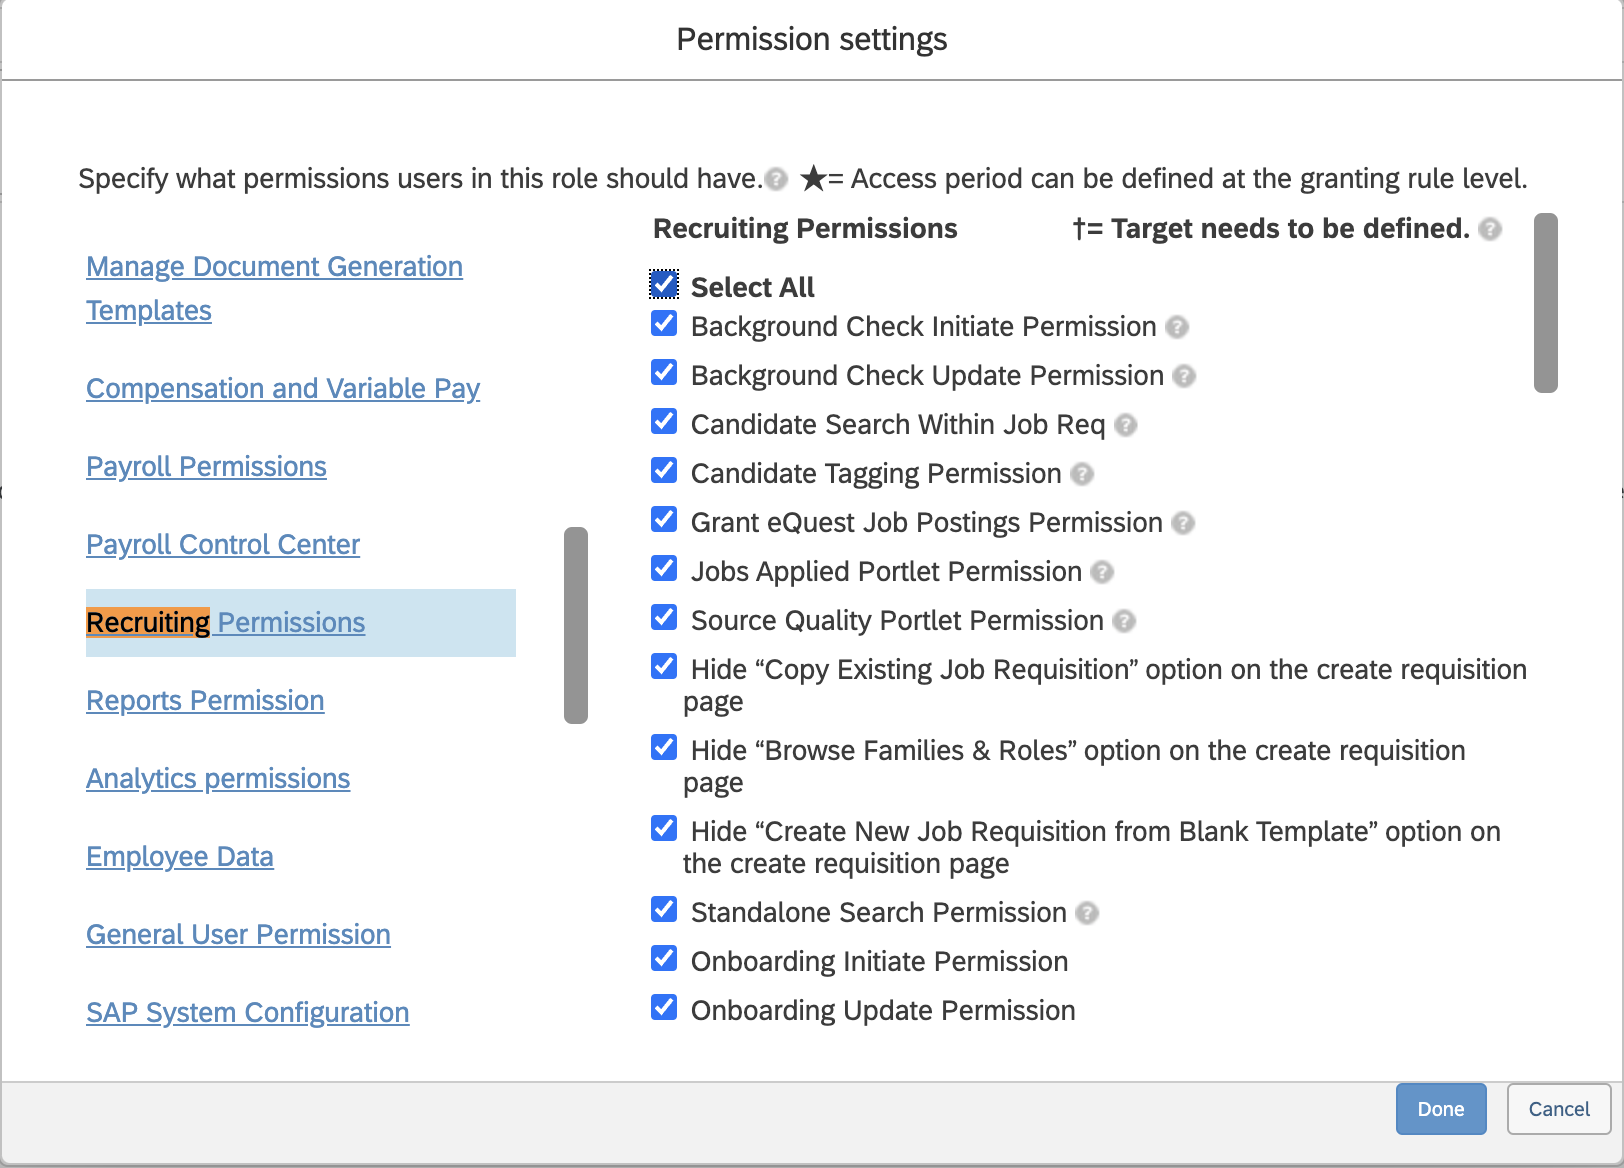
Recruiting Permissions - this allows for access to Recruiting specific actions via API
Manage Positions - this allows access to Job and Position Requisition data
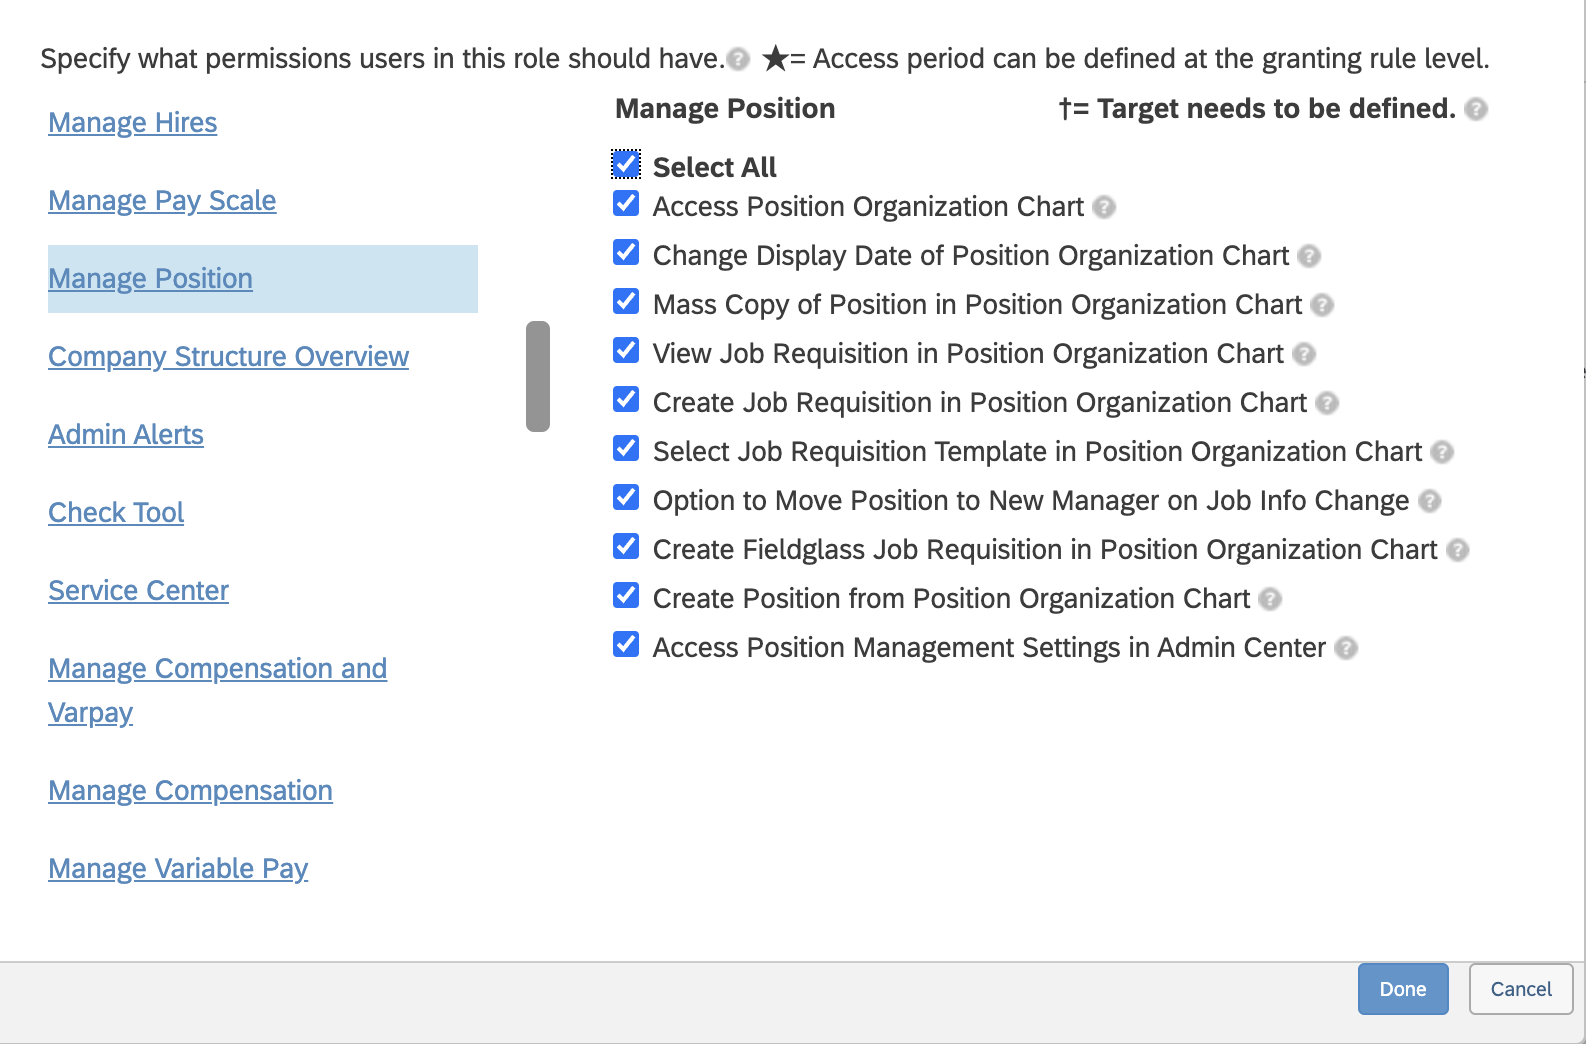
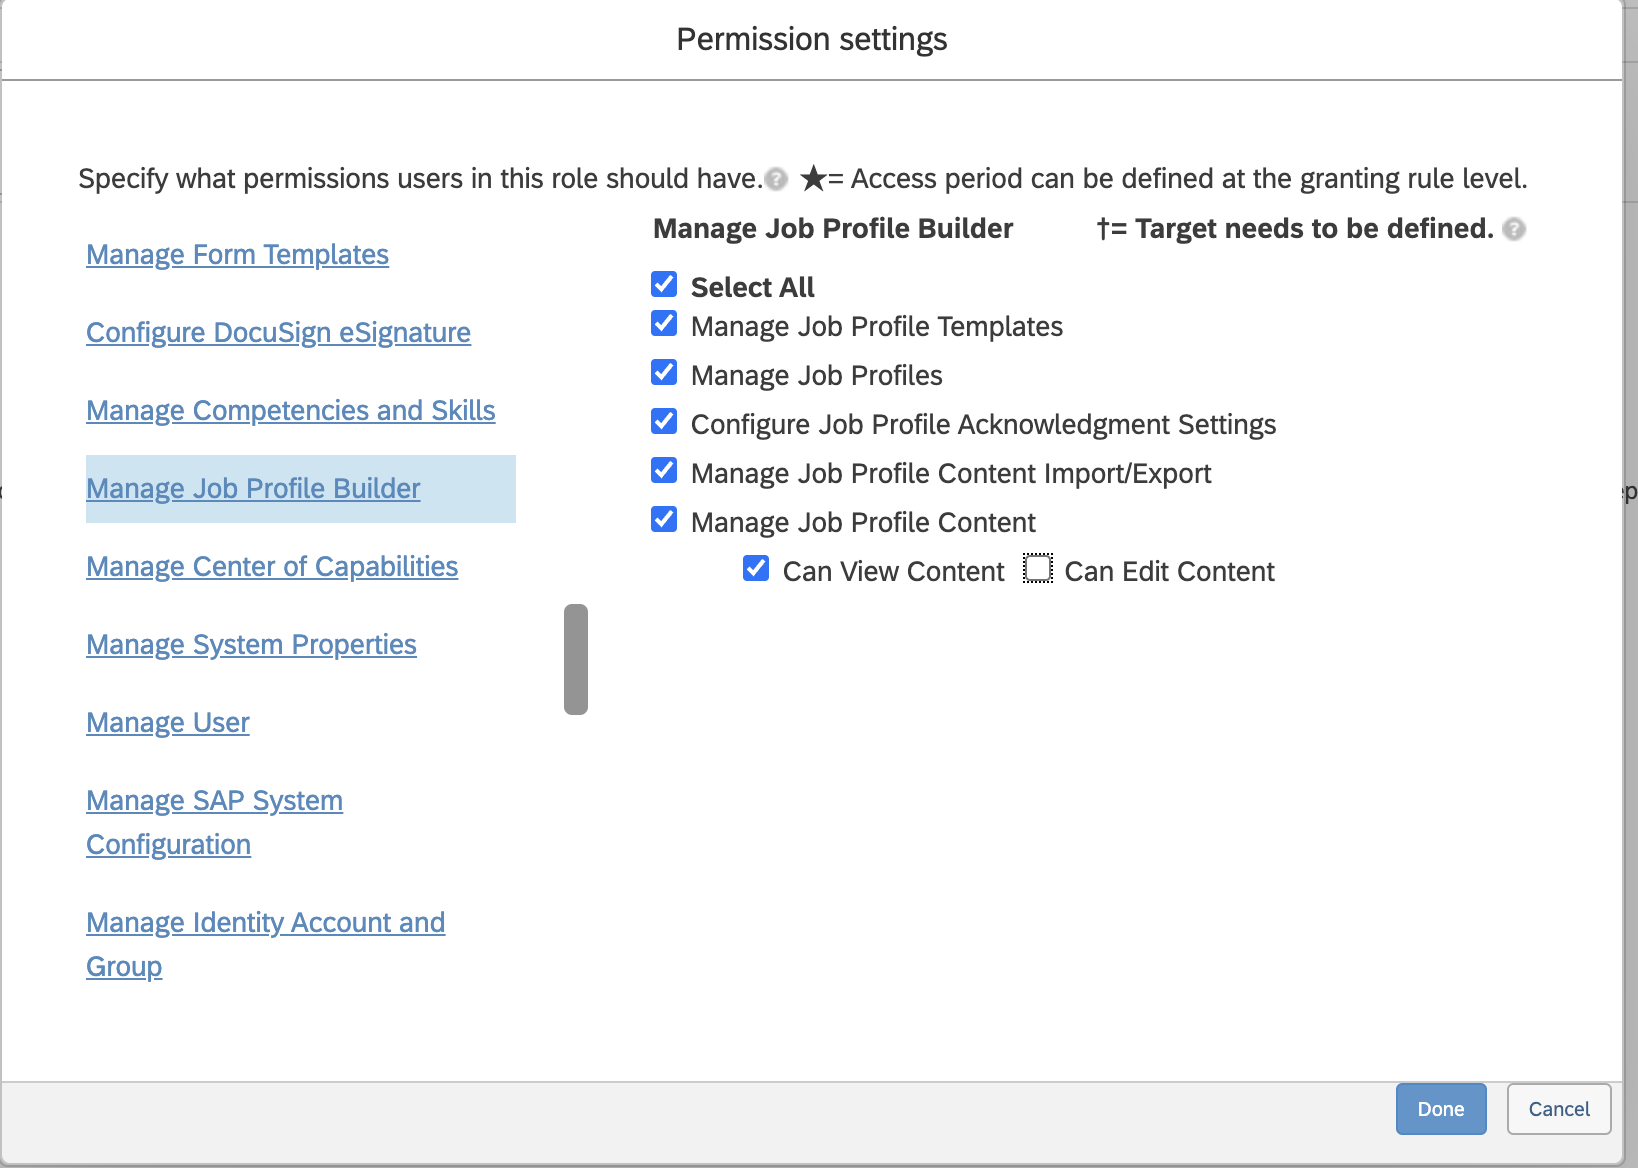
Manage Job Profile Builder - this allows for access to Job information
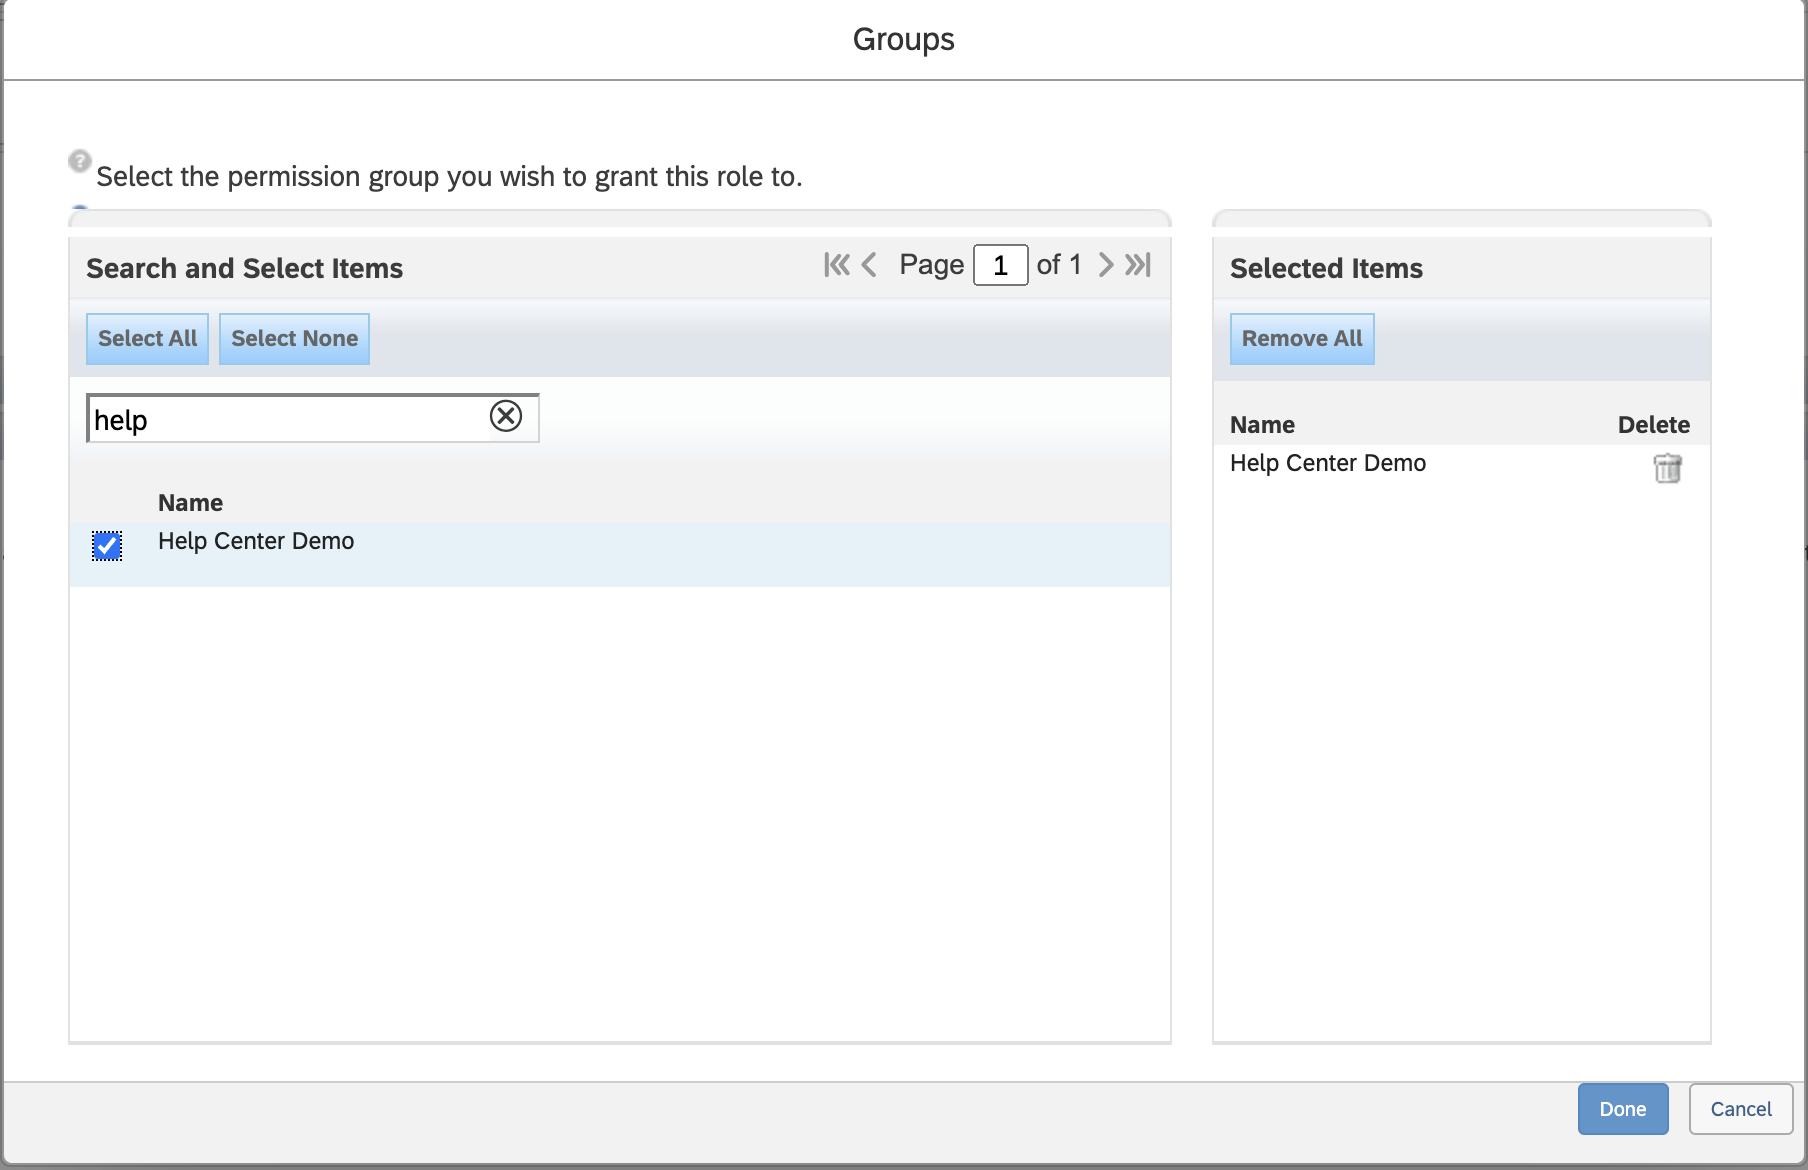
After setting the permissions, add the Permissions group you created in Step 2 to the role by clicking Add
You can search for the name of that Group, select it, and then press Done
Now you should save these changes as you're all set! You just need to login into the User's SAP account and generate the Client Credentials, which is described below.
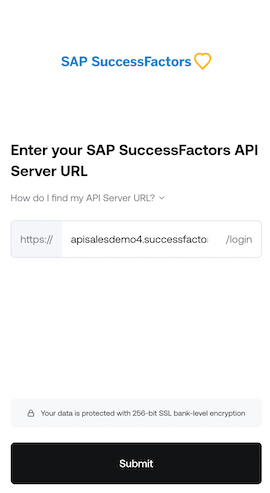
Step 4: Find your SAP SuccessFactors API Server URL
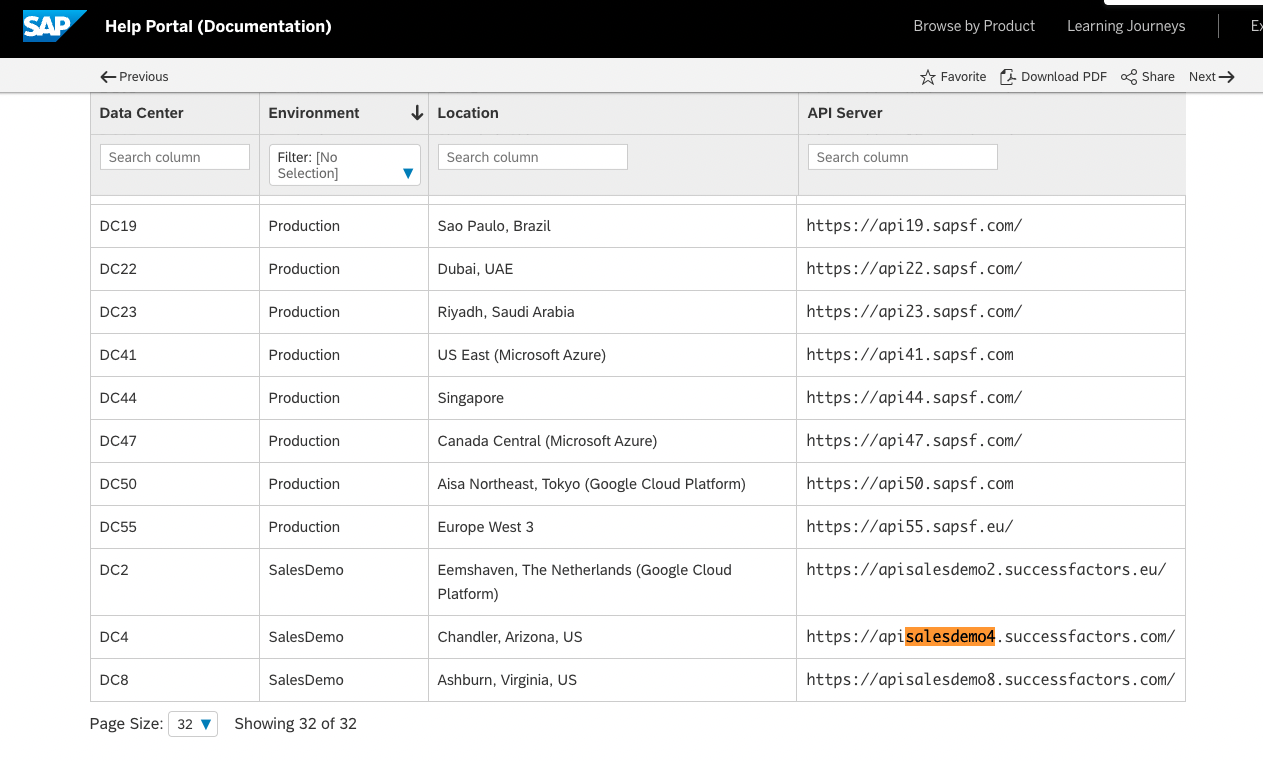
To find your API Server URL, navigate to the list of SAP SuccessFactors API Servers
In the listed API Server URLs, search for the environment that matches your subdomain.
For example, if your domain was https://salesdemo4.successfactors.com, search for salesdemo4.
If you are unsure what your API Server URL is, or are having trouble connecting, we recommend reaching out to your SAP Support team to obtain your API Server URL.
Once you've found the URL, copy the entire URL.
In this example, it would be:
apisalesdemo4.successfactors.com
Enter your SAP SuccessFactors API Server URL into the integration authorization component as shown below:
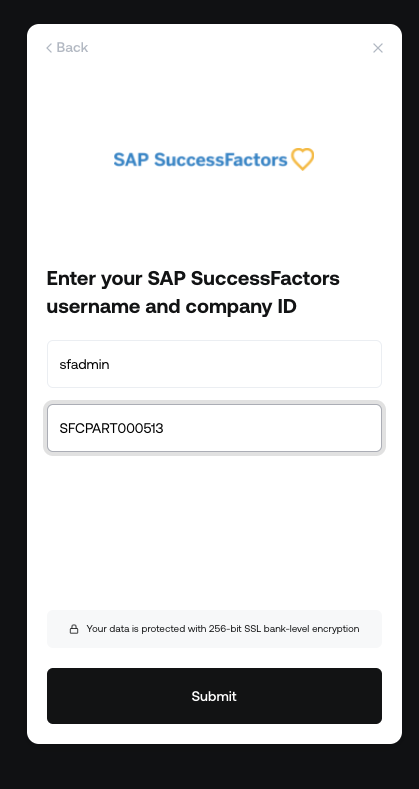
Step 5: Find your SAP Username and Company ID
To find your SAP SuccessFactors username, go to the upper right hand side and click on your profile image to view your username.
This will be the Username for the Service User you created in the first part of this guide!
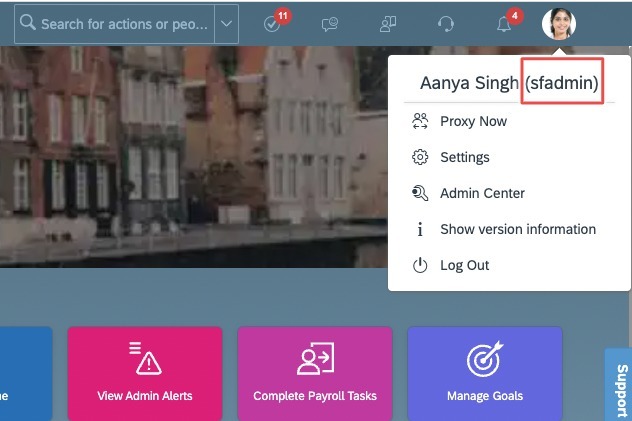
To find your SAP SuccessFactors Company ID, in the same dropdown menu, click "Show version information." Locate Company ID in the modal that pops up:
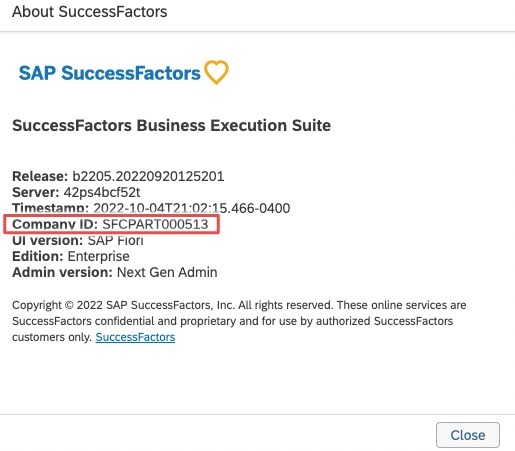
Once you obtain your username (not email) and company ID, enter them in the linking flow as shown:
Step 6: Find your SAP SuccessFactors Client ID and Secret
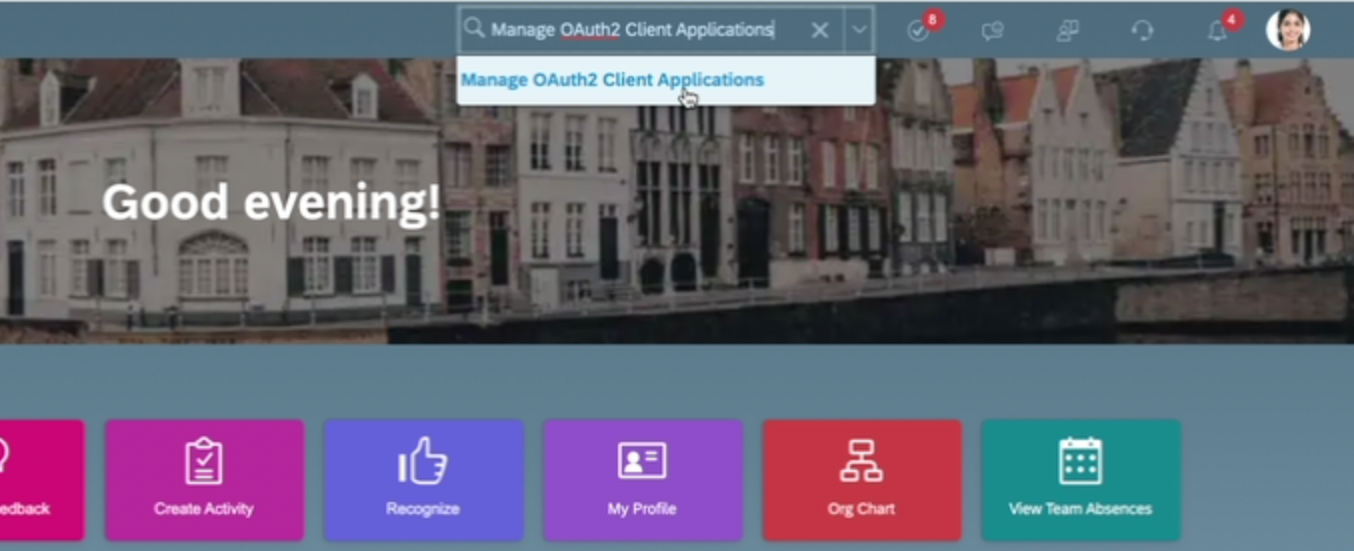
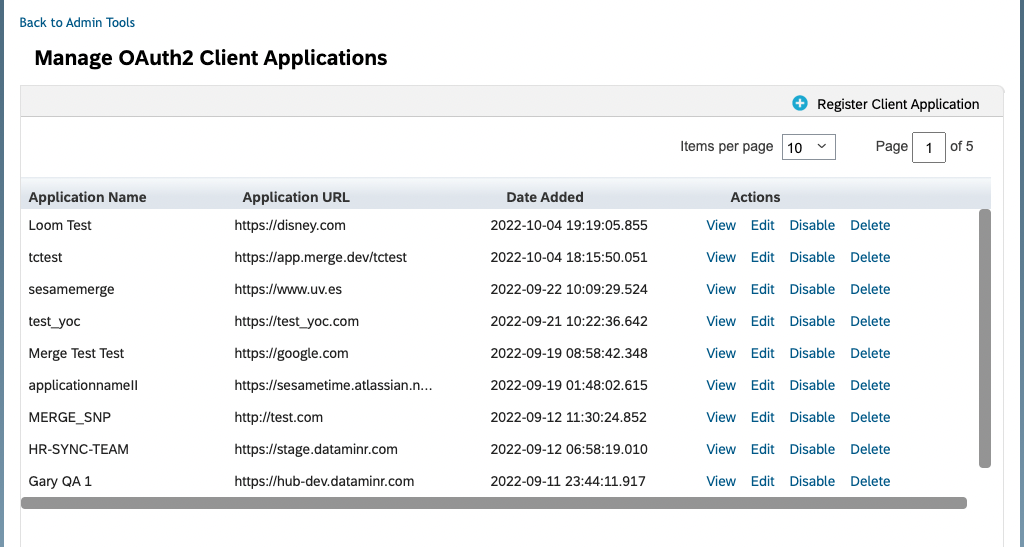
In your Admin Center, go to Tools, and search Manage OAuth2 Client Applications (If your page looks different, search for Manage OAuth2Client Applications in the search tool on your homepage).
Click Register Client Application.
Fill out Application Name & Application URL (what actually goes in these fields is not important, except that the URL has to begin with https://).
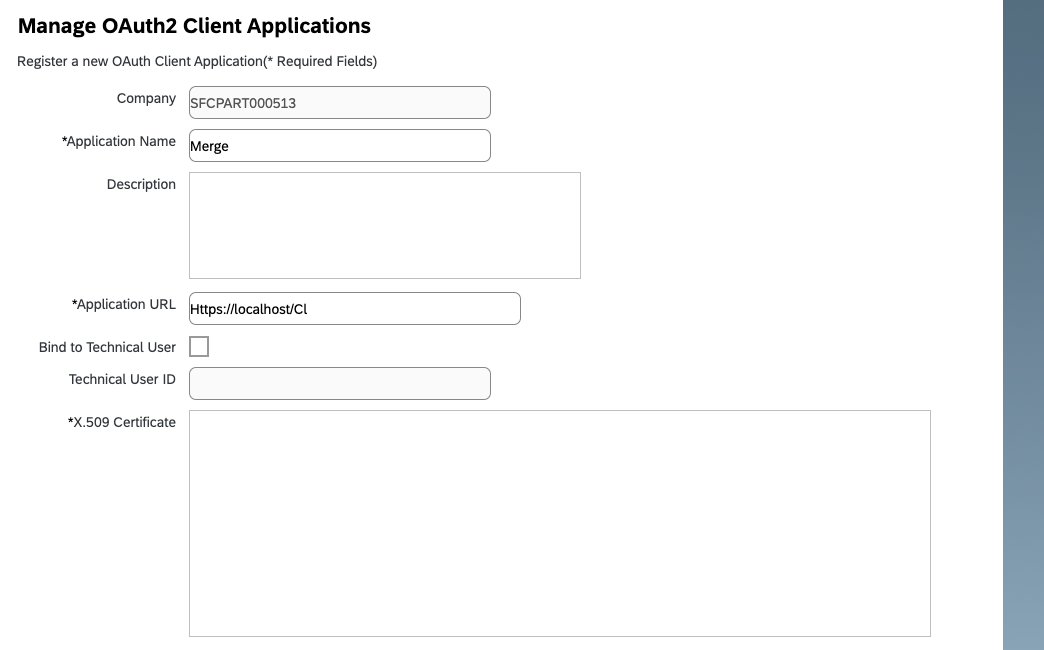
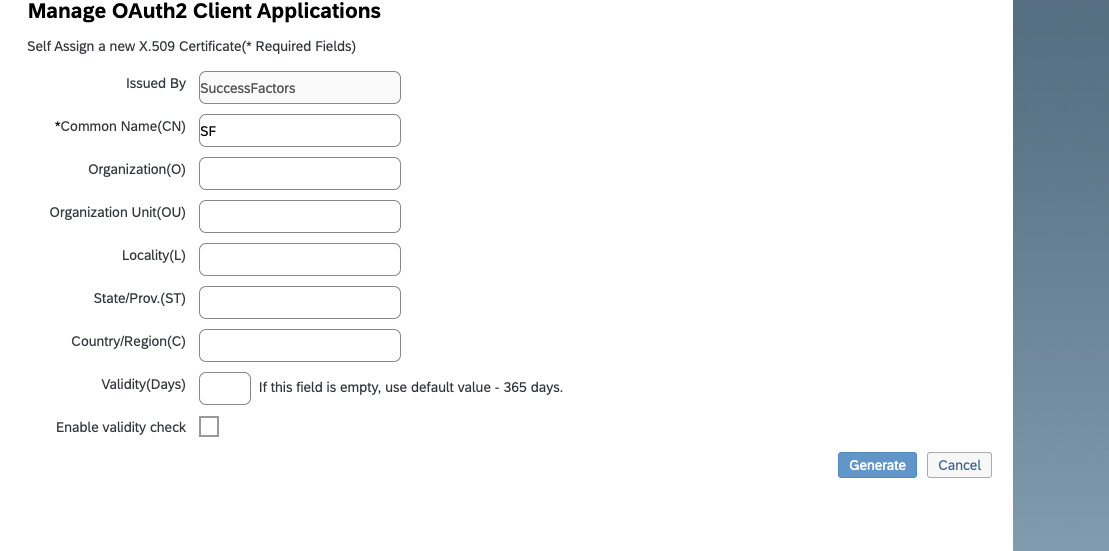
Click Generate X.509 Certificate. Fill out Common Name (name doesn't matter) and hit Generate.
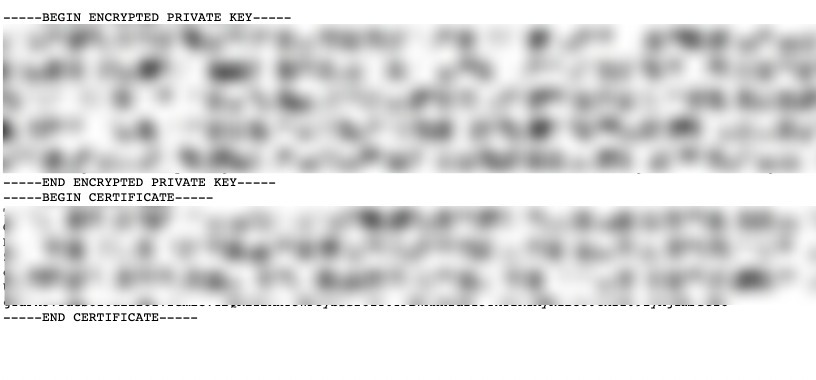
Once the certificate populates, download and save it. You will have downloaded a file called Certificate.pem.

Click Register (it will have replaced the Generate button).
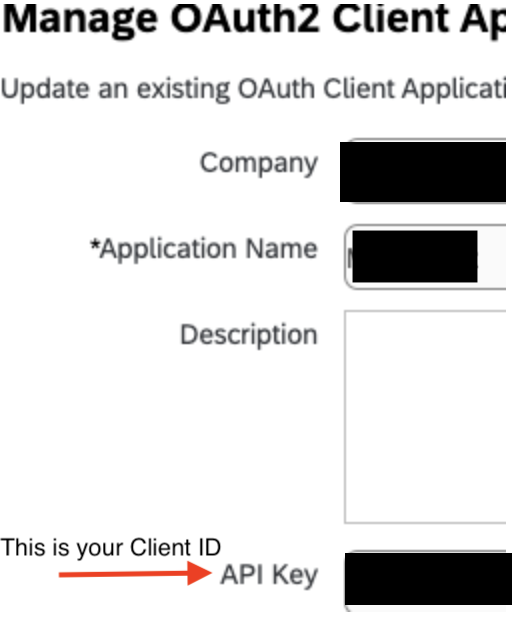
Back on your Manage OAuth2 Client Applications, go to the application you just created and click Edit.

You will now see an API key listed - this is your Client ID. Copy and save this Key.
Open up the "Certificate.pem" file that you downloaded previously in a text editor. The string between ——BEGIN ENCRYPTED PRIVATE KEY——- and —-END ENCRYPTED PRIVATE KEY——- is your Client Secret. Copy the Client Secret and save.
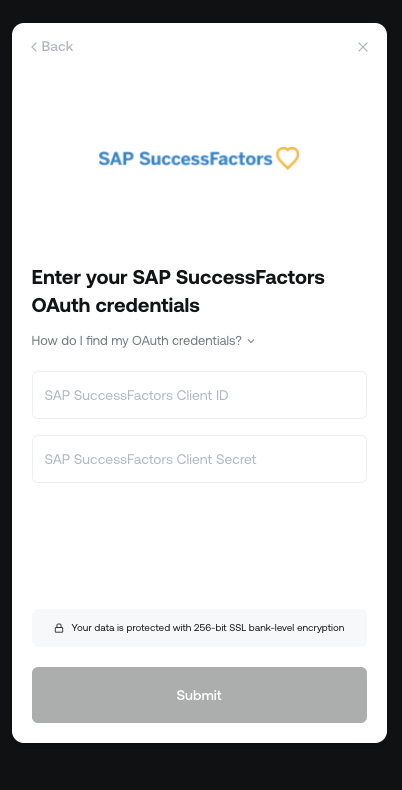
Enter your Client ID and Secret into the integration authorization component as shown below:
If you have any questions, please feel free to reach out to us at [email protected]