NetSuite - How do I link my account?
Last updated: April 2, 2026
Overview
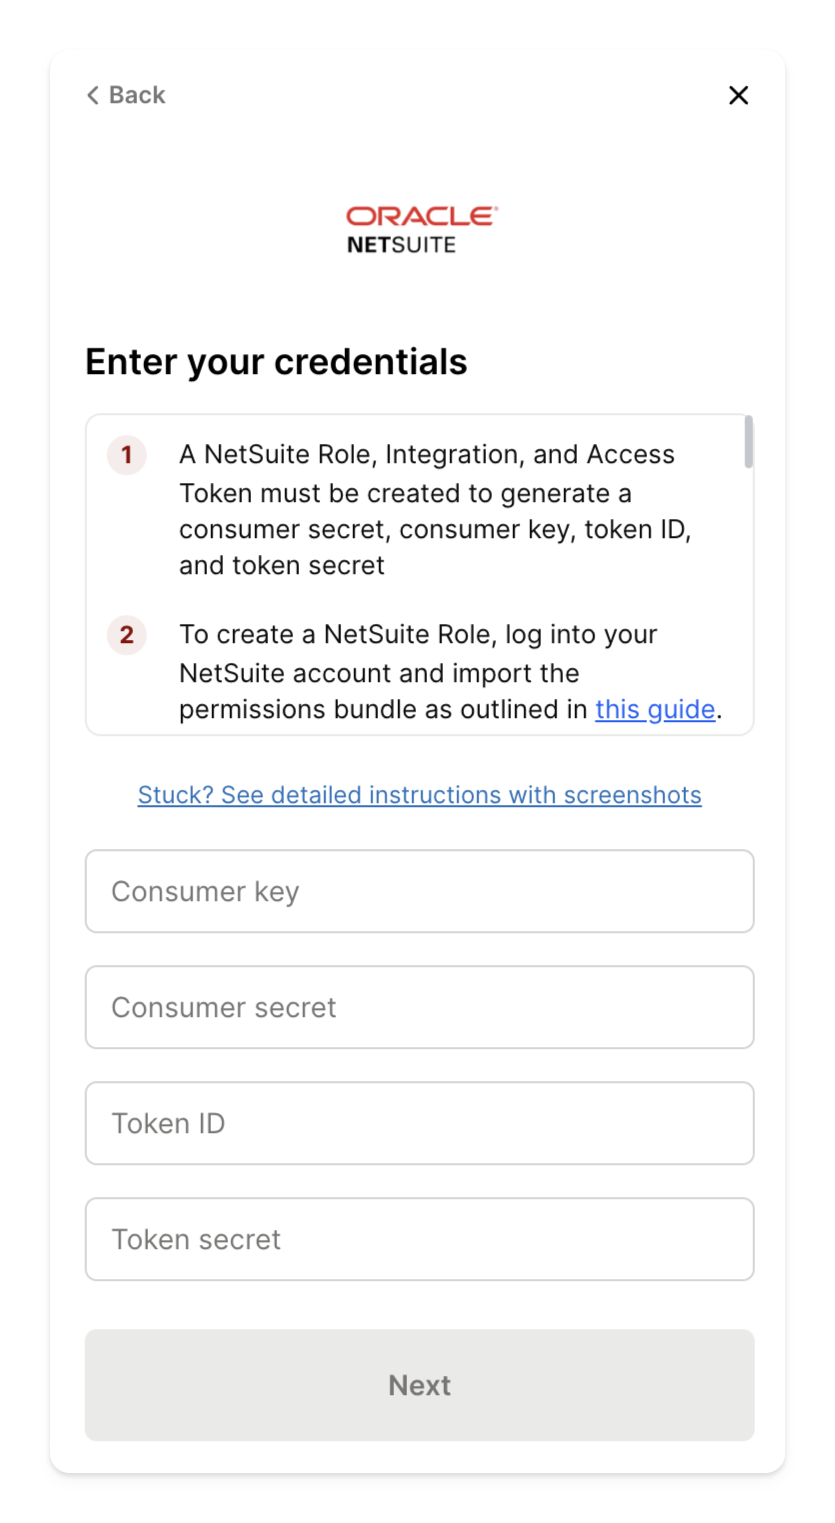
To authenticate NetSuite, you will need to provide the following information:
Consumer Key
Consumer Secret
Token ID
Token Secret
This guide will walk you through finding or creating those credentials within NetSuite.
Prerequisites
Please ensure you have Administrator permissions in your company's NetSuite instance, or someone has shared their access with you.
Video Guide
Instructions
Step 1: Finding your NetSuite Account ID
Enter your NetSuite Account ID in the Linking flow
This is the combination of letters or numbers before "app.netsuite.com" of the URL
If your URL is "https://7600508.app.netsuite.com...", your NetSuite Account ID is 7600508

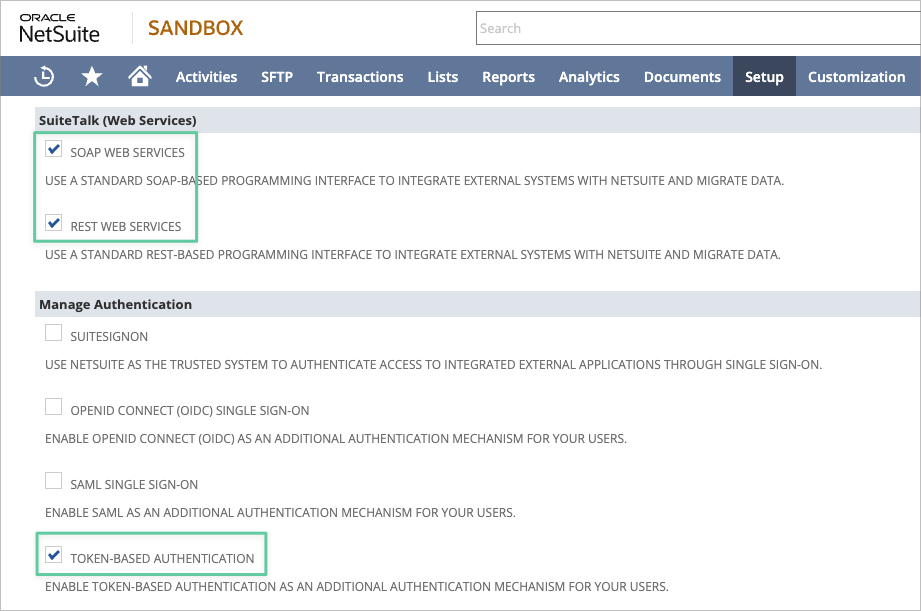
Step 2: Enable SuiteCloud features
Open the NetSuite Enable Features Page
Under SuiteCloud, check the following boxes then click save
SOAP WEB SERVICES
REST WEB SERVICES
TOKEN-BASED AUTHENTICATION
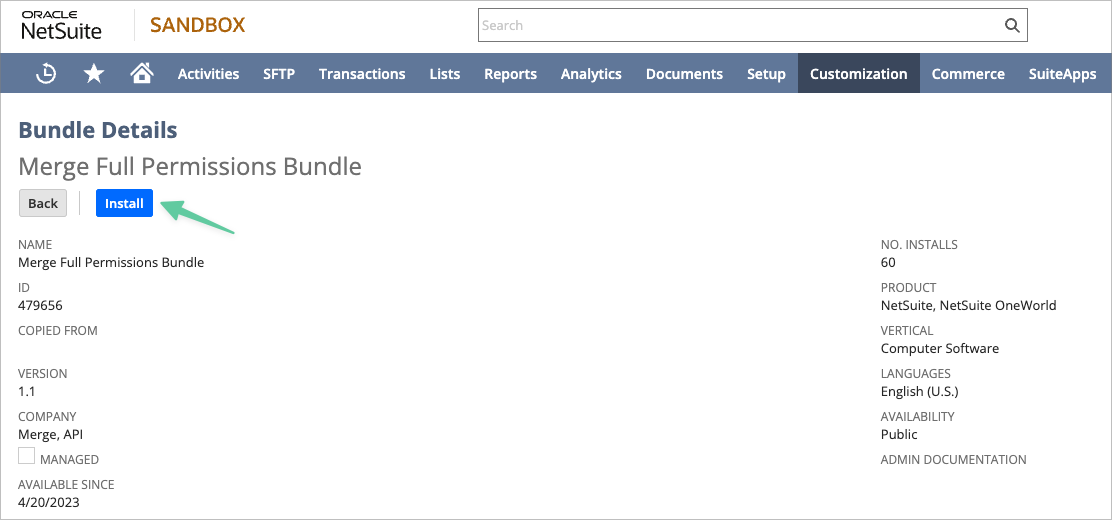
Step 3: Install the AccountLink NetSuite bundle
Install one of the Permissions Bundles below that fits your use case
Merge Read-only Permissions Bundle will allow for read-only access
Merge Full Permissions Bundle will allow for read-and-write access
It may take up to 5 minutes to install and you may be re-routed to the Installed Bundles page when the installation is complete
The bundle creates a role that can authenticate to NetSuite's API. For a full list of the role's permissions, see this article. The permissions may be updated, or a separate Role may be used, but doing so could result in permission issues.
Step 4: Provide access to custom transaction types, records, and segments
This step is required if you have custom transaction types, custom records, or custom segments within your NetSuite instance that you need to grant access to.
If you are unsure whether you have any custom transaction types, open this link to determine if you do.
If you are unsure whether you have any custom record types, open this link to determine if you do.
If you are unsure whether you have any custom segments, open this link to determine if you do.
If these does not apply to you, skip to Step 5.
Navigate to Setup > Users/Roles > Manage Roles

Locate and select the role associated with the account
Within the role, scroll down to Permissions
If you are adding a custom transaction type, go to the Transactions subtab
If you are adding a custom record type or segment, go to Custom Record subtab

Add your custom transaction type, record, or segment to the permissions list.
Save
Step 5: Assign a user to the role
Open Manage Users
Either select a user to assign the Role to or create a new user
Most users use an existing user (often yourself) so that an additional NetSuite seat is not consumed
To create a new user, however, go to Lists > Employees > Employees > New. Create the user and grant them NetSuite access by going to the Access tab in the Employee record and select 'Give Access'
In the user's employee record, click Edit and go to the Access tab. In your Access tab, go to Roles and select the Role you imported through the Import Bundle process in Step 3
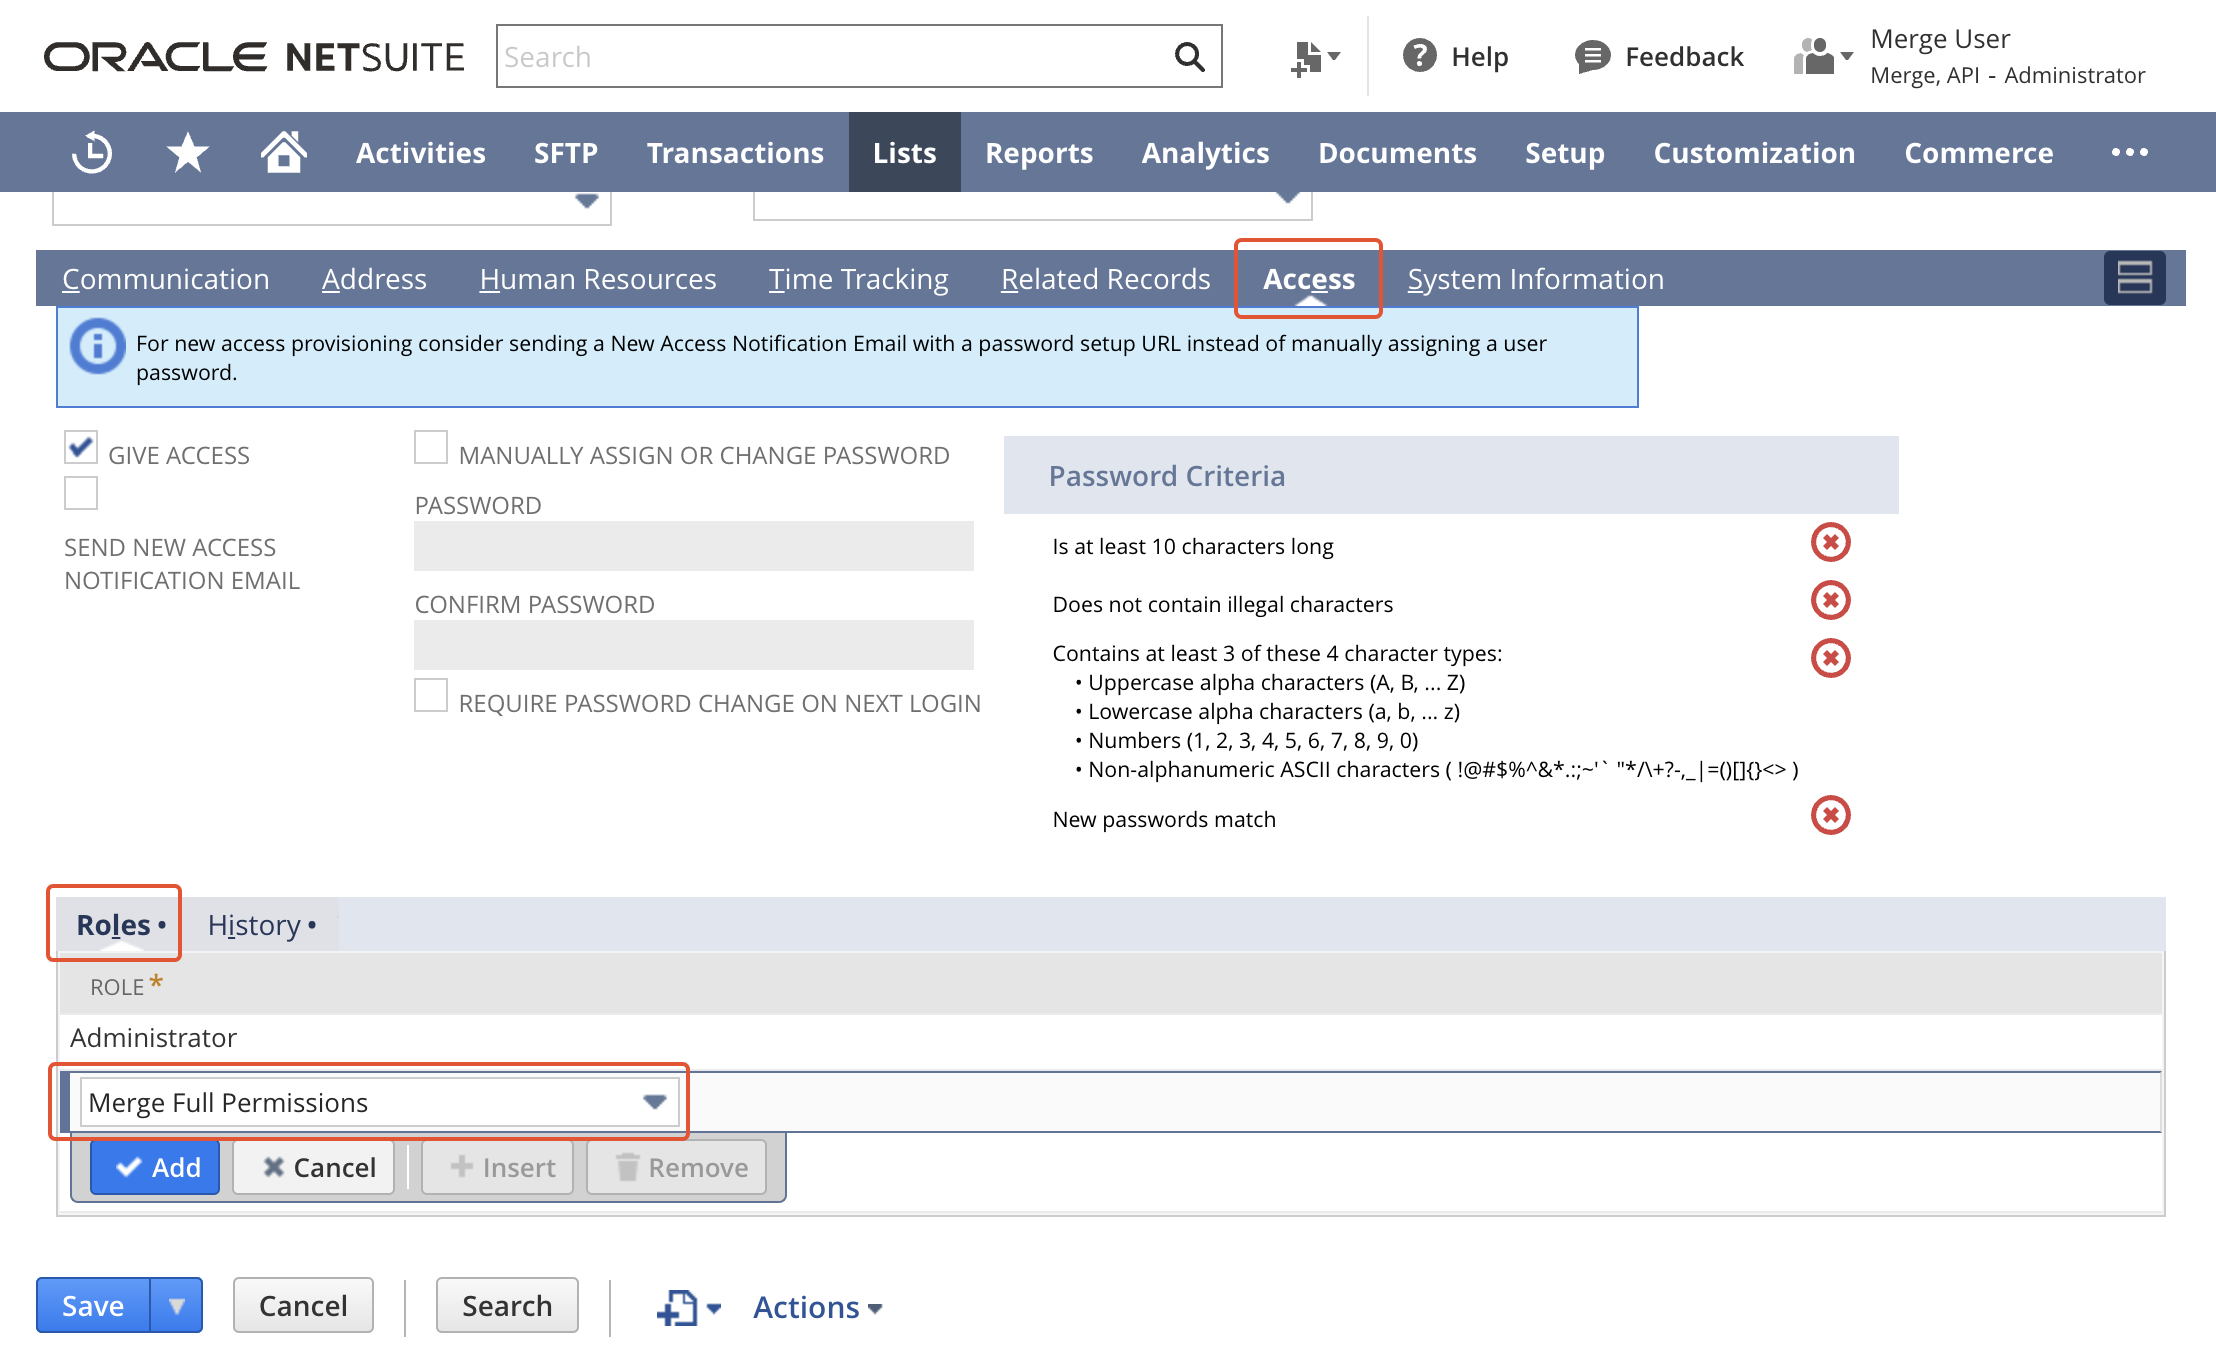
Click Save to apply these changes
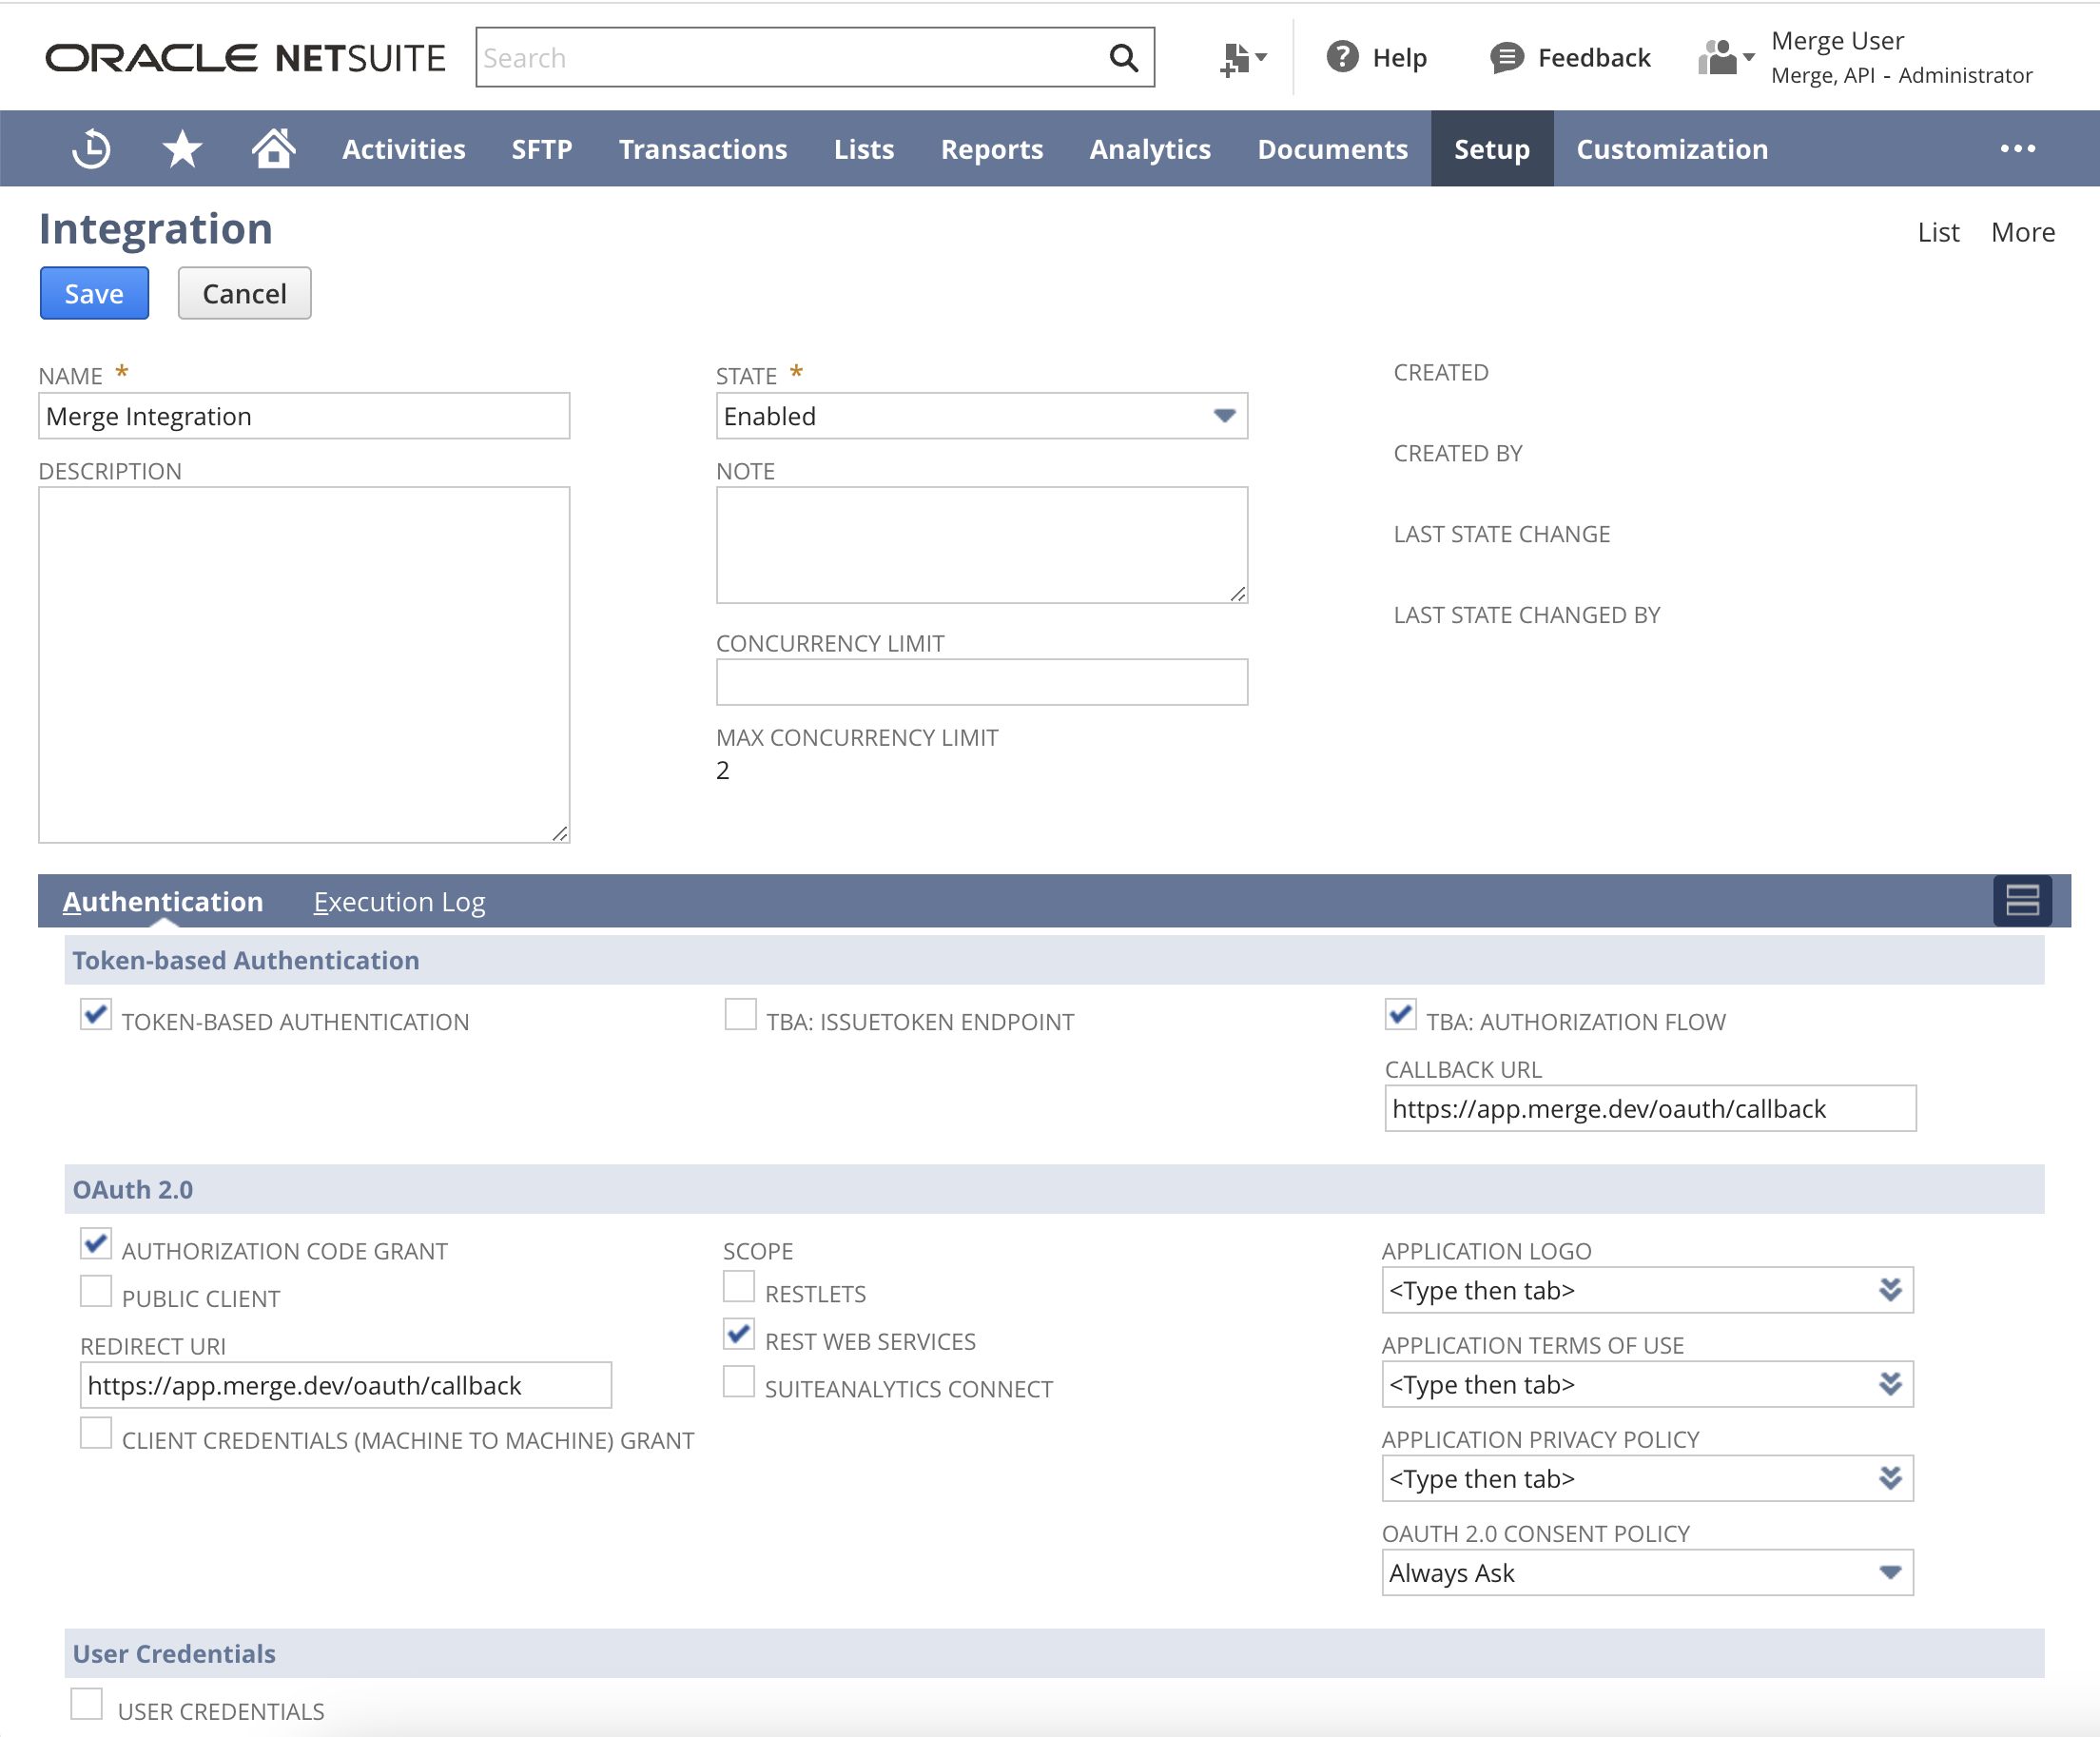
Step 6: Create an integration to obtain your Consumer Key and Secret
Navigate to Integration and create an integration with the following details
NAME: any value
CONCURRENCY LIMIT: leave blank
Suggested: As a part of this process, review your Integration Governance settings (navigate to Setup > Integration > Integration Governance) to understand your account’s available concurrency and how it is allocated across your integrations.
If your settings show an Unallocated Concurrency Limit of less than three, we suggest reviewing other integrations to determine where your concurrency is allocated.
Again, we suggest leaving the allocated concurrency limit null. If you must allocate, a minimum of 3 is suggested.
CALLBACK URL: https://app.merge.dev/oauth/callback
REDIRECT URI: https://app.merge.dev/oauth/callback
Check the following boxes
REST WEB SERVICES
TOKEN-BASED AUTHENTICATION
TBA AUTHORIZATION FLOW
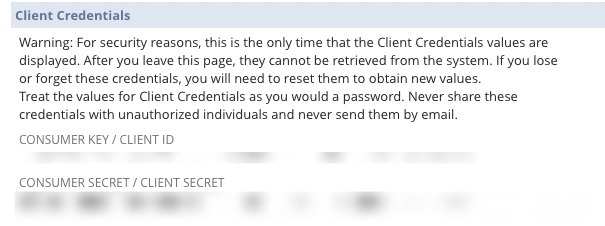
Once you click save, Copy the Consumer Key and Consumer Secret and store them in a safe place. They will only be shown once and you will need to enter it in Step 7.
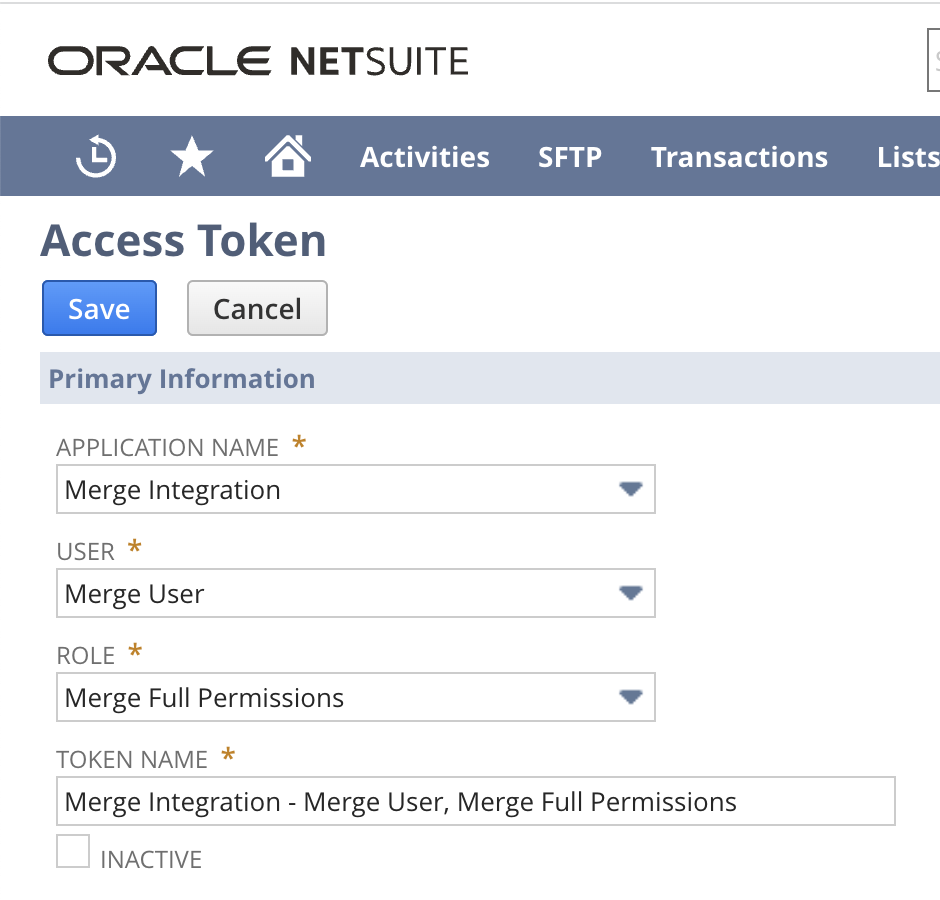
Step 7: Create an access token to obtain your Token ID and Secret
Navigate to Access Token
Ensure the below details are selected and click Save
Application Name: Name of the Integration created in Step 5
User: User that the Role was added to during Step 4
Role: The imported role (Merge Full Permissions or Merge Read-only Permissions)
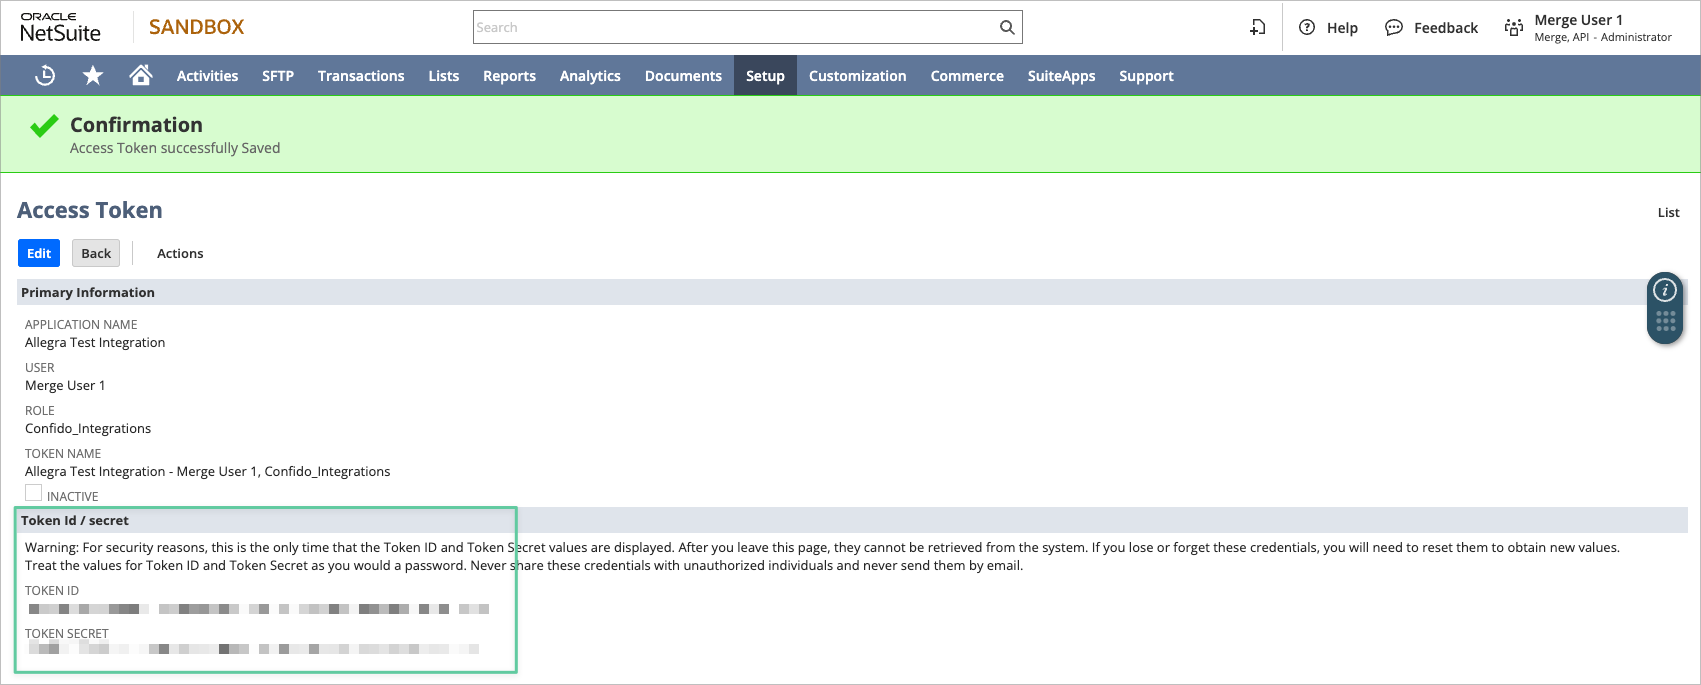
Copy the Token ID and Token Secret and store them in a safe place. They will only be shown once and you will need to enter it in Step 7.
Step 8: Enter credentials in the linking flow
Consumer Key: Confirmation screen after creating the integration (Step 6)
Consumer Secret: Confirmation screen after creating the integration (Step 6)
Token ID: Confirmation screen after creating your Access Token (Step 7)
Token Secret: Confirmation screen after creating your Access Token (Step 7)