Workday - How do I filter the Employees being synced from my Workday account?
Last updated: April 27, 2026
Overview
If you'd like to allow access to a subset of the employees — for example, only Active employees, only Full-time workers, or employees matching a specific calculated field — this guide will walk you through the setup required in Workday.
Filters are supported for the Employee common model, which corresponds to the Workers object in Workday.
Prerequisites
You'll need admin access to your Workday instance to complete the steps below. This setup involves creating an Integration System with a Field Override Service, which grants access to retrieve and filter on specific fields.
Instructions
Step 1: Create a Boolean calculated field (optional)
If you'd like to filter on a standard Workday field that's already a true/false (Boolean) type, you can skip this step.
If you're filtering on a custom condition, you'll need to create a calculated field of type Boolean that returns true for the records you want to sync. Only employees where this field evaluates to true will be included in the sync.

Refer to this guide for instructions on creating a calculated field in Workday. Once created, you can validate it by building a custom report that includes the field alongside base employee fields.
If your use case includes syncing only active employees while still reliably detecting terminations, use a Workday calculated field (or equivalent filter logic) that includes workers who are Active or recently terminated.
Calculated Field high-level logic
Include the worker if their status is Active, OR
Include the worker if their Last Termination Date is after a defined cutoff date (or after another Workday calculated “lookback” date)
Why this matters
If you filter to only Active workers, a worker who gets terminated may immediately fall out of the filter and stop appearing in Workday's API responses during syncs. If that happens, we won’t receive a termination signal for that worker, leading to stale downstream records.
Step 2: Create the Integration System and Field Override Service
If you already have an Integration System set up in Workday to pull additional fields, add your filter fields to that same system rather than creating a new one. Only one Integration System can be used.
Search and select the Create Integration System task in your Workday instance
Give your Integration System a name, ensure that the template is Core Connector: Worker, and select OK.
Ensure that the Template is: Core Connector: Worker
The name doesn't matter, but we suggest a naming convention that you will remember!

After clicking OK, as Configure Integration Services pop-up will appear. Scroll down to the bottom, and add a Custom Integration Services record.
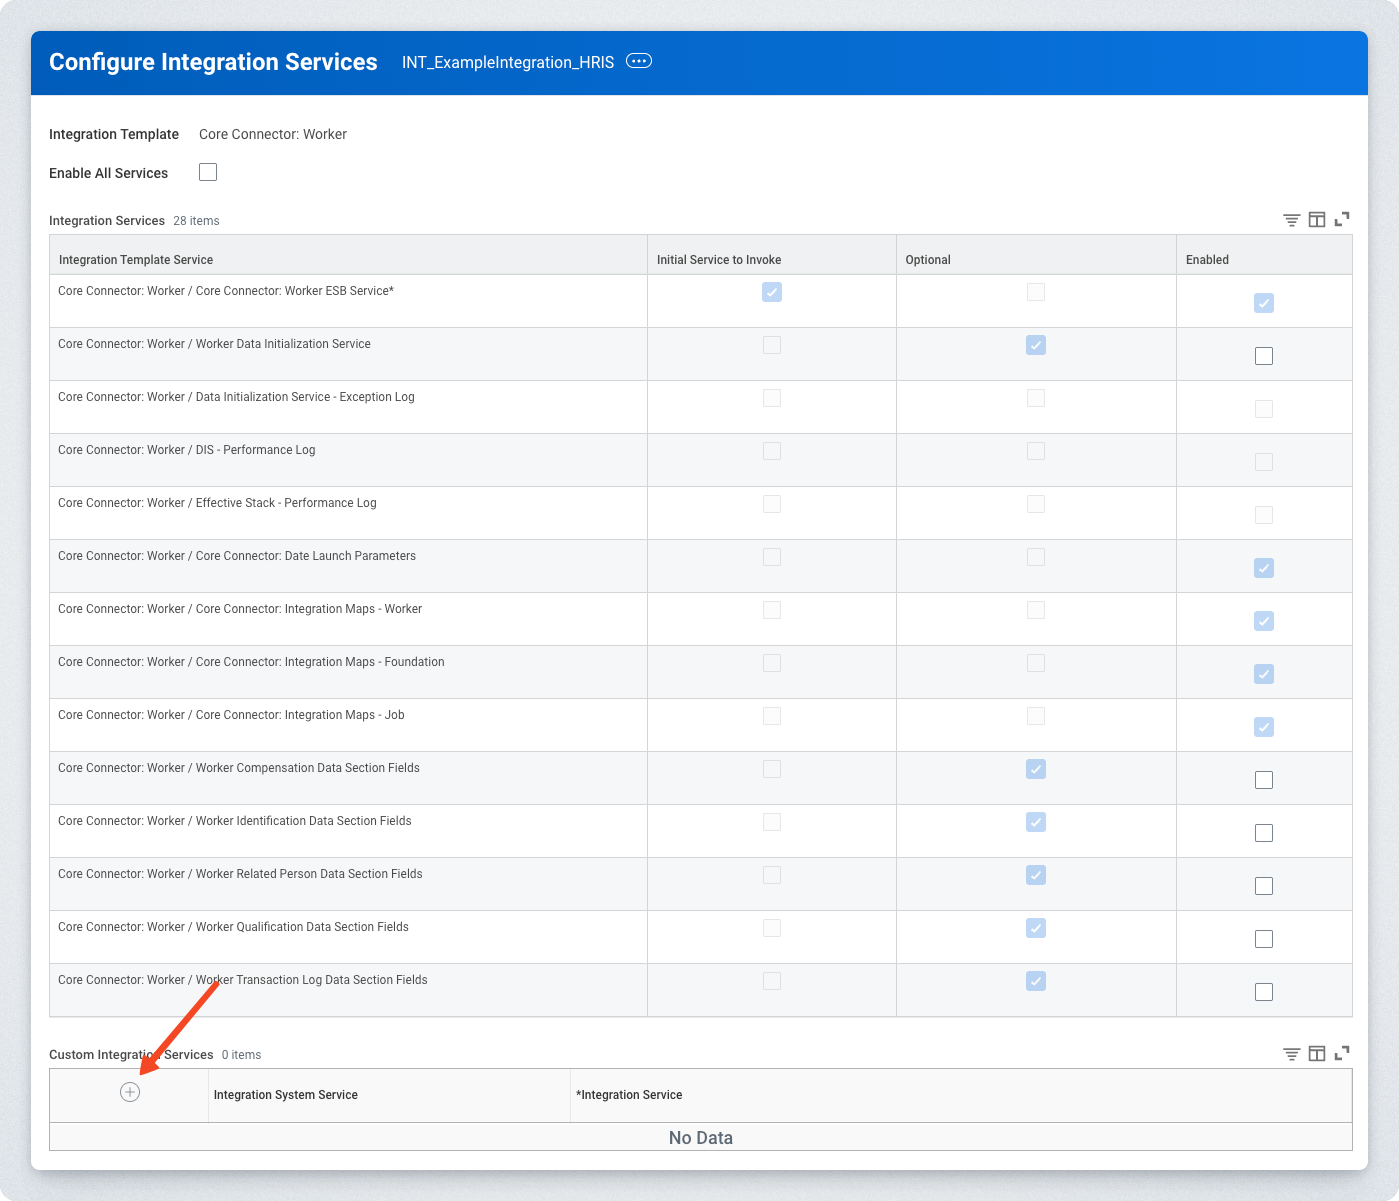
Under the Integration Service column of the newly created row, search for and select Create Integration Field Override Service.
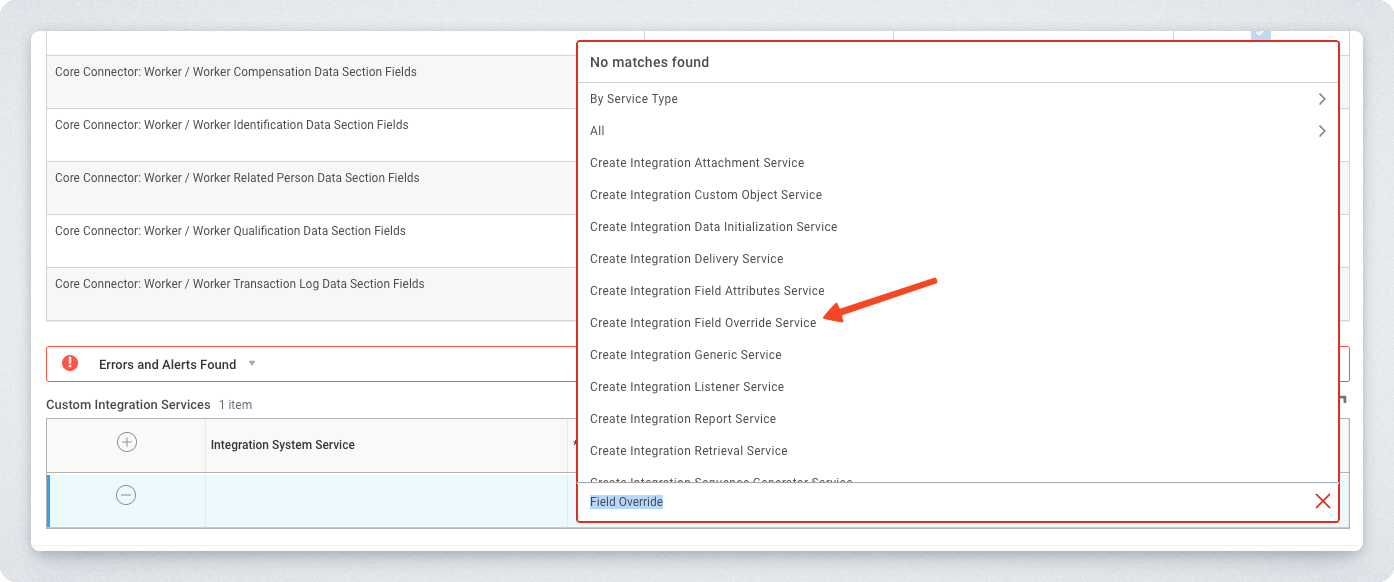
In the Create Integration Field Override Service pop-up, give the Field Override Service a name and select the Worker Business Object. We suggest something like "INT_"
Provide a name in the Fields section. The name of the field is not the same as the actual field you will filter with. The mapping of the actual field to the above happens in later steps.

You will be taken back to the Configure Integration Services pop-up. Finish the initial creation of the Integration System by selecting OK
On the Integration System page, navigate to Integration System > Configure Integration Field Overrides
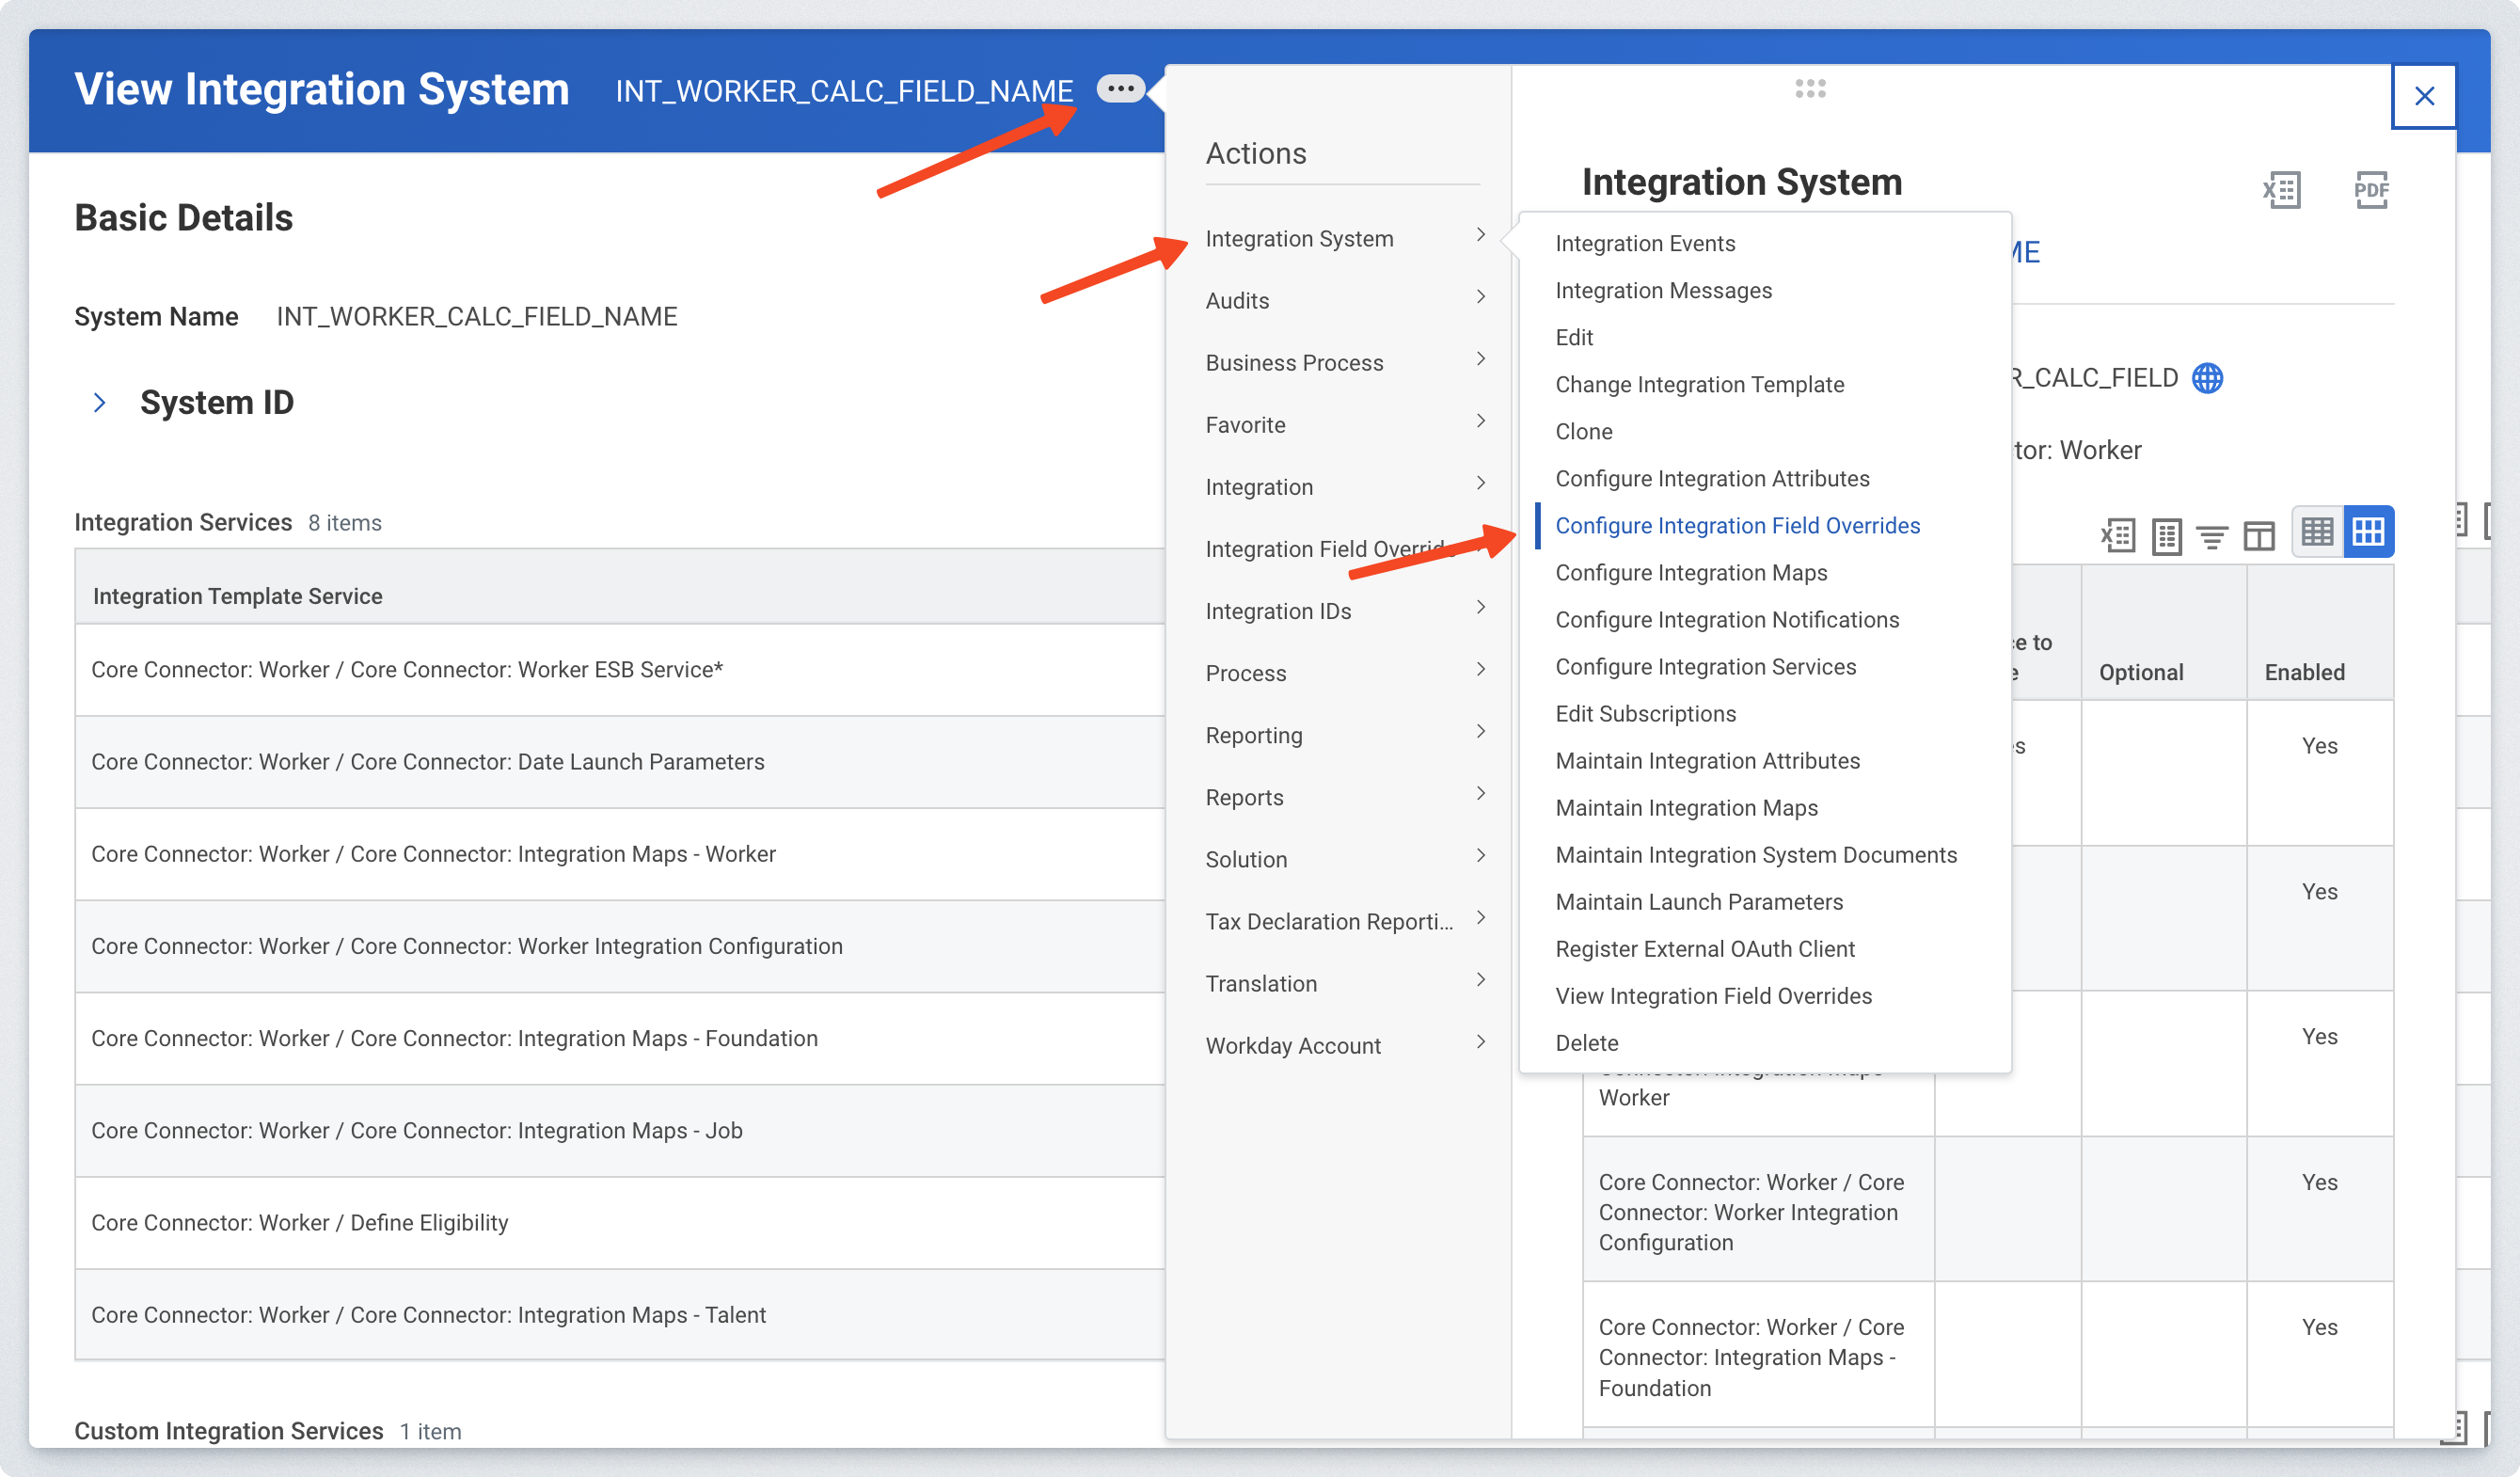
Find the name of your Field Override Service on the left side of the page. Under the Override External Field, add the calculated field you created in Step 1, and select OK

Step 3: Retrieve the Integration System ID and Integration Field WID
You will need two IDs to connect your filter to the sync:
Integration System ID
Back on the Integration System page, navigate to the Integration IDs > View IDs
Note, if you've navigated away from the Integration System, you can find it again through the View Integration System task

Copy the value listed as the ID — this is your Integration System ID.

Integration Field WID
To find the Integration Field WID, navigate to the Integration System > View Integration Field Overrides

Find the field you want to filter on, hover over the name, then click on the action icon and select Integration IDs > View IDs

Copy the Workday ID — this is your Integration Field WID.

Step 4: Input the Integration System ID and Integration Field WID in the Linking Flow
Once you have both IDs, head back to the linking flow and enter them in the filter settings as shown below.
