Microsoft Dynamics 365 Business Central - How do I set up my partner credentials for OAuth?
Last updated: May 28, 2025
Overview
In order to authenticate an MS Dynamics integration, Merge customers will need to create an Azure Application that end users will authorize to access their Dynamics tenant. The steps detailing that process are outlined below
Instructions
Step 1: Check whether you have a tenant
Sign in to your Azure Portal
If you do not yet have an Azure account, sign up for a free account here
After signing in, locate the tenant name in the upper right-hand corner directly under your account name.
Step 2 (if necessary): Create a new tenant
Navigate to this Active Director Creation page and log in to your Active Directory account.
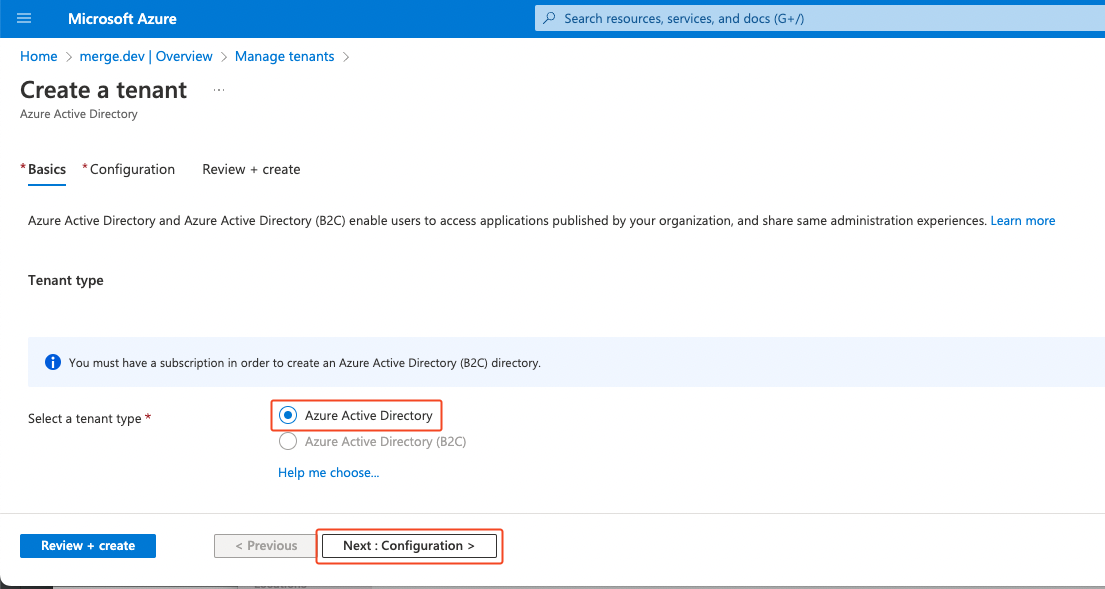
Choose the Azure Active Directory tenant type then select Next: Configuration
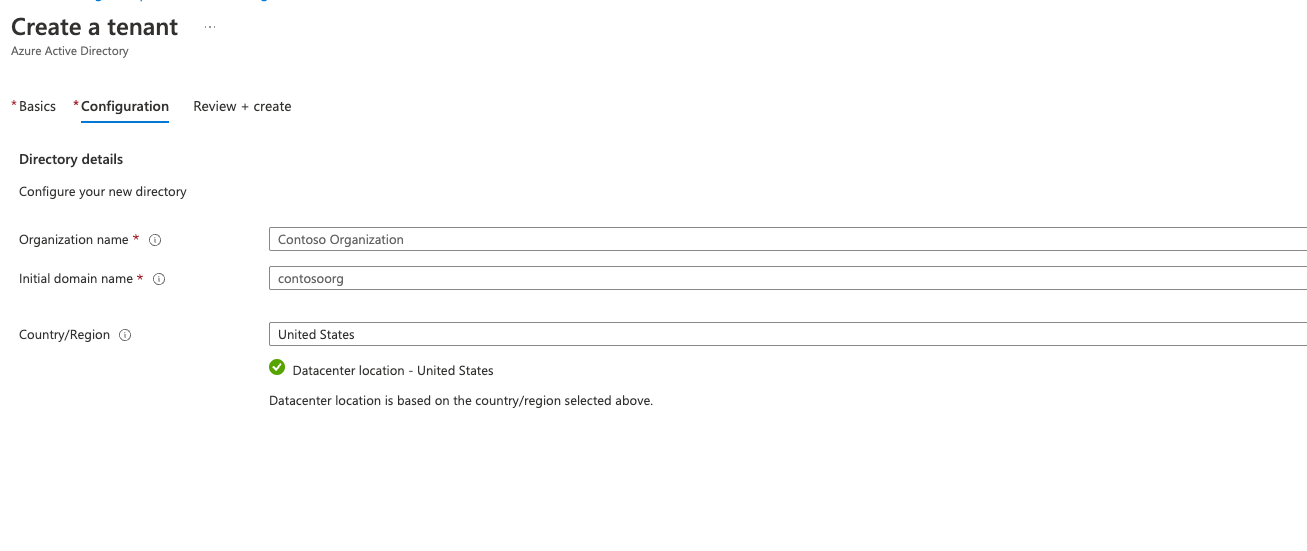
Enter the required information for your tenant then select Next: Review + Create
Step 3: Register your application
Search for and select Azure Active Directory
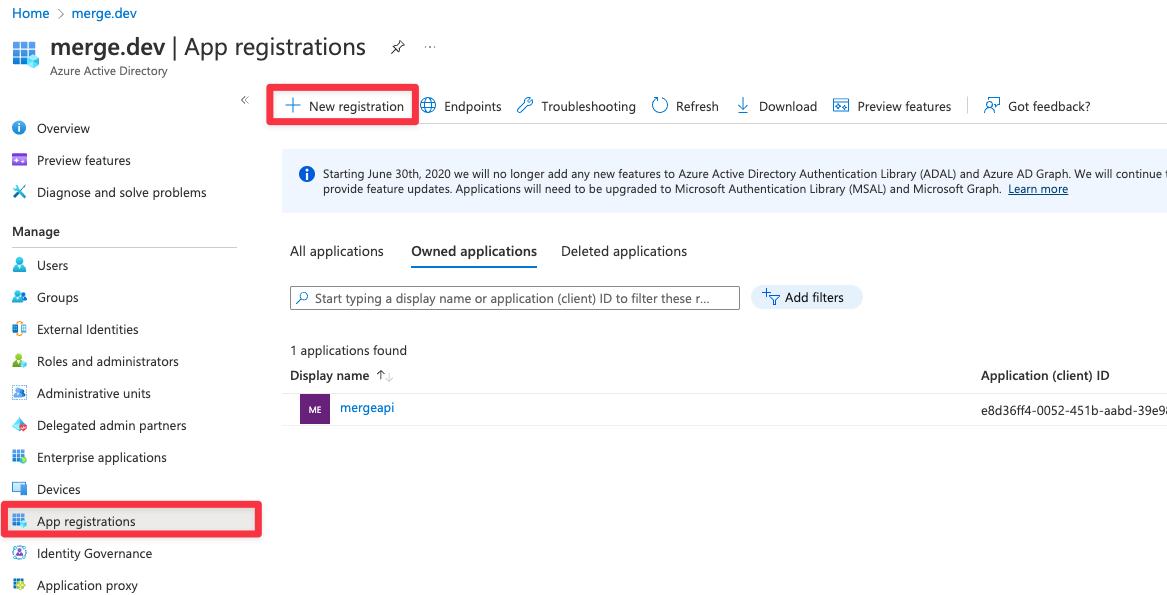
Under Manage, navigate to App registrations and select New Registration
Enter a display name, and specify who can use the application. It is important to mark select one of the Multitenant options to allow your end users to link!
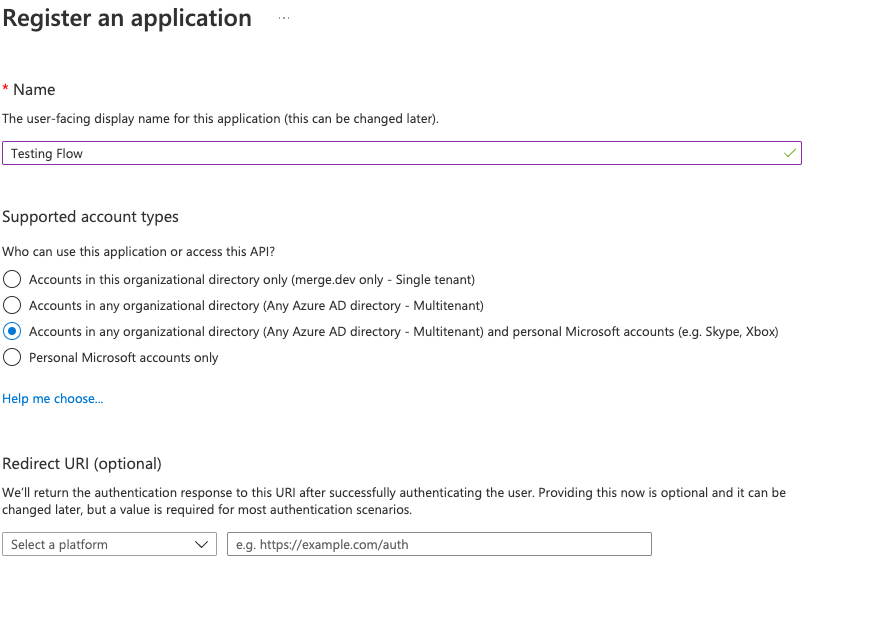
Select Register to complete the initial app registration
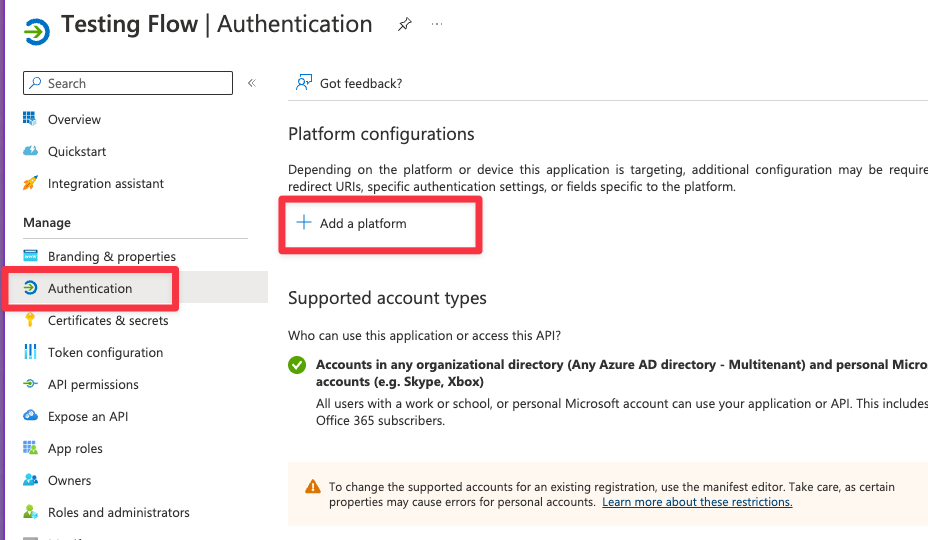
Next, under Authentication > Platform Configuration select Add a Platform
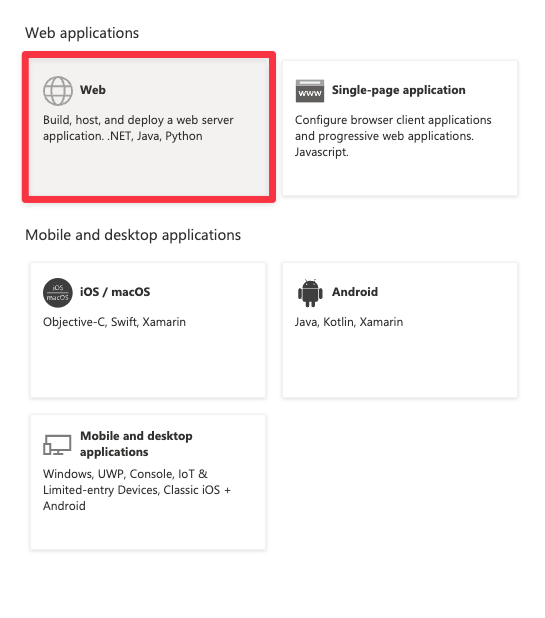
From Configure platforms, select Web, then enter the following callback URL:
https://app.merge.dev/oauth/callback
Step 4: Add a client secret
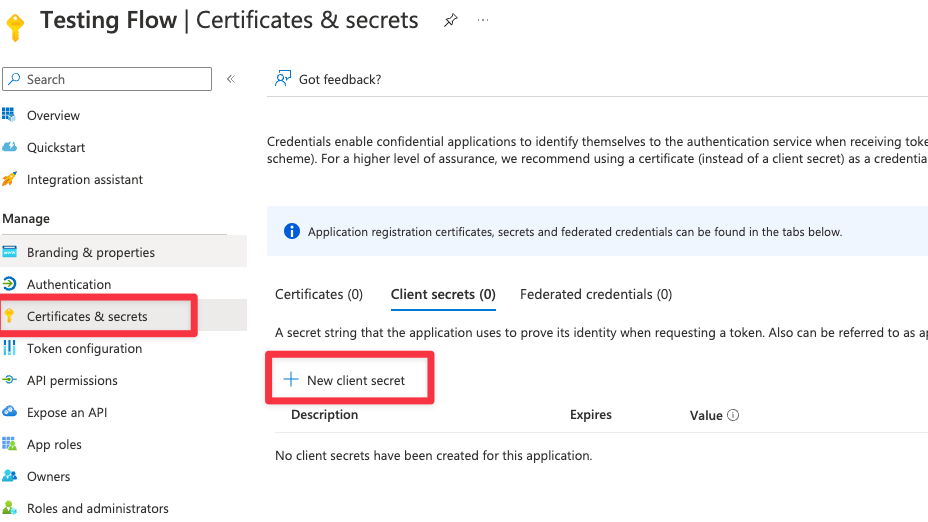
Within your newly registered Application, navigate to Certificates & secrets and select New Client Secret
Add a description and select an expiration date for your client secret
Click Add and record the secret’s value

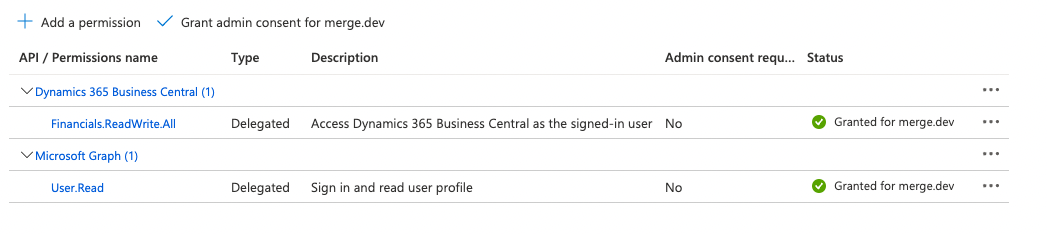
Step 5: Add Permissions
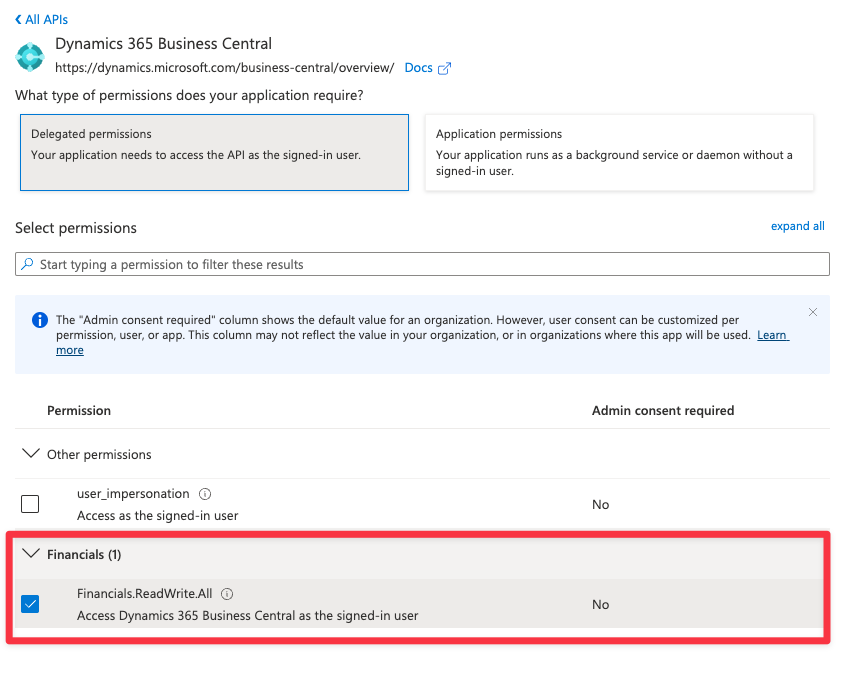
On the API Permissions page, select Add a Permission
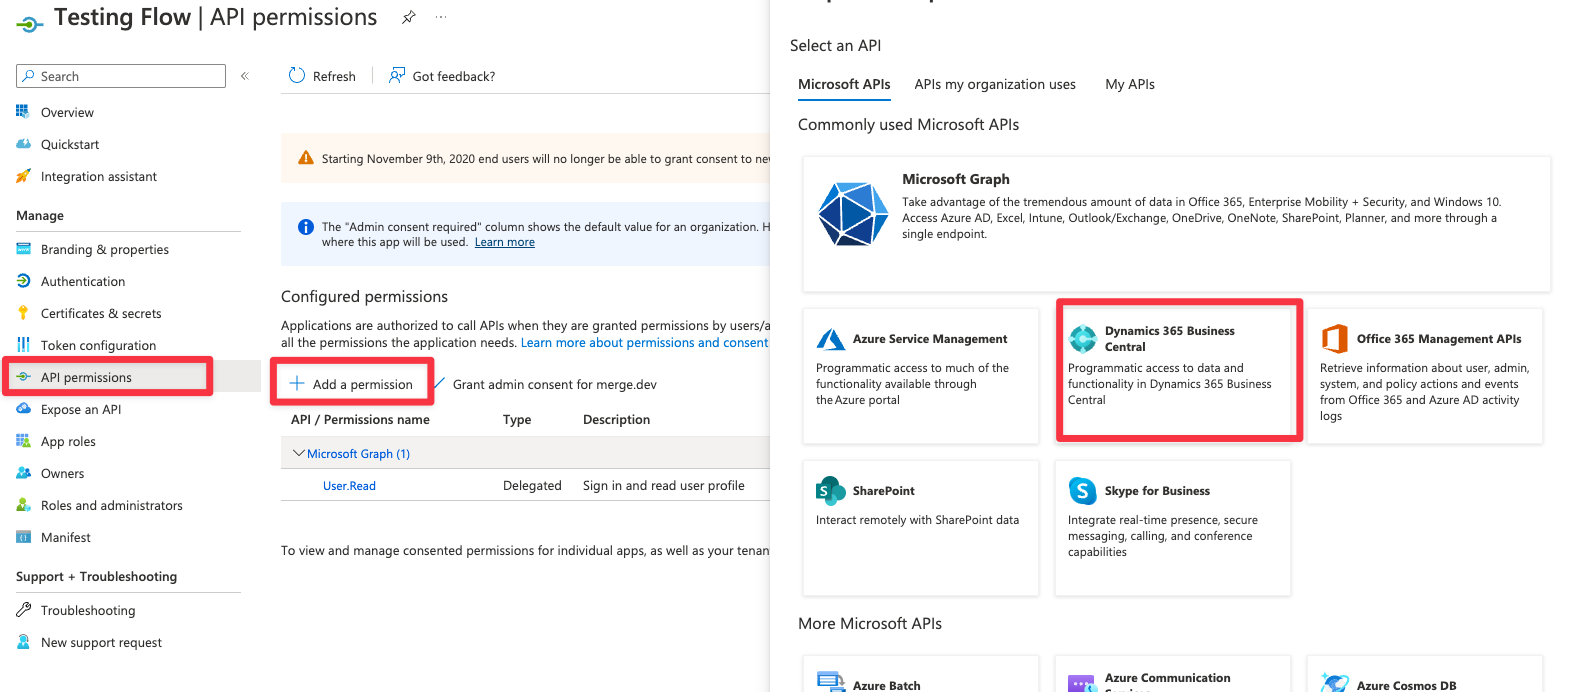
Select Dynamics 365 Business Central -> Delegated Permissions -> Financials.ReadWrite.All
3. Then select Application Permissions -> Dynamics 365 Business Central
and select:
app_access
AdminCenter.ReadWrite.All
API.ReadWrite.All
Automation.ReadWrite.All
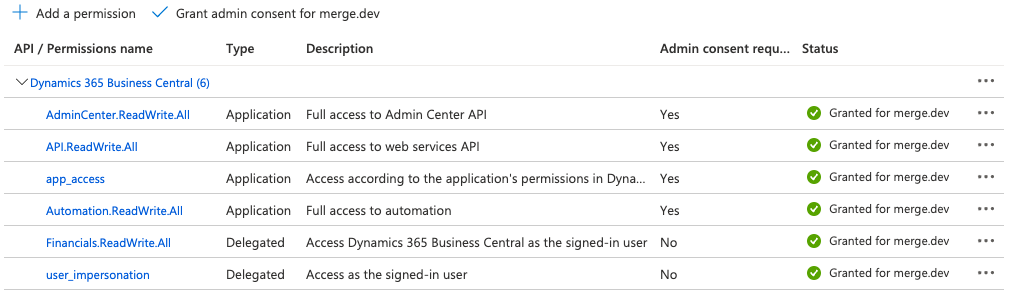
Note: you will need admin level access to do this. In case your organization does not have an admin, you can follow the link here to take over as an admin https://portal.office.com/admintakeover#/admintakeover