Intercom - How do I set up my partner credentials for OAuth?
Last updated: June 9, 2026
Overview
You can create and use your own Intercom partner credentials to connect to your customers’ Intercom workspaces. To set this up, sign up for an Intercom Developer account and create a public OAuth app.
The steps below walk you through the full setup process:
Instructions
Step 1: Create a Developer account and workspace
To develop a public app, you will need to use a development workspace: sign up here to create your free account.
Intercom's development workspaces have limitations listed here and do not have the full functionality of a paid Intercom workspace. Development workspaces are only available for the US region.
Step 2: Create your OAuth app
After signing into your new developer account, go to Settings > Integrations > Developer Hub.

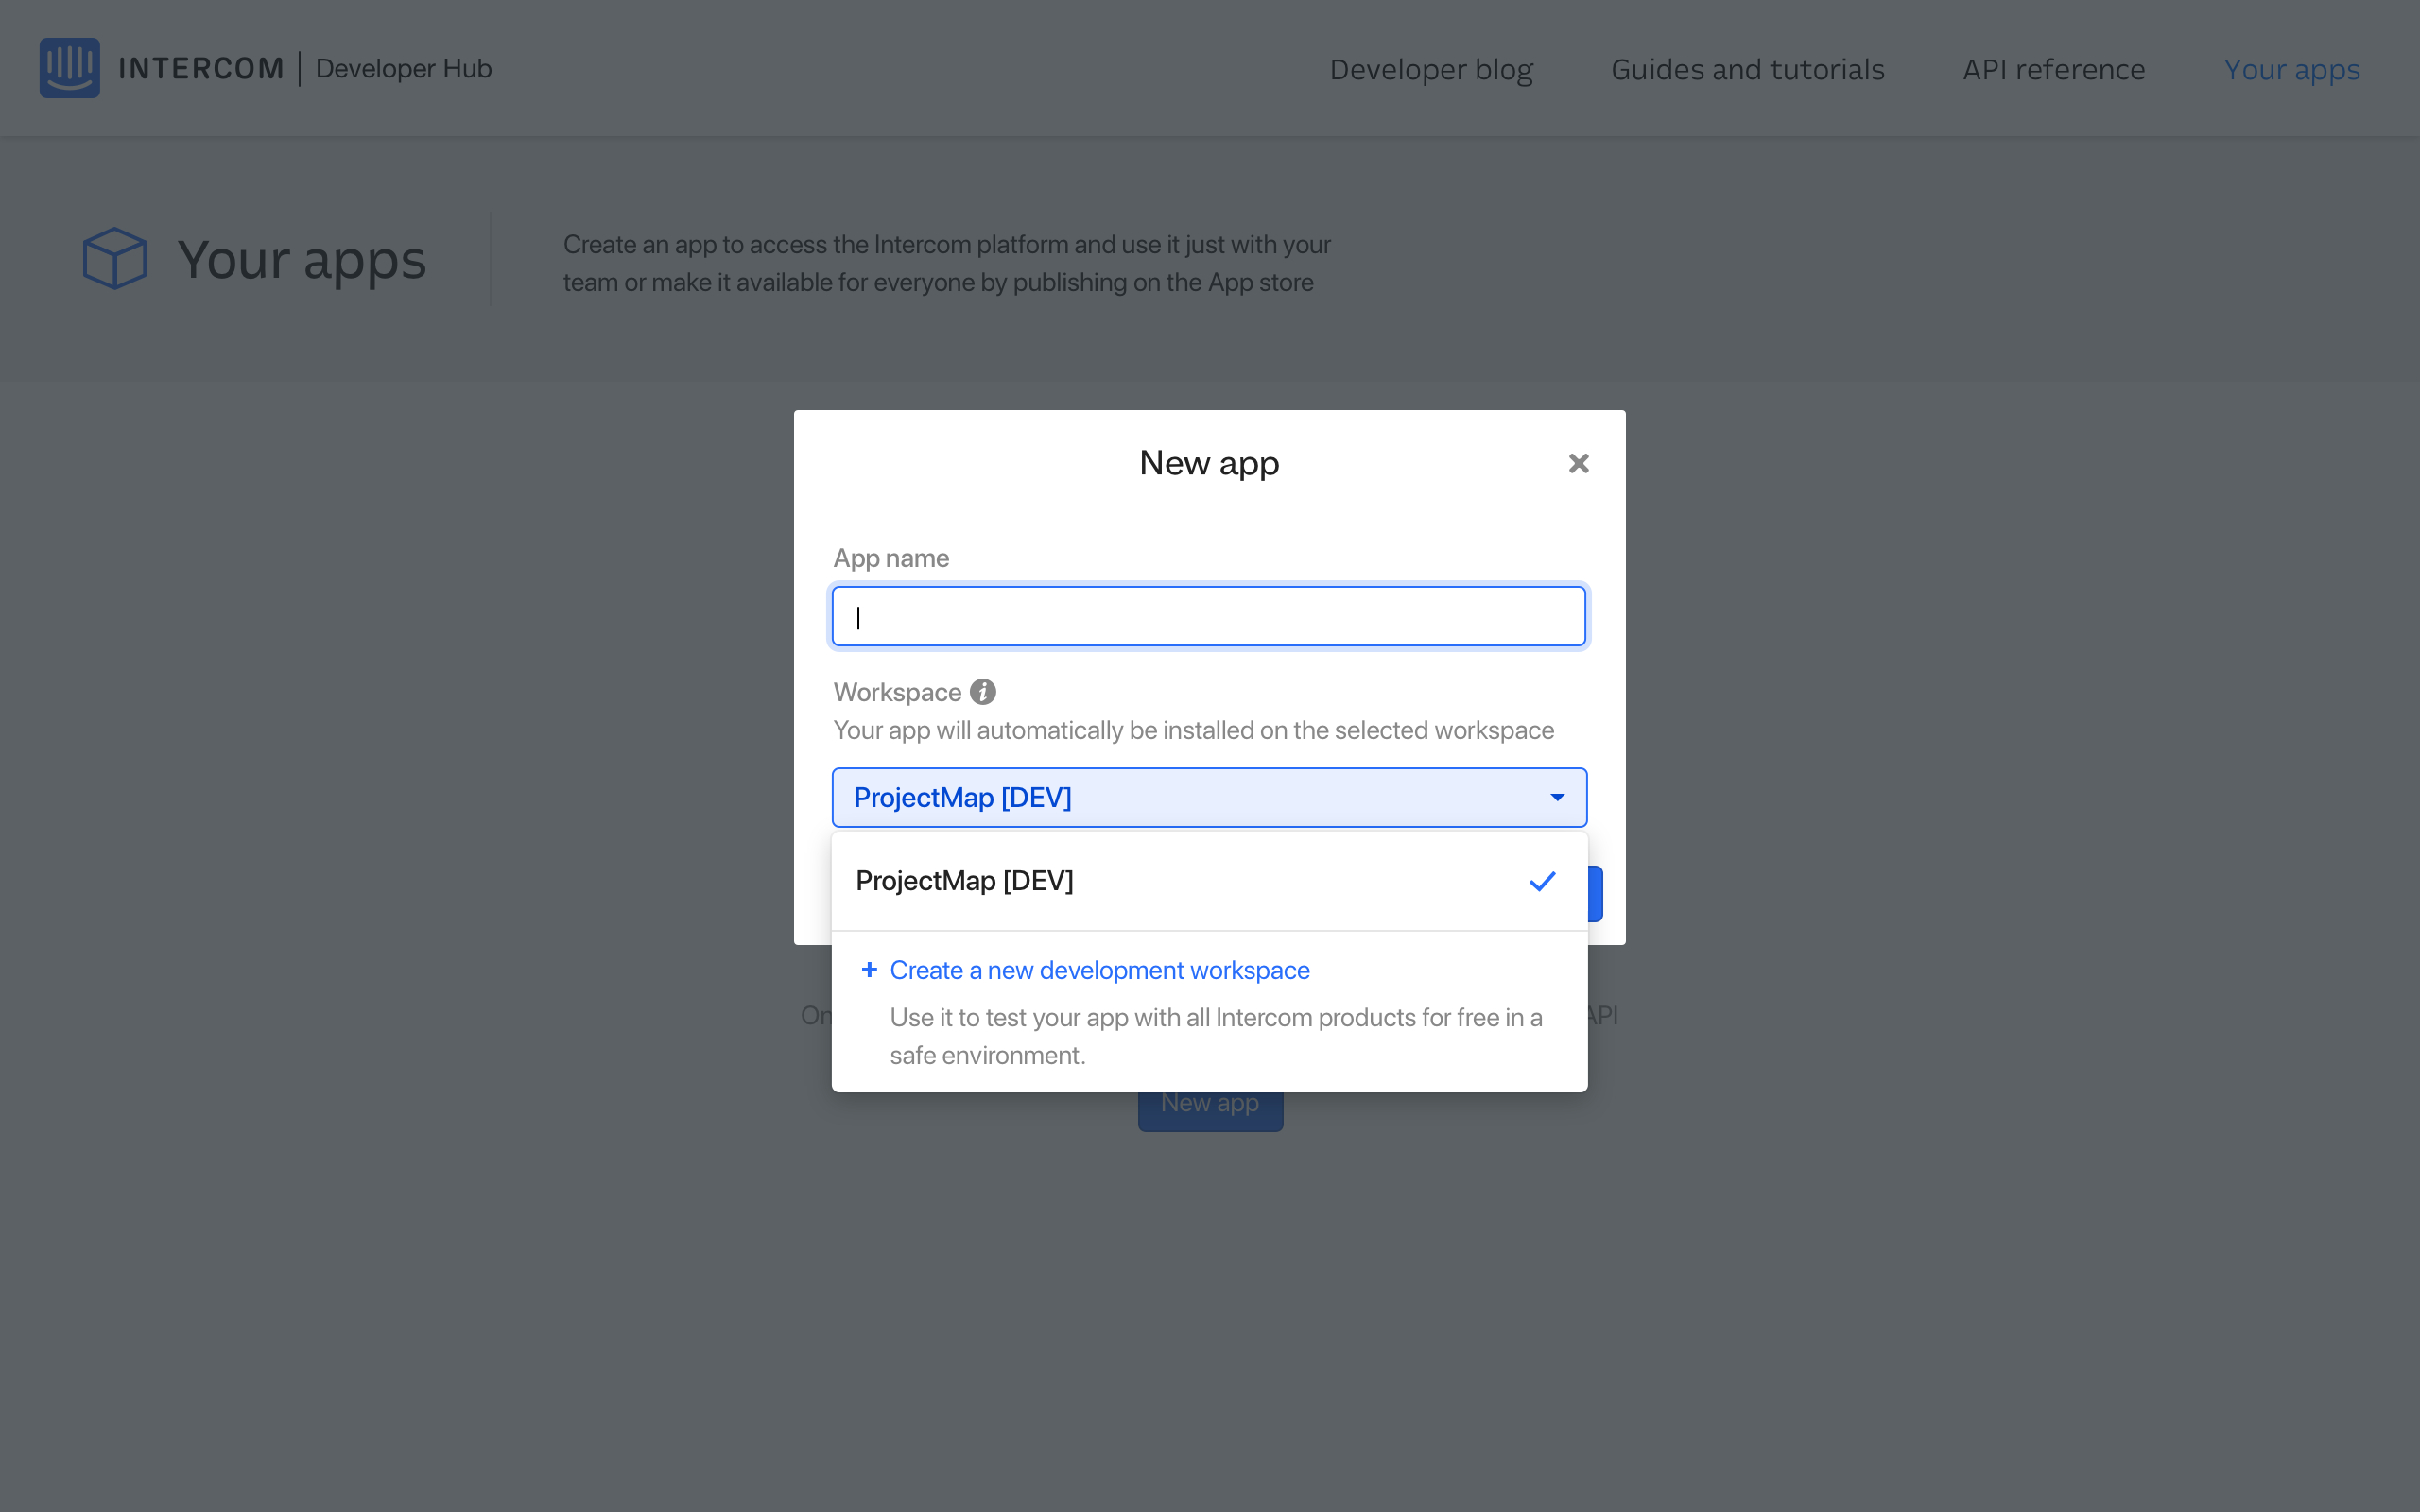
You should land on the Your apps section within Developer Hub, where you will create your OAuth app. Click New app in the lower left side
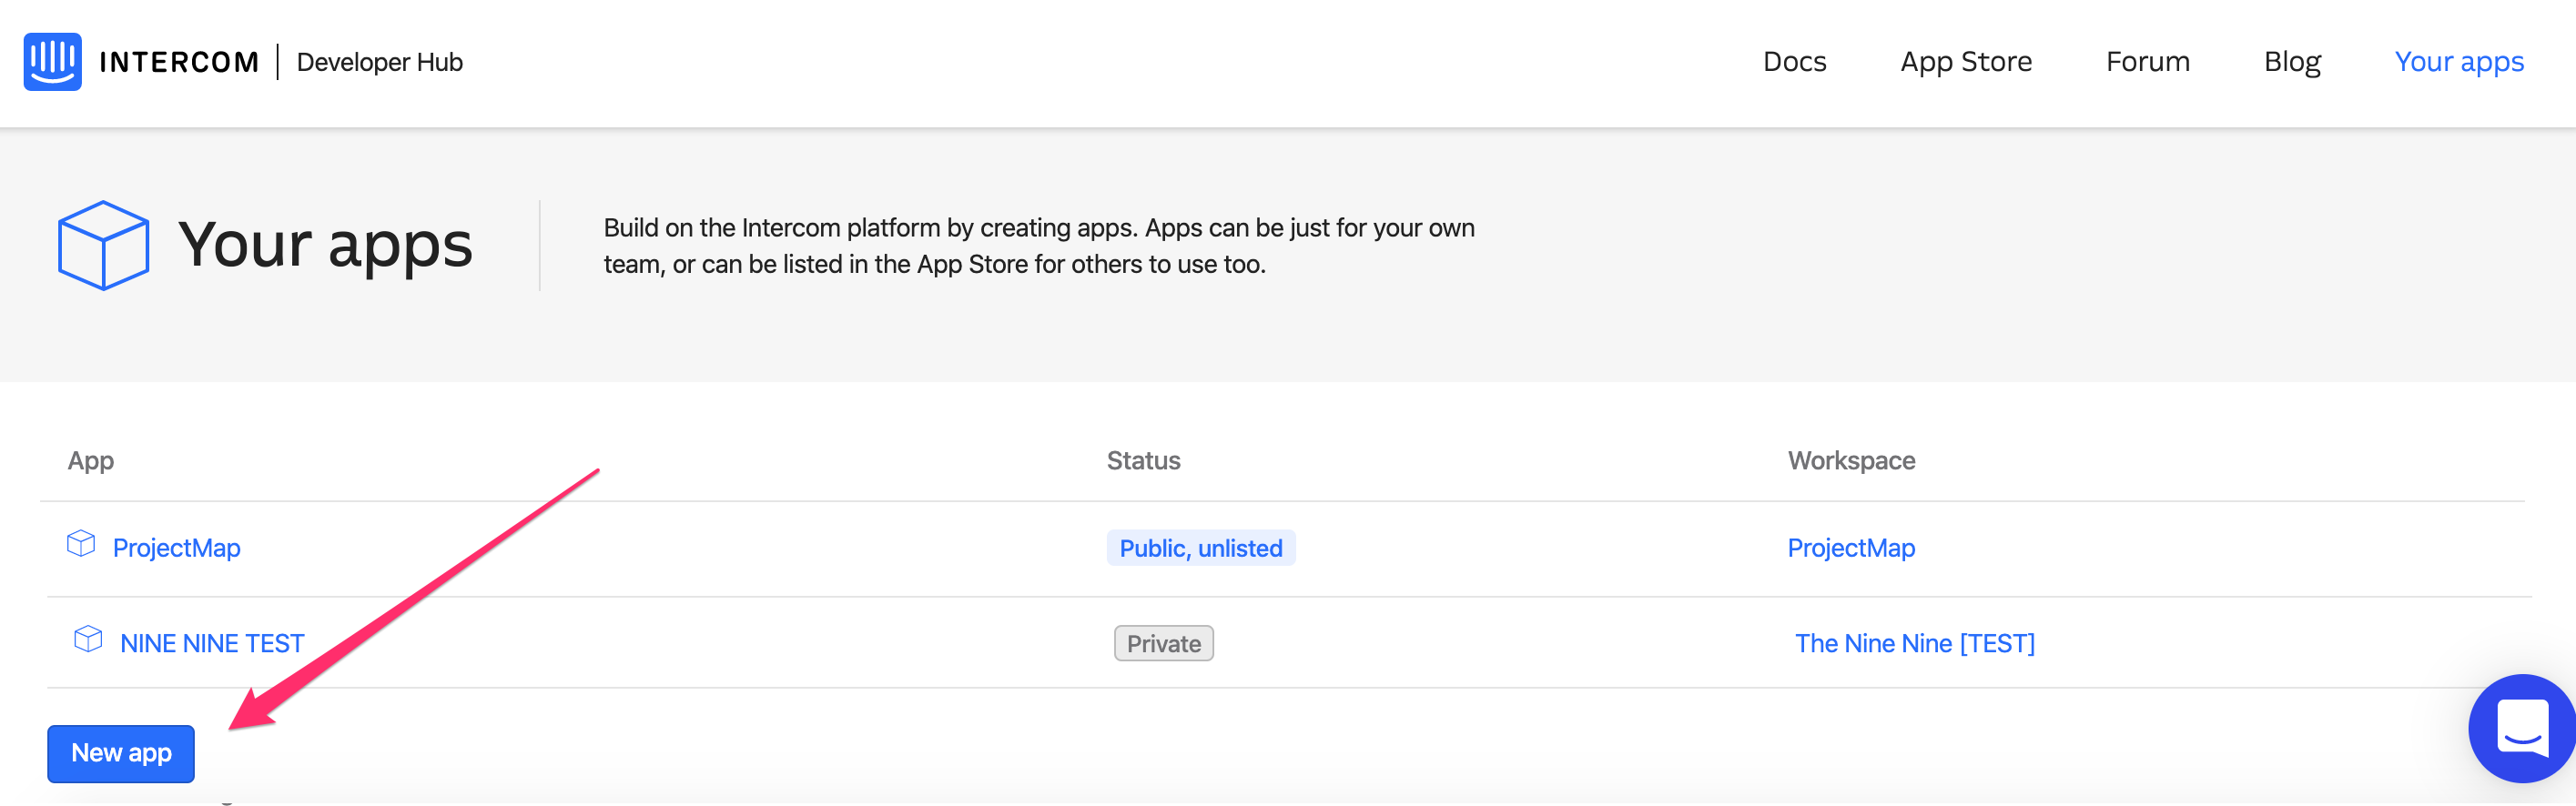
Select an app name.
You'll land on the Authentication page in your OAuth app.
Click Edit
Tick the Use OAuth option
Under Redirect URLs, add https://app.merge.dev/oauth/callback
Under Permissions, select all the access scopes you require.
Here are the scopes to add if you want to provide a user-level experience.
Scopes
Description
Read and list users and companies
Read users and companies (including external users, i.e. contacts and accounts)
Read one user and one company
Read details about a single user and company
Read conversations
Read conversations, Intercom has conversations and tickets which are both mapped to Merge tickets
Read tickets
Read tickets
Read admins
Read user data, all internal users in Intercom get called admins
Here are the scopes to add if you want to provide an admin-level experience.
Scopes
Description
Read and list users and companies
Read users and companies (including external users, i.e. contacts and accounts)
Read and write users
List all users and execute bulk actions
Read events
List all events belonging to a single user
Read conversations
View conversations
Write tags
Create update use and delete tags
Read counts
Count users and companies with specified criteria
Write users and companies
Create and update users and companies
Read one user and one company
List and view a single user and company
Write events
Submit events (i.e. user activity)
Write conversations
Reply to mark as read and close conversations
Read tags
List all tags
Write data attributes
Create and update custom data attributes
Read admins
List and view all admins
Read one admin
View a single admin
Read and list articles
List and view all articles
Update admins
Update away mode for admins
Read admin activity logs
List and view all admins and their activity in the app
Read and write articles
Read update and create articles
Click Save
Go to the Basic Information page, find and copy your
Client idandclient secret.
Step 3: Submit your OAuth app for review
Intercom requires a review from their team to make your OAuth app public, meaning one that can be used by your customers and allow you access to their workspace data. Here's Intercom's docs around this process.
You will need to provide
An app description
Submission Review Video
clear instructions on how your customers can install your OAuth app
The app will be unlisted (vs listed).
Unlisted apps do not need to fill out the Installation status section. Please provide clear instructions in your own product on how customers can install and use your app.
Intercom states
These reviews typically take 7-14 days, but if your app is initially rejected you will need to make updates based on the feedback provided and resubmit for approval. If you have a firm go-live date for your app, make sure that you give your team ample time to get app approvals.
Step 4: Enter your app's details in the Merge Dashboard
Navigate to the Integrations > Ticketing page in the Merge dashboard
Expand the Intercom selection and select Edit to enter your credentials, and eventually switch to them.
Select Edit to enter your credentials

Under select credentials, select My credentials

Populate your credentials:
OAuth Client Id: Your Client ID from the first step
OAuth Client Secret: Your Client secret from the first step
Redirect URI:
https://app.merge.dev/oauth/callback
Click Save