CyberArk - How do I link my account?
Last updated: May 28, 2025
Overview
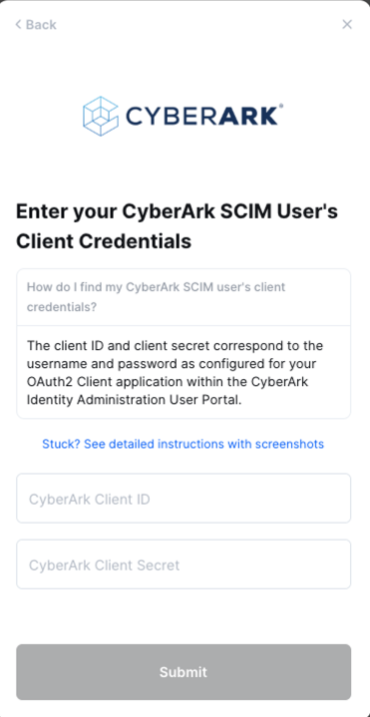
To authenticate CyberArk, you will need to provide the following information:
Tenant URL
OAuth Client Application ID
Client ID
Client Secret
This guide will walk you through finding or creating those credentials within CyberArk.
Prerequisites
Please ensure you fulfill all the requirements to set up the integration:
You are an Administrator in your company's CyberArk instance, or someone has shared their access with you.
Instructions
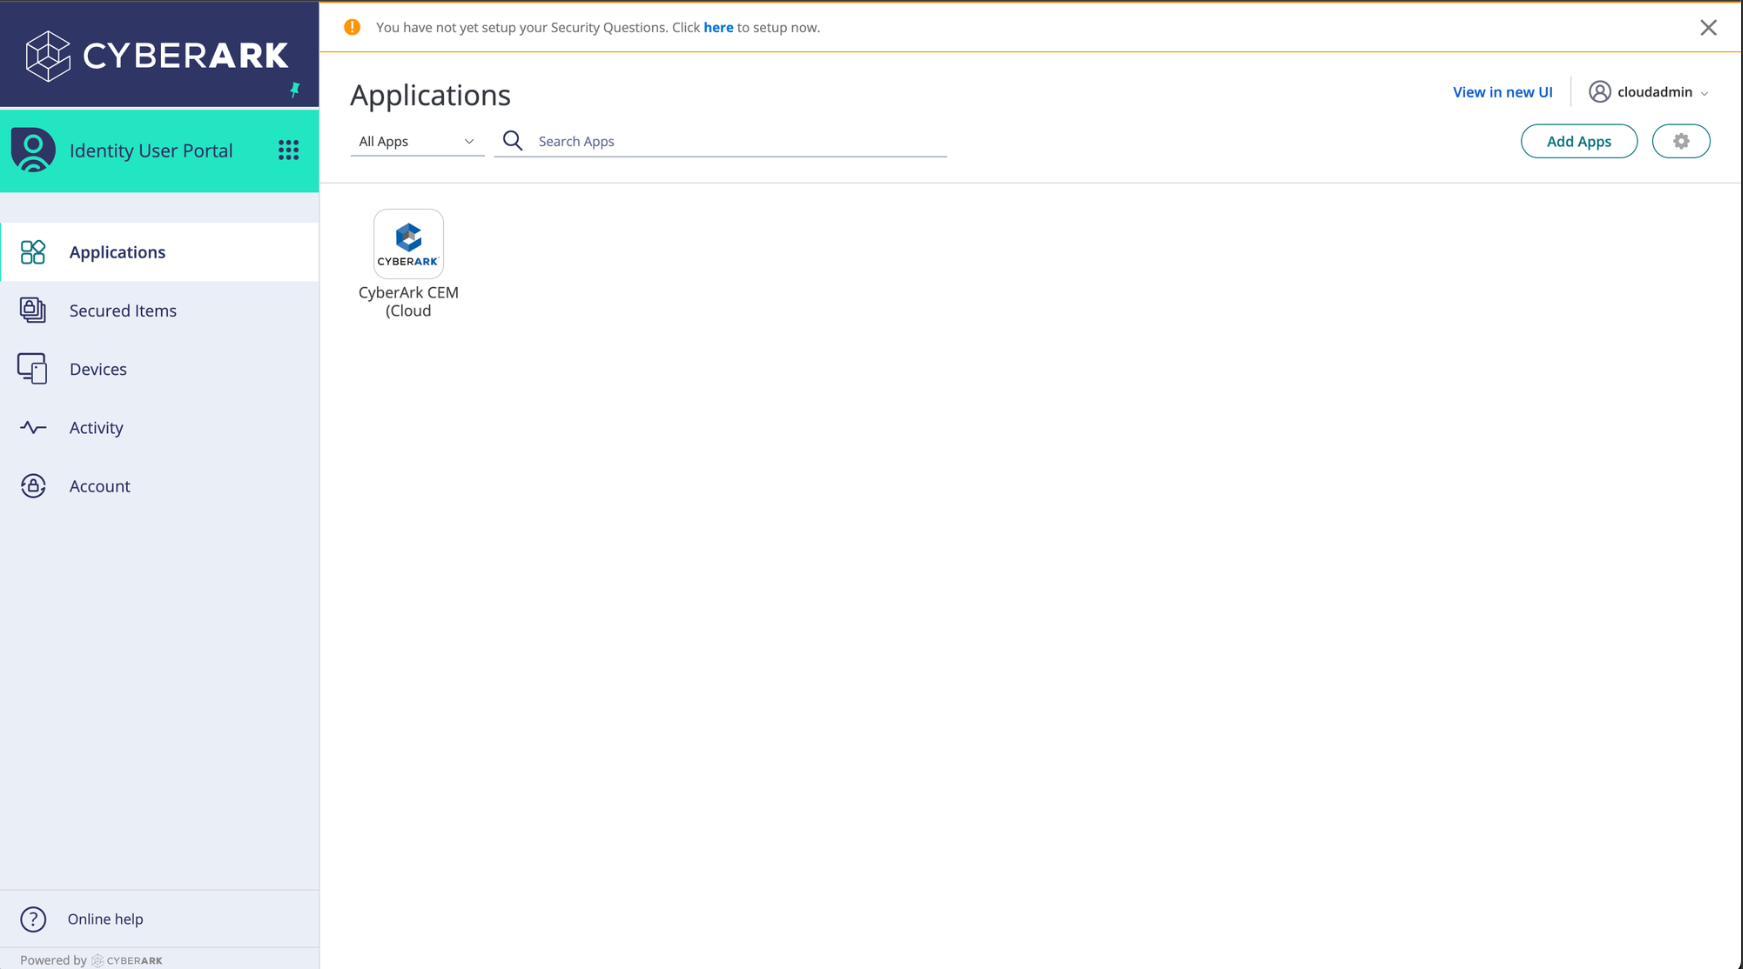
Step 1: Log in to your CyberArk Admin Portal
Log in to your CyberArk portal via your organization’s tenant URL. The portal home page should look something like this:
Switch to the admin portal view by clicking on the grid symbol next to “Identity User Portal” and selecting “Admin Portal”
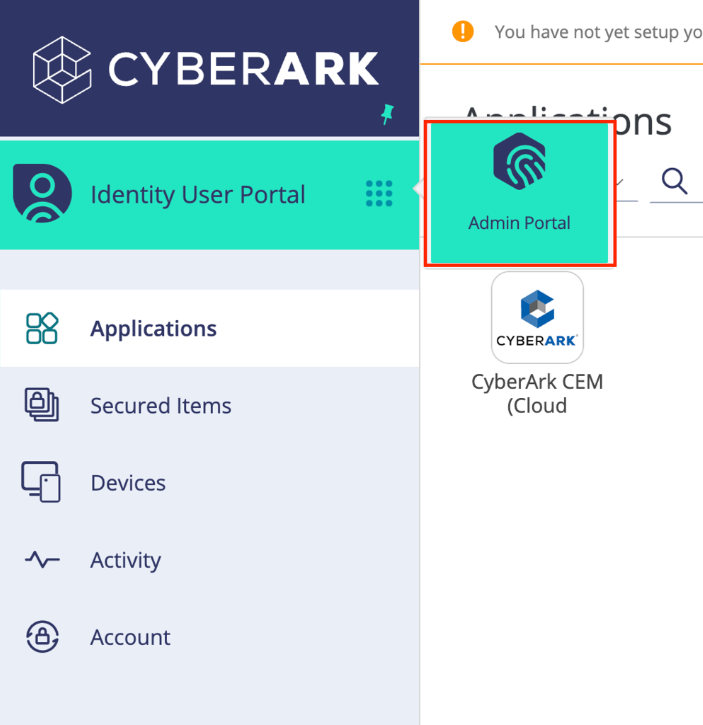
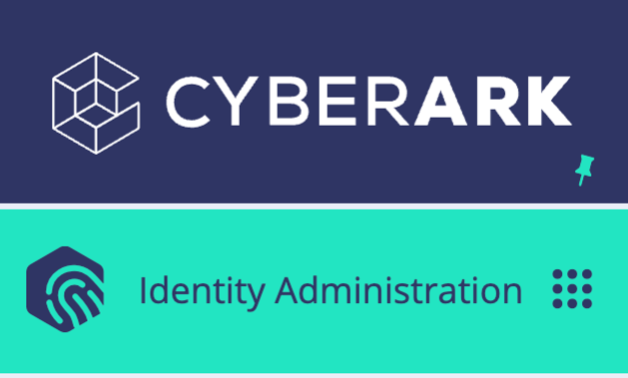
Now your web page’s top left corner should look like this:
Step 2: Create a SCIM client role
Navigate to “Core Services” > “Roles”:
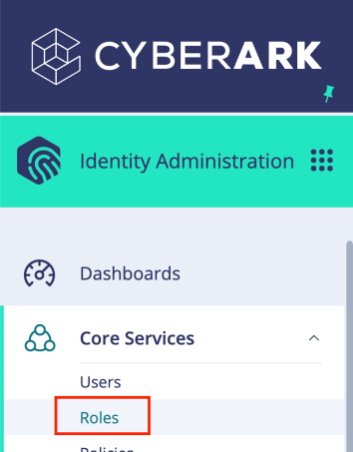
Click “Add Role” in the top left corner
Name your role “SCIM Client” and click “Save”. You will be automatically redirected to the settings page for the new role
Under “Administrative Rights,” click “Add,” search for/select “User Management”, and click “Save”
Note that you need to select “User Management”, not “Read Only User Management”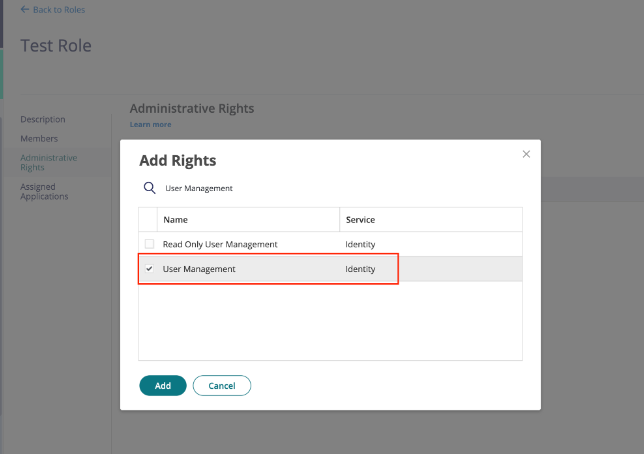
Click “Save”
Step 3: Create a custom OAuth client
Navigate to “Apps & Widgets” > “Web Apps”:
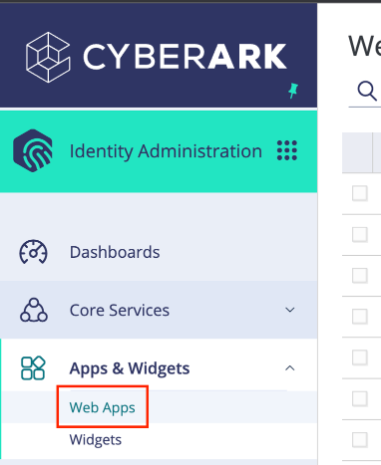
Click “Add Web Apps” in the top right corner
On the Custom tab, next to the ”OAuth2 Client” entry, click ”Add”:
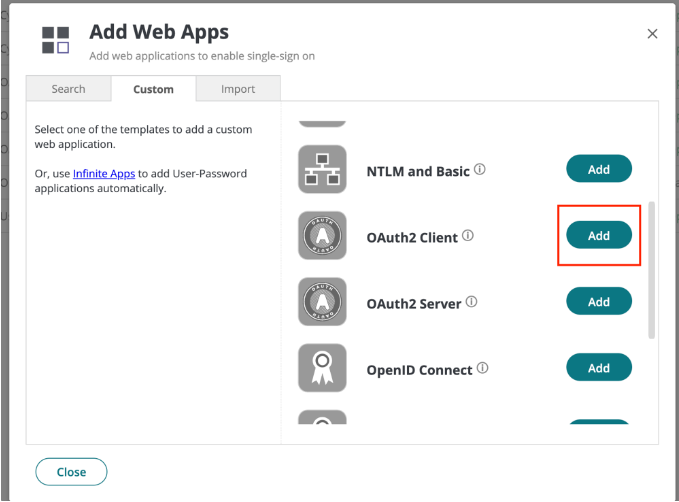
In the Add Web App screen, click ”Yes” to add the application
Click the “Close” button of the “Add Web Apps” modal. You will be redirected to a screen for configuring your OAuth2 client
On the Settings page, complete the following fields:
Application ID: any arbitrary value you choose, e.g.
scim_oauth_clientThis is a unique key used to build the OAuth2 endpoint URL
This is the Application ID that must be entered during the linking flow
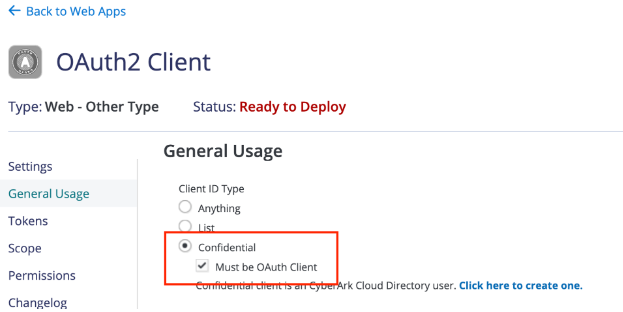
On the General Usage page, complete the following fields to specify the types of credentials that can be used to authorize with this server:
Client ID Type: Check the boxes “Confidential” and “Must be OAuth Client”
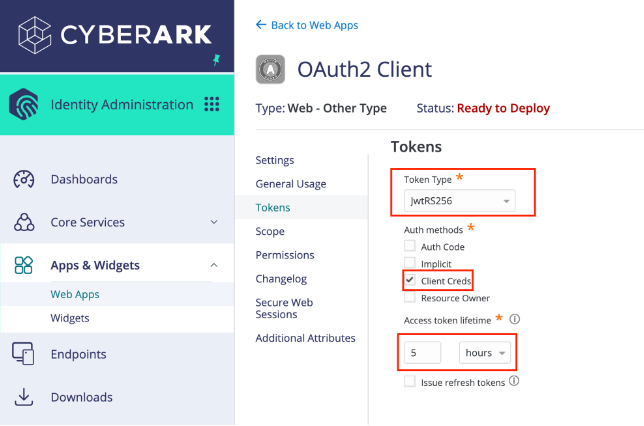
On the Tokens page, complete the following fields:
Token Type: JwtRS256
Auth methods: Client Creds
Access token lifetime: 5 hours
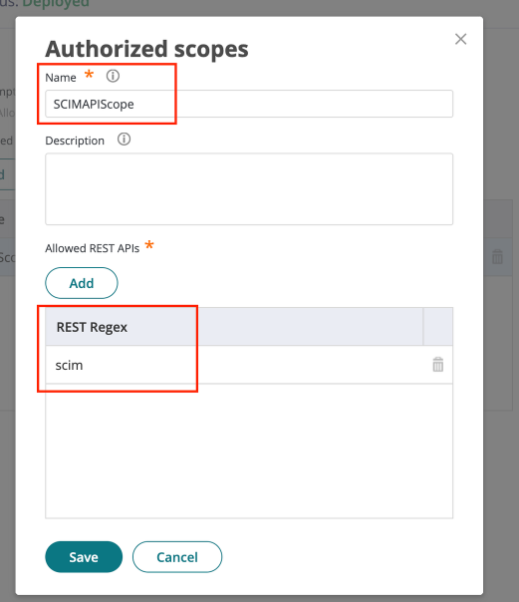
On the Scope page, click Add and create a new scope as follows:
Name: SCIMAPIScope
Allowed REST APIs:
click Add
add an entry with the text "scim"
Note: Please enter these fields exactly as shown
On the Permissions page, add the SCIM client role that we set up in Step 2 and make sure the Run permission box is checked
Click Save at the bottom of the page
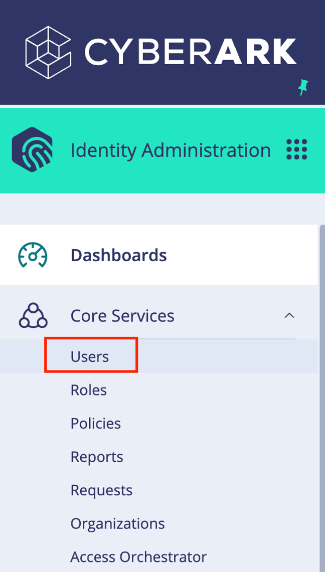
Step 4: Create a CyberArk service user
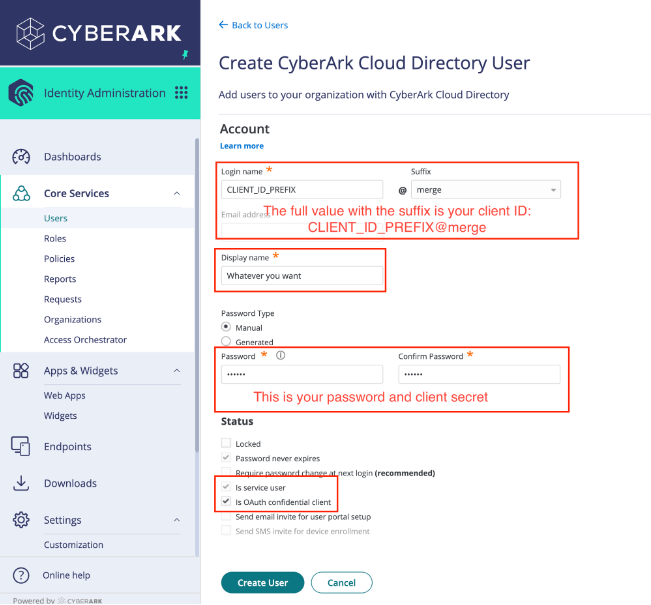
Navigate to “Core Services” > “Users”
Click “Add User” in the top right corner
Complete the following fields:
Login name
This field, combined with the @ symbol and chosen suffix, will become your username and Client ID. In the below example, that full value is “CLIENT_ID_PREFIX@merge”
Display name (set to whatever you want)
Password (this field will become your password and Client Secret)
Check the box under the “Status” section labeled “Is OAuth confidential client”. Upon clicking this box, you should see the email field grayed out, and the “is service user” box checked automatically
Navigate back to “Core Services” > “Roles” and open the SCIM client role we created in Step 2
Under the “Members” section, click “Add” and then add your newly created user
Click “Save"
Step 5: Enter information in the linking flow
Back in the linking flow, enter the URL used to log into the CyberArk portal

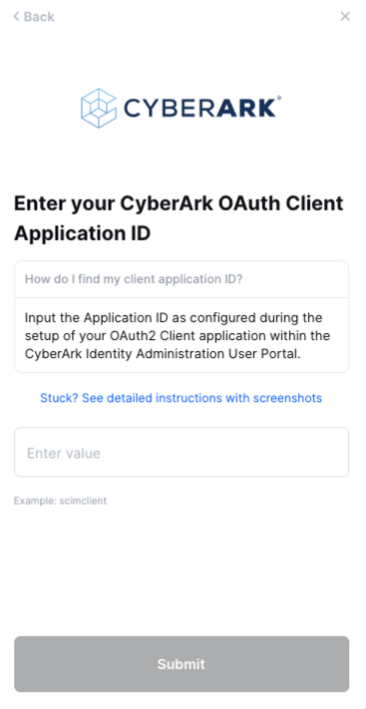
Next, enter the Application ID you created from step 3.6 above
On the following page, enter your Client ID and Secret/password from step 4.3