Setting up ServiceNow scopes and roles for non-admin integrations
Last updated: October 8, 2026
Overview
This guide explains the minimum roles and Access Control Lists (ACLs) a user needs in ServiceNow to allow your integration (such as Merge) to read and write data through the ServiceNow REST API.
Using these scoped permissions ensures least-privilege access while maintaining full compatibility with core ITSM and CSM functionality.
ServiceNow uses roles and ACLs to control who can read, create, and update data.
By default, only admins can query system and Customer Service Management (CSM) tables. To integrate using a non-admin user, you must explicitly grant table-level permissions for the data your integration will access.
Instructions
Step 1: Create a custom role
Navigate to All → User Administration → Roles → New.
Fill out:
Name/Suffix:
integration_role(or any custom name)Description:
Custom role for non-admin API access
Click Save.
You’ll see a generated name like:
x_<instance_prefix>_integration_roleThis role will be used in all ACLs and assigned to your integration user.
Step 2: Create a non-admin integration user
If the integration user doesn’t exist yet:
ServiceNow enforces MFA on interactive (Human) accounts. Configure the integration user as a non-interactive service (Machine) account. A Human-type account will fail programmatic API authentication. Enabling Web service access only on the user record makes the account API-only and avoids the interactive MFA requirement.
Go to All → User Administration → Users → New.
Fill out:
User ID:
integration_userActive: ✅
(Recommended) Web service access only: enables API-only access and avoids the interactive MFA requirement
(Optional) First name / Last name / Email: recommended
Click Set Password to assign a local password (required for Basic Auth).
Make sure Password needs reset is unchecked.
Click Save.
Step 3: Assign the role to the user
Open your integration user record.
Scroll to Roles → Edit.
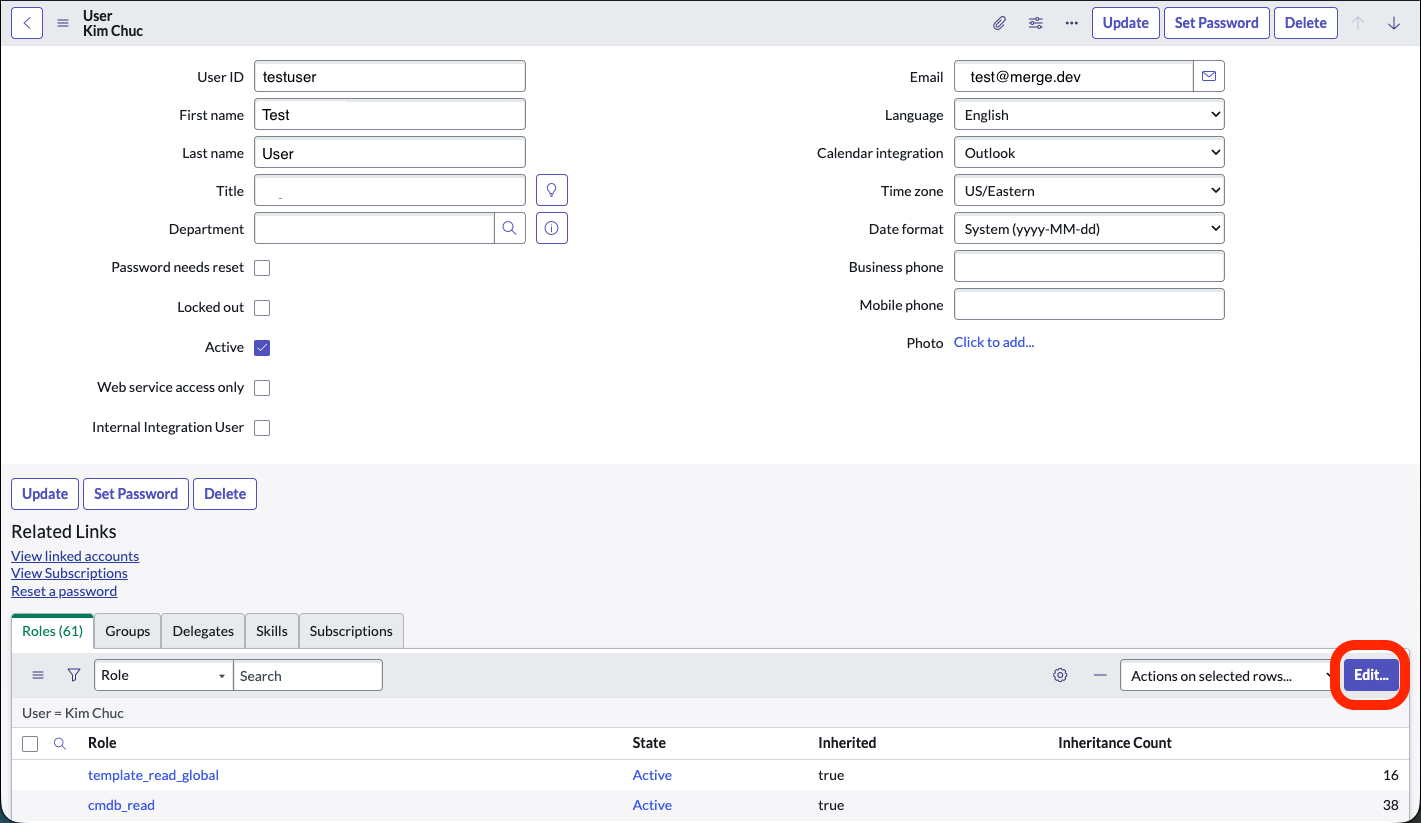
Search for and add the role you created:
x_<instance_prefix>_integration_role
(Optional) If your integration also needs ITSM data like Incidents or Tasks, add:
itilsnc_platform_rest_api_access
Click Save.
Your user now has a scoped role that will be used for ACL permissions.
Step 4: Create custom ACLs (access control rules)
Before creating a Custom ACL, make sure your role is allowed to add Custom ACLs. This can be manually done by Elevating role and enabling the security_admin role for the user:
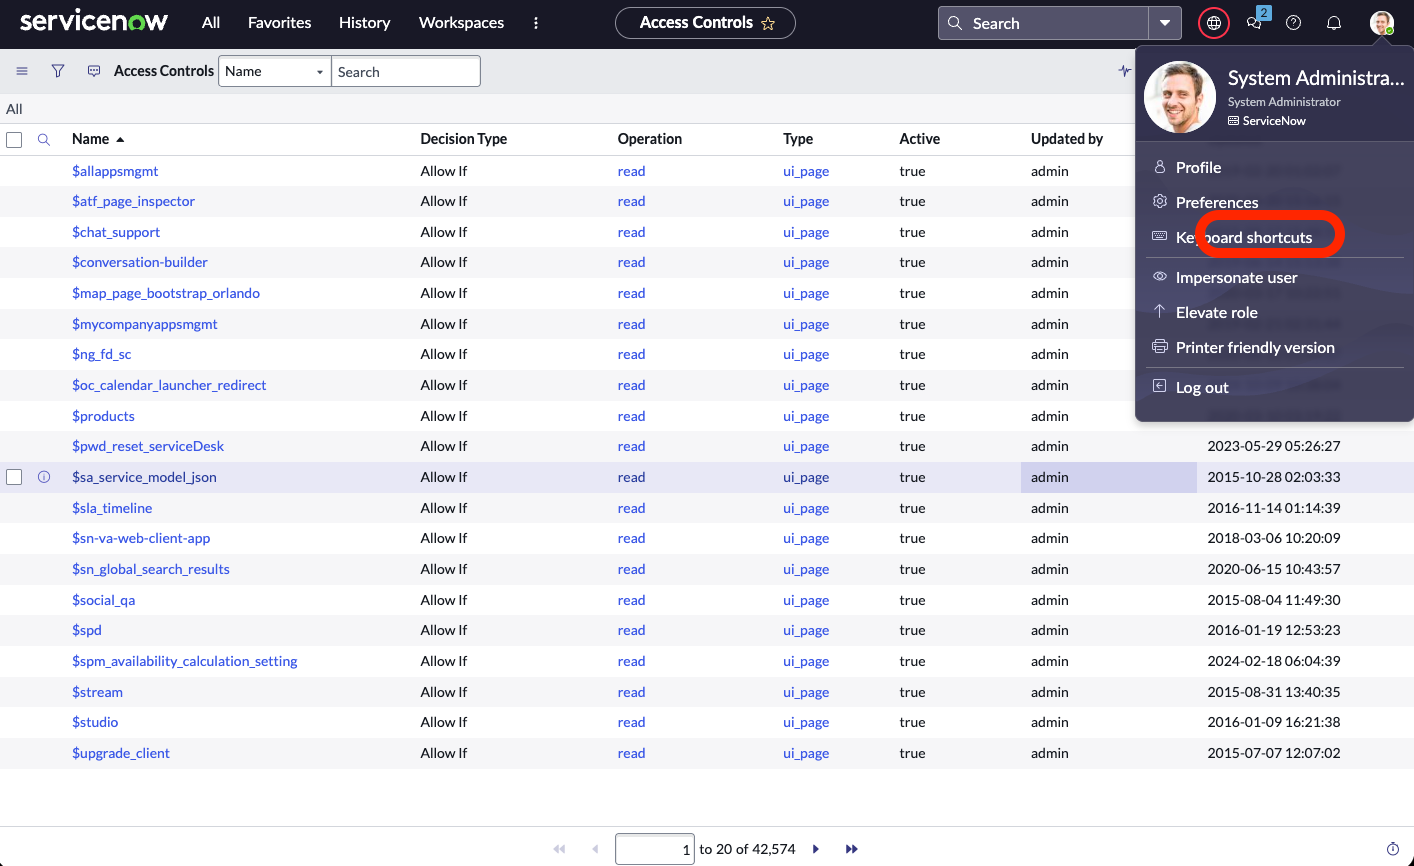
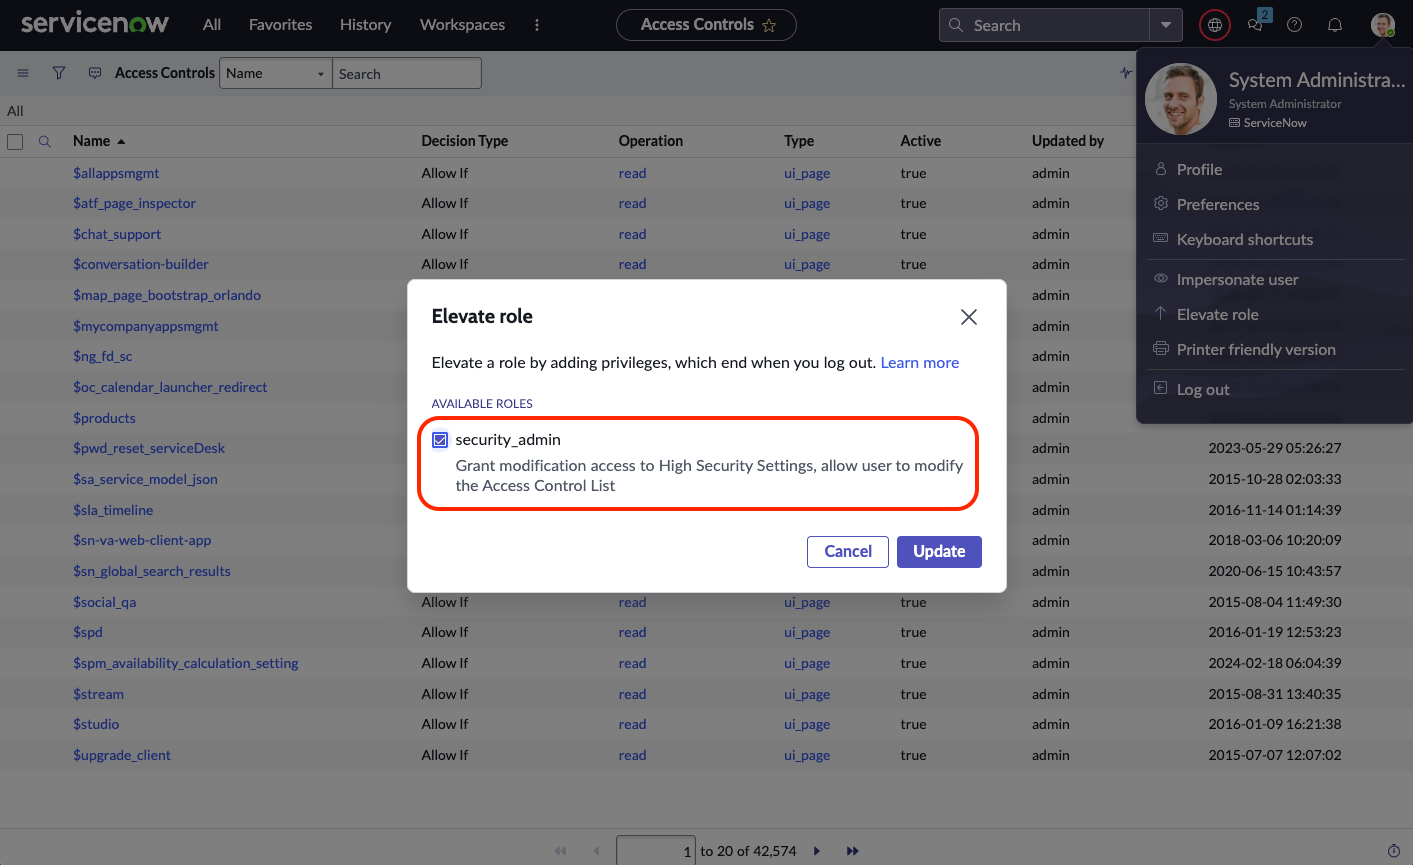
ServiceNow ACLs define which roles can perform actions on which tables or fields.
You must create one ACL per table (or field) and per operation type (read, write, create). Alternatively, there are suggested roles that the previously created role can inherit, which covers the scope of the ACLs.
Table-level access does not guarantee field-level access. Granting read on a table (for example sys_choice) does not necessarily grant read on the fields within it (for example sys_choice.name). Whether it does depends on your instance configuration, because ServiceNow ACLs interact with one another.
To guarantee your integration has the access it needs, create ACLs at the table, table-wildcard, and field level. For each table you need access to:
Add a
read(orcreate) operation on<table-name>Add a
read(orwrite) operation on<table-name>.*For each field on the table, add a
read(orwrite) operation on<table-name>.<field-name>Confirm there are no ACLs that deny the given permission for your service role.
This is deliberately granular because ServiceNow ACLs affect one another. Configuring all three levels is the only way to comprehensively guarantee that permissions work as expected.
Go to: All → System Security → Access Control (ACL) → New
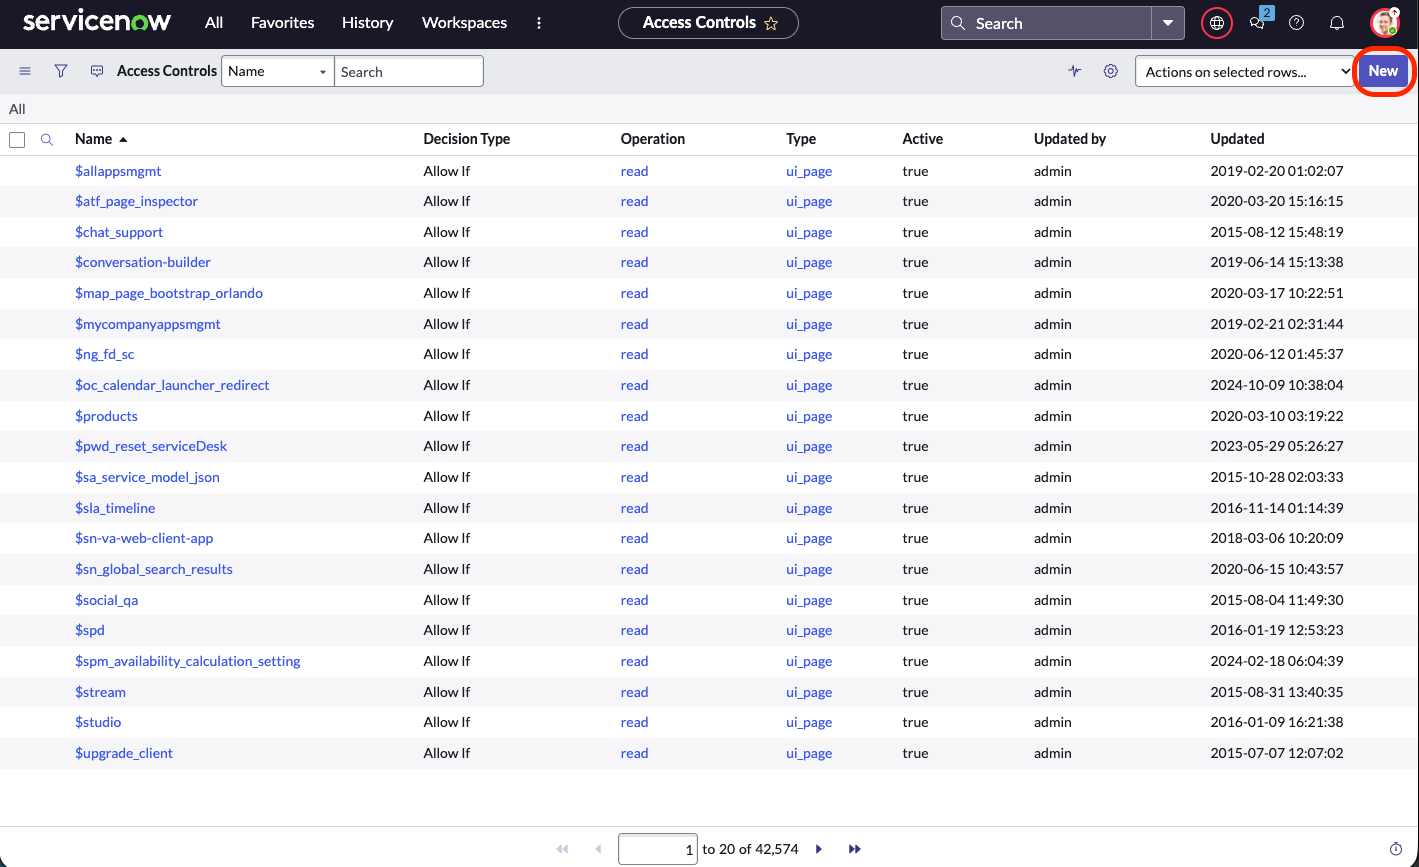
Fill out these fields:
Field | Value |
Type |
|
Operation |
|
Name | Table name (e.g. |
Requires role | Your custom role (e.g. |
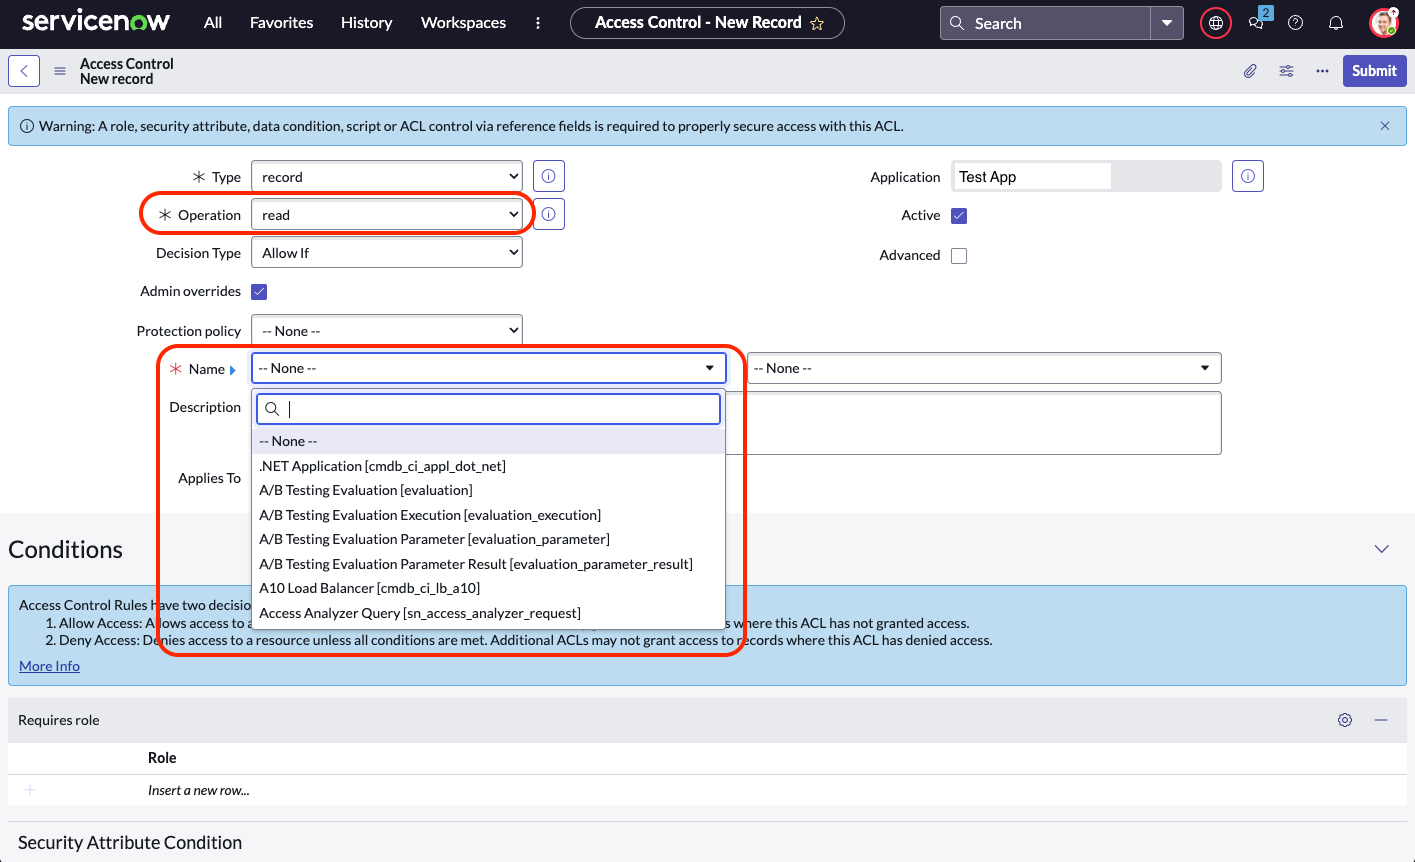
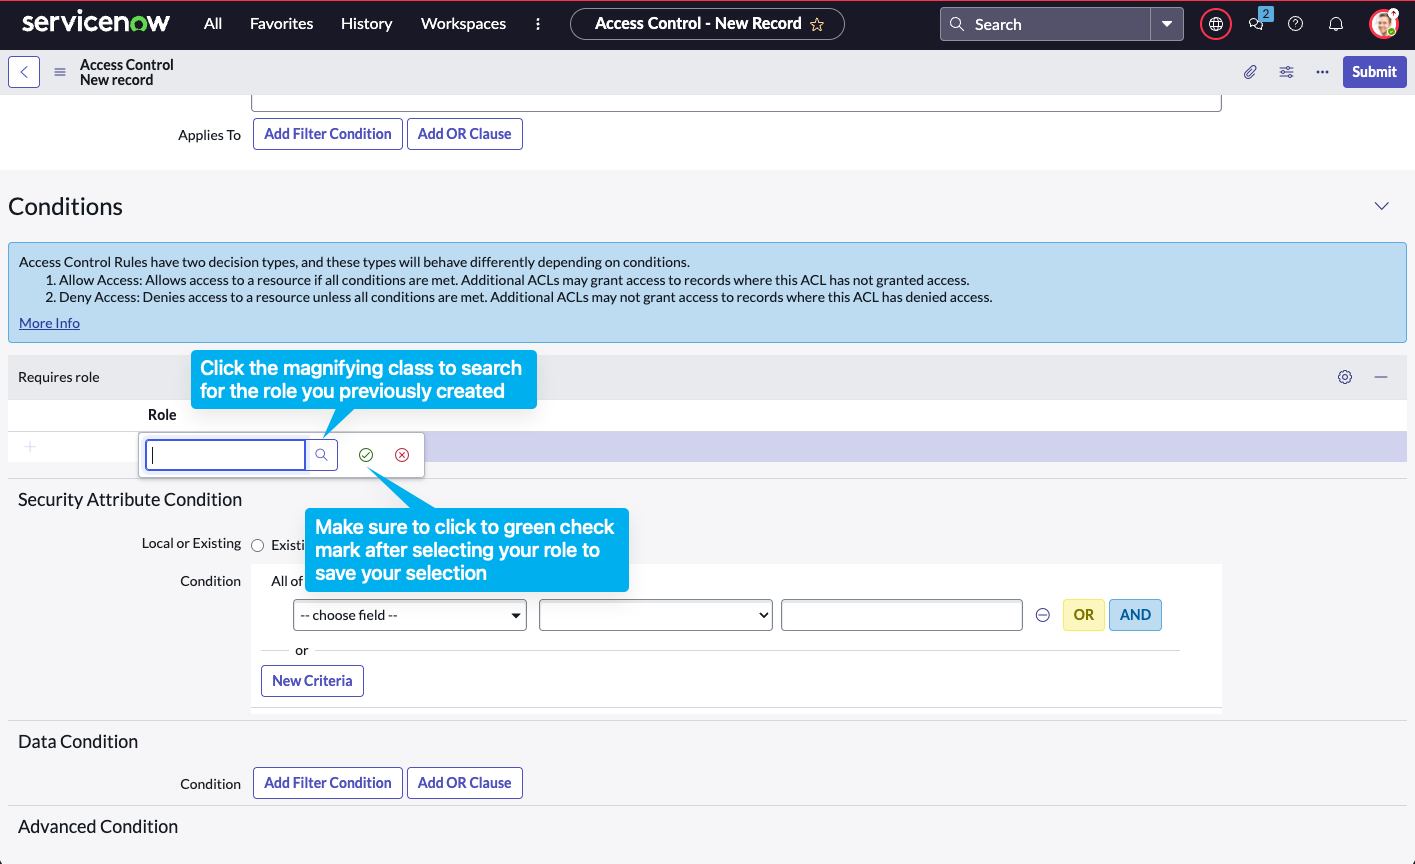
Click Submit.
Repeat this for every table you need access to. See the section below for the required roles for every table.
Required tables and roles
Add ACLs for each required scope
Each ServiceNow “scope” (table) must have its own ACL or be covered by an inherited role.
Below is a complete list of common tables, what they do, and what role or ACL grants access.
Core systems tables
Table | Required role | ACL description |
|
| User records (needed for user lookups like |
|
| Field and schema metadata |
|
| Dropdown / picklist values |
| Custom read ACL | Field type (glide object) metadata, used to resolve field classes |
| Custom read ACL (admin-only by default) | Database table metadata |
|
| File attachments on records (inherit permissions from the parent record, such as |
|
| Comments and work notes (read and write) |
Customer service management
Table | Required role | ACL description |
|
| Customer/consumer records |
|
| Customer contact records |
|
| Customer Service cases |
ITSM and task management
Table | Required role | ACL description |
|
| Incident, problem, and request records |
Additional scopes to include in custom ACLs
These system tables are frequently queried by integrations. Add read ACLs for your custom role to prevent 403 errors.
Table | What it represents | Why it's needed | Grants access to |
| Customer/consumer records | Needed to link CSM cases to users |
|
User and role data
To minimize privilege, use your custom integration role with targeted read ACLs for user-related tables.
Table | Purpose | Required role / ACL |
| User records |
|
| Role assignments |
|
| User groups (Teams) |
|
| Group memberships |
|
| Table metadata | Custom read ACL (admin-only by default) |
Tickets (tasks, incidents, requests, problems, cases)
The itil role grants full CRUD access to ITSM “task” tables, including incidents, problems, and catalog tasks.
If integrating with CSM, add sn_customerservice_agent.
Table | Purpose | Required role / ACL |
| Base task table |
|
| Incident management |
|
| Problem management |
|
| Service catalog requests |
|
| Service catalog tasks |
|
| CSM cases |
|
Comments (journal fields)
Journal fields (comments, work notes) inherit ACLs from their parent record.
If your integration can read/write incidents or tasks, it can usually access related journal fields automatically.
Table | Purpose | Required role / ACL |
| Comments, work notes, and activity logs |
|
Writing tickets (POST access)
To create new tickets via the Table API (POST /now/table/<table_name>), your user must have create ACLs or roles granting write access.
Table | Purpose | Required role |
| Create incidents |
|
| Create problems |
|
| Create generic tasks |
|
| Create catalog tasks |
|
| Create service requests |
|
| Create customer cases |
|
Questions
Reach out to your Customer Success Manager or email [email protected].